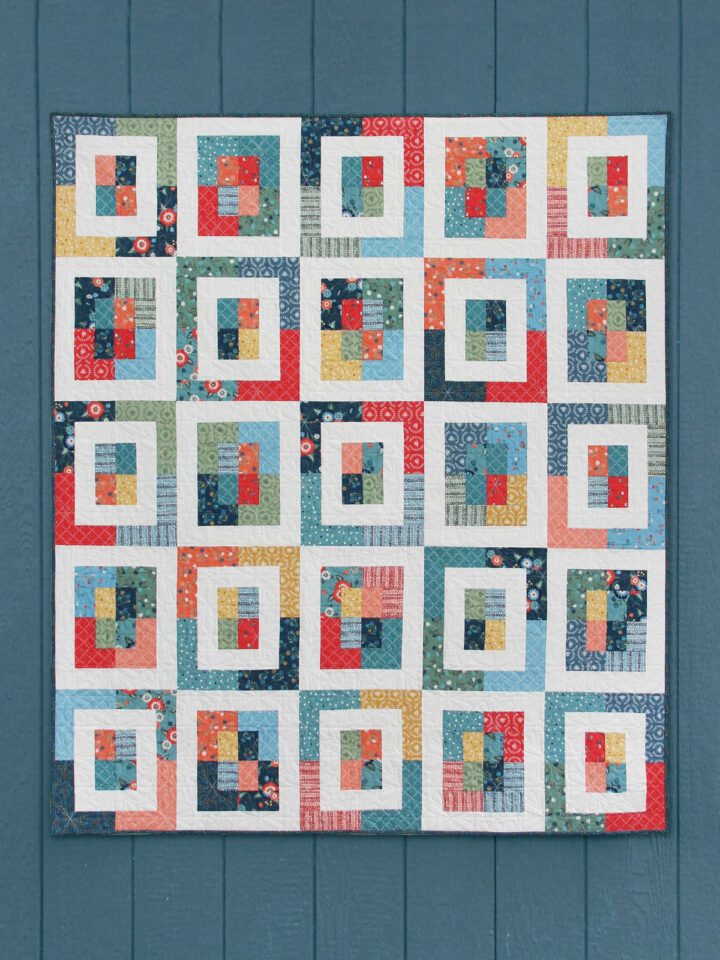
I love snowball quilts. Like the bird quilt, or my very 1st quilt. I’ve had some questions about making snowball blocks, so I just thought I’d show you how easy it is. This is a great pattern for beginners, and I love it because the big blocks show off the fabric prints and it goes together really fast. Ok here goes:
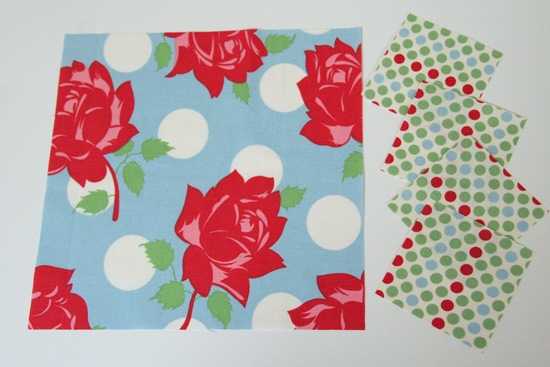
Cut one 8” square and four 2 ¾” squares.
Draw a diagonal line on each small block.

Pin the small blocks to the 8” block, right sides together, and so the diagonal lines run perpendicular to the corners.

Sew along your drawn lines.

Ok here’s where you can cheat…..see that painters tape on the sewing machine? I don’t draw my diagonal lines onto my squares (I did here for tutorial sake). Instead, you can put a piece of painters tape on your machine so the edge lines up directly with your sewing line, then as long as you keep both corners along that tape as you sew, you will get a perfect line without drawing. It sounds confusing but it makes sense as your doing it. Maybe. :)
Then cut off your corners leaving ¼” allowance.

Now iron and your done! An 8” snowball block.


Heather
Thanks for the quick how-to. I'm ready to try this.
I Love Baby Quilts!
Cute! You sewing machine users have it so easy. I have to draw all my diagonals.
Annalee
Wow! Much easier than I imagined. I'll have to give it a try!
Betty Crocker Ass
seriously, so flippin easy and cute.
you just rocked my world!
yet another quilt to add to my list.
thanks for all of these!
Bowlby
Yeah! I'm definitely going to try this. Thanks for making it look so easy!
Heather
Awesome - looks much more difficult than it is - love it!!
beth
aaw! you're just few hours too late...I already cut 6" squares for a snowball. wish I would have waited to hear from you:) I will be cutting 2" squares for the corners. thanks for the tape idea..sounds great!
Paula
I love this! Thanks for the quick tutorial!
Andi
Great idea with the tape!!
amandajean
i've been wanting to try a snowball quilt for awhile now. thanks for the tape tip.
allsewnup
I know what I'm doing when I get back from a week long get away.
Thank you for the great tips!!
Carolyn*
Leslie
that is great. thanks for the easy to follow directions.
Linda
Thanks for this tutorial on snowballs! You are so generous to help us with the 'how-to's. Looks like you are getting back into the sewing groove!
Jackie
Great tutorial! That is exactly how my husband's aunt taught me for the quilt I made for our bed. Below is the post I wrote about it. http://blessingsoverflowing.blogspot.com/2009/01/sharing-some-quilts.html
flowerpress
Wow, that looks my kind of simple! I love the bird quilt. Busy in a beautiful way :-)
Debbie in Chico
Really cute. What is the fabric line?
Robin (rsislandcrafts)
I love working with half square triangles and was wondering how to avoid drawing all those darn lines! Great idea, thanks!
Mimi
My youngest just married, this would be a nice christmas gift for her and my new son-in-law. Thanks!
have a great day!
Laura
What a great idea for the painter's tape. Drawing on the lines can be so annoying. Thanks for sharing!
Jodie B-C
What a great idea! I was just wondering what quilt I was going to start next! Thanks for the idea!
The Calico Cat
Do you have a way of figuring out the proportion when you are using differently sized squares? For example a 5 inch big square?
Angie
This is great! Thanks for the how-to :-)
Cheryl Arkison
Love that tape trick. Such a good idea. (I don't mark my diaganals either).
Wendy P
Don't waste those corners! Bonnie Hunter of Quiltville teaches that if you sew a second seam outside the first one and trim between them, you have ready made triangle squares for a future project!
Charlotte
Great idea! Thanks!
Charlotte
Great idea! Thanks!
Charlotte
Great idea! Thanks!
Charlotte
Great idea! Thanks!
Amy
Excellent! Thanks.
Melody
Snowballs are a great way to use up some scraps! Great mini Tutorial!
Wendy
Thanks! Your bird Snowball quilt turned out beautiful - this would be a good quilt 'camp' project!
Pink Little Ladies
I am making a list of all the beautiful quilts I need to make, I think I will add this to that list. Are you having so much fun being by your family?
lambie-pie
That just gave me a great idea for using a charm pack and layer cake I have. Do you think the measurements would work out for that? They are 10" squares and 5" squares. I guess the charm square would be too small, so you could use the layer cake and trim down the charm square to a smaller square size. I'm going to try it and see how it works. I really like the idea someone left in comments of making triangles with your scraps too.
I don't know how you can stand to sell something this cute!! Oh, and what is the fabric in your snowball example? It's really cute!
Melvin
I really enjoyed looking at all the new blogs and getting that inspiration from all the quilts that were shown.
__________________
Melvin
Email Marketing Solutions
sandrina0608
I have been looking for the size of the small corner squares for an 8 inch block and lo and behold yours was the first one I clicked on. Thank you so much and great tip with the painters tape
houseonhilltop
I'm making one of these quilts right now and didn't know that it was called a snowball quilt. That's great.
Cláudia
I love this blog. Here, from Brazil I've learned so many cool things and I'm so grateful for this because here I don't find people who do quilts, patchworks, etc and no patterns.
Thank you for all shared here.
Love.
Cláudia.
sarahmarie
Thanks for this tutorial. I plan to make a hospice charity quilt with it.
Jenn
I taught myself to quilt and wanted to expand my horizons. Thank you for teaching me to do that! My first one to try will be the snowball quilt, yippee!
Cheri, the Quilting Nanny
I just made a quilt for my grand son and I am writing about it on my blog. I made it with the snowball pattern/block. Is it okay if I link to this post of yours for a "how to" to make the snowball block?
Cheri
fabricandmemories.blogspot.com