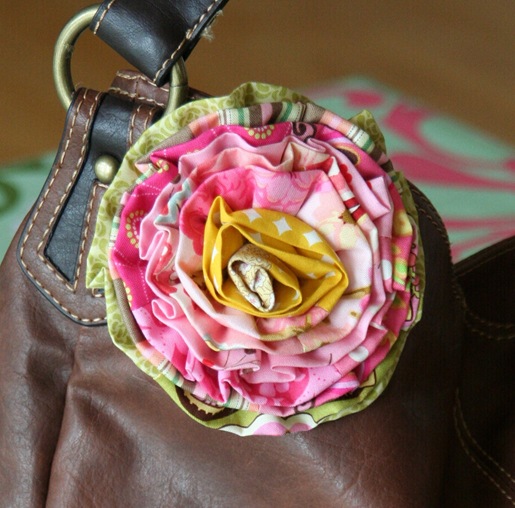
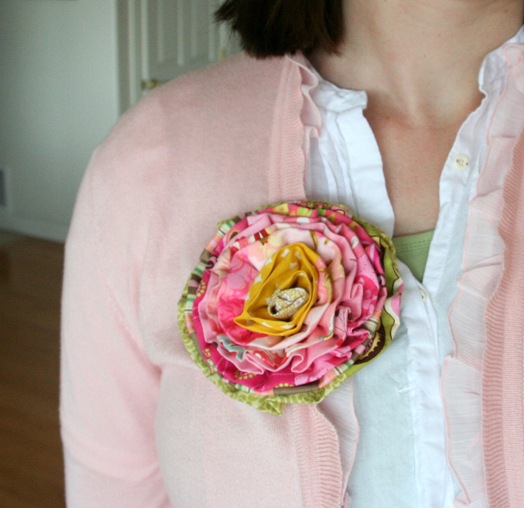
I have a fun new flower tutorial for you that’ll use up some of your scraps. Mine is attached to my bag as you can see, and it looks so cute that I almost forget my bag is full of diapers and crumbled goldfish crackers. Now on the tutorial…
First you’ll need:
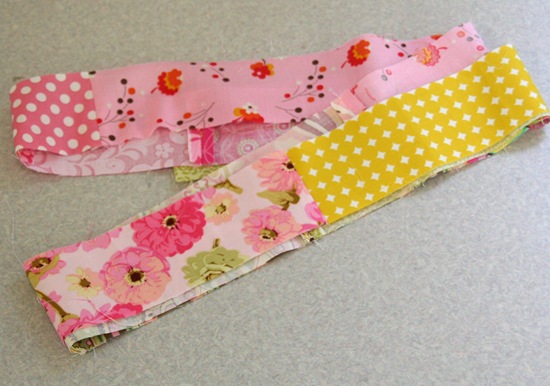
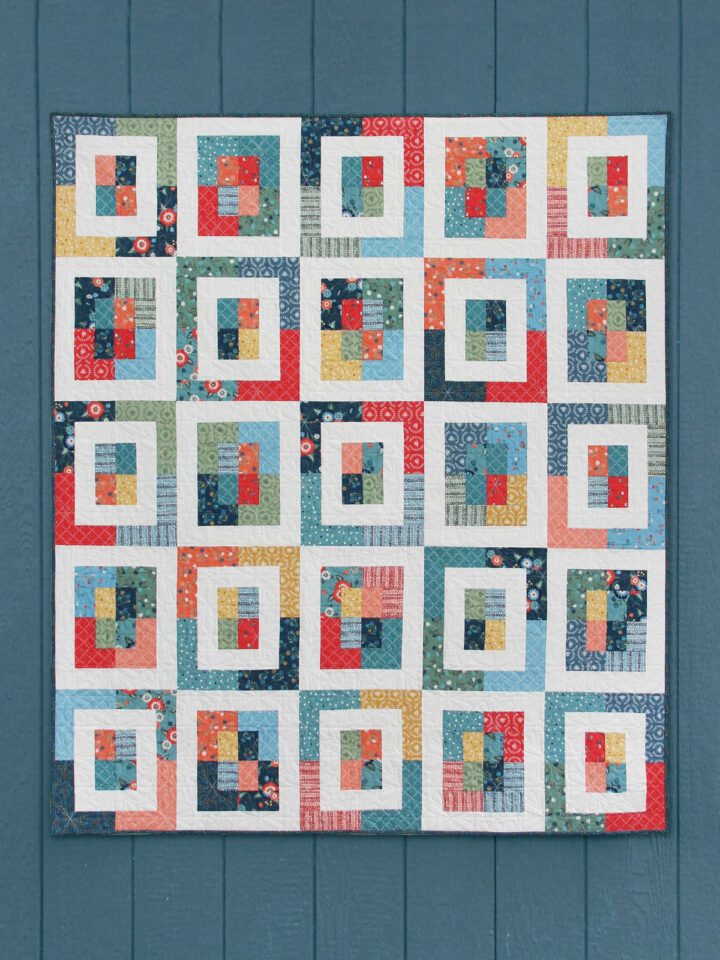
- 2.5” wide scraps of fabric in whatever colors your heart desires cut to various lengths. Mine were 3" long to 14" long. For fabric I used my leftover binding strips. My strips added up in length to about 2 yards, which made me a 5" flower. Add or take away strips or cut them shorter if you want a bigger or smaller flower. Shorter strips and more of them will make a more colorful flower.
- A sewing machine and a needle and thread.
-A piece of felt or other strong fabric, a hot glue gun, and a broach bracket.

Here are my various 2.5" wide strips. Put them in order from the color you want in the center of the flower, to the outside of the flower. Now sew them all together end to end, and press seams open.
Now folding your strip in half as you go, serge OR sew a zig zag stitch down the raw edges. Do the same on the ends.
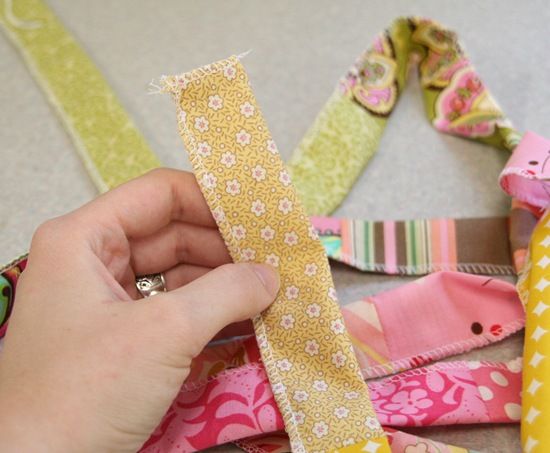
With your sewing machine….increase the stitch length as high as it will go (a 4 on my machine) and increase the thread tension as high as it will go. Now sew down your strip again right along your sewn/serged edge. The strip should gather as you go. If it is gathering TOO much, lower the stitch length (see picture below for how much mine gathered)
**** I tried this gathering method on a computerized machine first and it would NOT work. When I switched to the older, manual machine it worked like a charm. So if this method isn’t working on your machine…you can either gather it by hand by folding and scrunching the sewn edge as you sew over it, or use a gathering foot. Because the strip is so long it won’t work to sew down it with a large stitch length and pull the bottom thread.
This is what it should look like after its sewn:

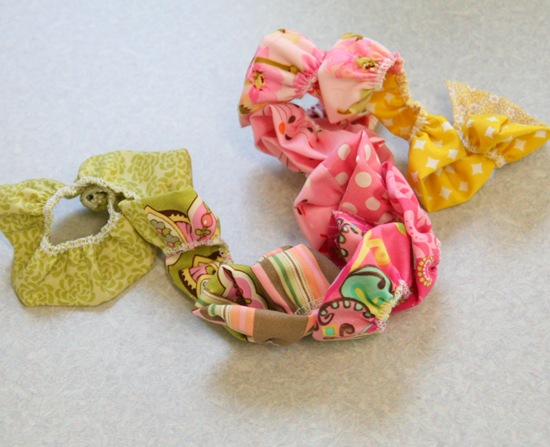
Starting with the end you want as the center of the flower, fold the raw edge down and make the center of the flower by folding the strip around it. Sew in place either by hand or machine with a few stitches.
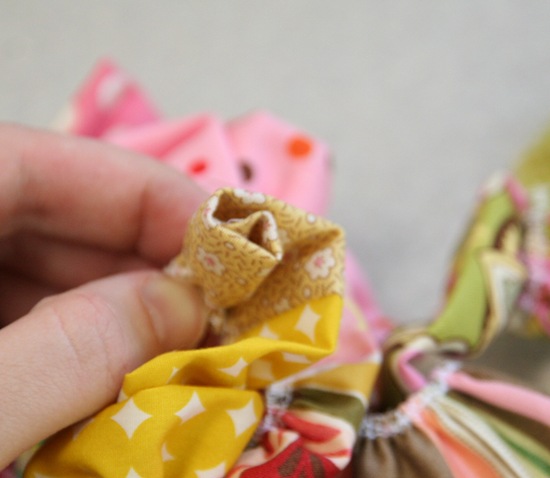

Continue to wrap the sewn/serged edges around the center, securing the edges to the center with your needle and thread. I put the needle and thread all the way through the center for the first few layers.

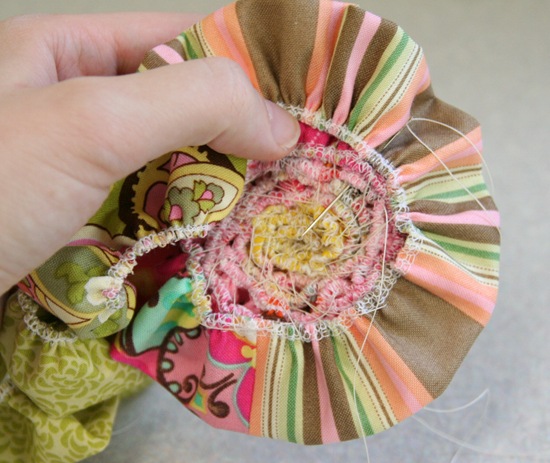
As you continue adding the layers the center will have a tendency to stick out, but try to keep the sewn edges lined up and flat. Also as you add more and more layers, you can secure the layers to the previous layers with a stitch every half inch or so. If you secure the layers loosely to the previous layer, you’ll get a better result.
This takes a little bit of practice, but I’m also quite possibly the worst hand sewer ever, so chances are you’ll do it perfectly the first time.
When you get to the end, or the flower is as big as you want it, cut off the end and tuck the end to the back. Secure it with a stitch and knot your thread off.
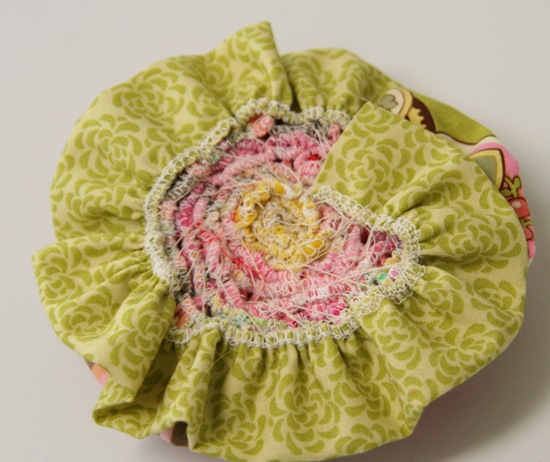
Make sure your flower is just right and poke the center down a little if its sticking up too much to make the back flat.
Cut a circle out of your felt, just big enough to cover all of the sewn / serged edges.
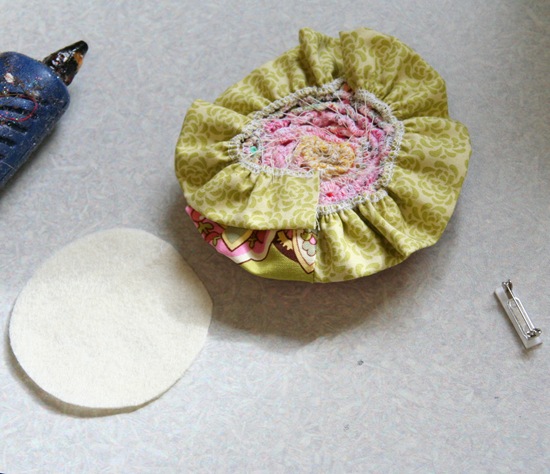
With your hot glue gun, cover the backside of your flower with glue, then press the felt onto the back.
Then hot glue your broach bracket to the felt. (think I used enough hot glue??? I’m paranoid)

And there you have it, your cute scrappy flower you can attach to just about anything.
![IMG_4255_thumb[7]](http://cluckclucksew.com/wp-content/uploads/2009/10/IMG_4255_thumb7.jpg)
The first attempt was made out of my left over border strips from the chain quilt. It involved some trial and error with the hand sewing….so it looks a little more bunched.
If you need another broach made from scraps….last year I made this circle one that I still love.


Leslie
this is so cute...i really like the white one.
Jan
Great instructions! Very clear and concise.
Thank you, I can't wait to give it a try.
kersten
Love it!
Cheryl Arkison
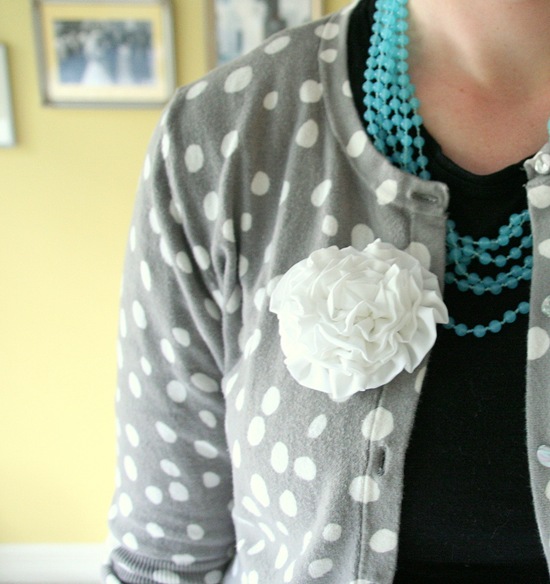
Your style in that bottom photo is to die for!
Amy - Park City Girl
Cute!
Jen
Awesome tutorial! Thank you.
Kelli
Thanks for this tute! I can't wait to make one!
Jo
That's such a cute corsage! And a great tutorial too - it's sitting on my (slightly endless, I must admit) To Do list right now.
jaybird
very cute! i love making flowers like this!
shellysquilts
This is beyond fabulous! I'm going to have to make one too! Thanks for the tutorial! Well done! You rock! Happy sewing!
Katie
This is one of the best, most detailed fabric flower tutorials I have seen! Nice work! And thanks for sharing.
Ariane
Love this tutorial. It is so cute!!! I'm definitely going to try this.
Kimberly
How perfect on the strap of a summer tank top?
LOVE this! Thanks!
panamamama
Scared to show my 13 yr old, she won't stop making them once I do!
PioneerValley
Nice idea - a fun way to use up scraps!
SoozeM
Very pretty! Thankyou for such great instructions, I think I will have to try making one!
Brooke
Great tutorial- thanks! I want to make one to put in my daughter's hair.
Cora
Love it! :)
beth
lovely flowers!
momto2wasd
This is great! I was thinking of putting a flower on a bag, and now I know how to do it w/out having to guess.
Erika
Super cute! Love your cardigans too!
Christina
OMG! So Cute! Can I just pay you to make me one?? ;)
A Quilter Awakens
Your nursing story made me smile on Mother's Day. Thank you! Last week my 25 year old son hydro-planed on the highway, crossed the median into oncoming traffic, whipped around and was rear ended. All that without a seat belt on. Thank God all that was damaged was the car. But 25 years ago I was nursing said (chicken pox covered) 4 month old son on an airplane during an hour and a half delay on the runway in St. Louis. Oh the memories! Hang in there mama! Karmen
Whosies
we just made a few of these in a group...not as big though. great idea to use the machine to ruffle it. those darn breaking threads. :)
http://patchworkposse.com/blog
Rachel@oneprettything.com
It's so pretty! Thanks so much, I'll be linking.
Julie
I love this! I am having a linky party on my blog and Flower Week May 24th. I hope you'll come by and check it out.
singingthreelittlebirds.blogspot.com
Natalia
This is super cute Allison! I'm going to link to it on Sew What.
Thanks!
kanishk
i really like the white one.
indian classified site
Debbyanne
I love these, im off to get my sewing machine out!!!! x x x
Julie
Hi! I am featuring this on my blog for Flower Week. Thanks for linking!
Amber
I will be making this...as soon as I have time and scraps :)
Tere
Very cute! I'm making a little girl's dress right now and that would be a perfect little accessory....I'm thinking headband flower or something in the hair. Thanks for sharing!
I am a new follower right back at you!!!
terelauritsen.blogspot.com
ponytails and fishscales
Rosanna Hope
This was great...thanks so much for taking the time...can`t wait to run in and make a bunch for summer
Simone de Klerk
Beautiful!
Suze
That is so cute!
emilyc @ Sew Super Sweet
I love your blog and have no idea why I haven't seen this tutorial before! I LOVE it! and can't wait to try this! Thank you!
Miss P
I love this! Thanks for the tutorial. I turned it into a headband for my daughter. Check it out: http://thisideaattic.blogspot.com/2010/08/accessorize.html
Jeanne
Such a cute way to use scraps. I've got a few ideas on how to use them after they are made. Thanks for sharing.
Nenny Septiana
Love it! Thank you for the tutorial :)
The Ninja Knitter
LOVE! I'm going to make a few to put on headbands, hairclips and pin backings. Thank you very much for posting this tute!
The Ninja Knitter
And I forgot to mention - if you don't have a ruffling foot, you can use lastin (clear elastic) to get the ruffling effect too!
Suzanne
These are gorgeous! I will have to try one out after finishing my first quilt!
Loll
I came across this wonderful tutorial yesterday and spent this morning blissfully creating my first fabric flower. I love how this flower has a finished edge, yet isn't hard to make.
What a great way to play with color and use up some scraps in the process. I am definitely going to make more.
Terrific tutorial.
Thanks a lot.
Anni Due
sød blomst !
knittingdragonflies
Wow! super cute!
Thanks, I'm going to make some of these!
Vicki
linda
My first thought was "NO WAY.,, I have no interest in doing something that detailed".
But, as I scrolled through the EASIEST looking instuctions....even to ME.... my mind started scrolling with ideas for this cute cute creation.
Kylors Nana
Az
ILALANG SENJA
mkasih ilmunya ya....,aku seneng sekali,laenne mau juga dong,
Adeela
Cutest flower ever!!!
I have been making tons of flowers lately and I think I will be making some of these.
Thanks for the tutorial.
♥Adeela♥
LA Ingram Photography
Great tutorial...love it! This is just what I was looking for to make a camera strap cover. It will be a great embellishment!
Thanks for sharing~
Lee Anne
Irum
awesome.... luv it
MsKillaSmile
Absolutely amazing!
Caroline
Really nice tutorial, I made a nice flower from it.
And, my daughter asked me if is was me in the last picture and my husband also. It really could have been! :)
entreartes
Thank you for the tutorial. It´s so cute.
I post it in my blog.
Katy
We are working on about 100 of these right now at my house. 50 for the 2nd grade market at my daughter's school, their lesson in economics. Just as many being made for baby shower party favors. Oh my!
Margaret
I love, love your Brooch*- thanks so much for the tutorial- these would make some great little Christmas gifts in my Kate Spain 12 days of Christmas fabric- many thanks! Love all your tutorials- so many great ideas and so little time!
Margaret
(* Absolutely no offense meant but a pin is a Brooch, the word Broach means to raise an issue in conversation- sorry, Webster really is my middle name:)
zakrecona kurka
beautiful flower :)
Jessica's Closet
Beautiful! I wonder if you could make a solid color flower, but bind the edges with another solid color. Or, two different patterns, polka dots and stripes.?
Doreen
Hi there,
Visiting from Burlap & Blue -- adorable rosette! I've pinned to my "SEW Cute" board, and will def be making this!
Doreen
http://altered-artworks.blogspot.com
Think Bowtique
Love it Thank you for sharing.
awesomejulianne
ooooh i love this! simple yet elegant :)
raggedy amy's
I just made the flower as a topper for a bridal shower. It's perfect. Thank you for the nice instructions.
raggedy amy's
I just made the flower as a topper for a bridal shower. It's perfect. Thank you for the nice instructions.
Lori
Very cute and easy, I wonder what it would look like if the raw edge was the out edge, giving the flower a raw frayed look? Thanks again for sharing****Lori
Nancy
Thsnk you so much for sharing. Love it.