
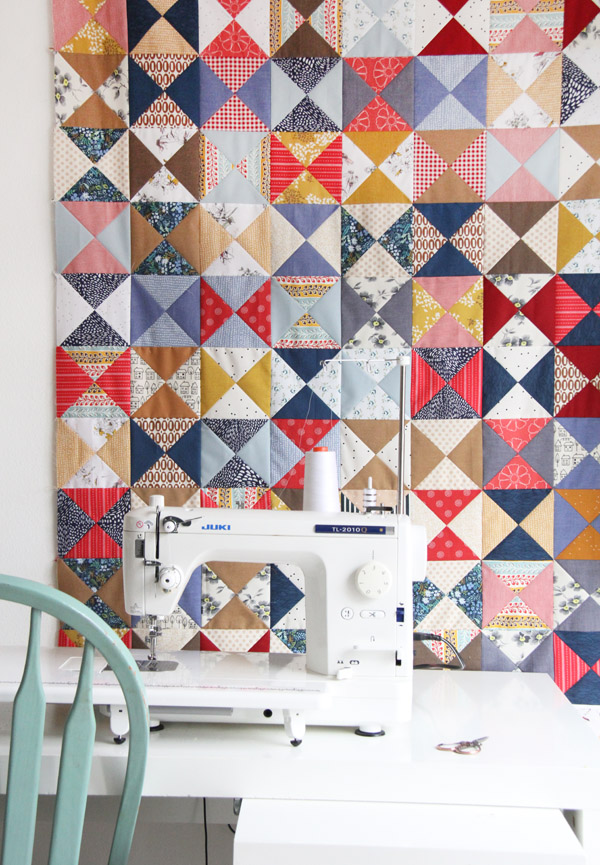
Instead of sewing the blocks together all boring-ish, I decided last minute to sew these blocks into rows with sashing in between. I happened to have a half yard of the green fabric which semi-matches…and sometimes semi-matching is as good as it gets!

I had some requests for how to make these little 9 patch blocks…they are super easy with this stack n’ whack method, so hopefully some pictures will suffice.
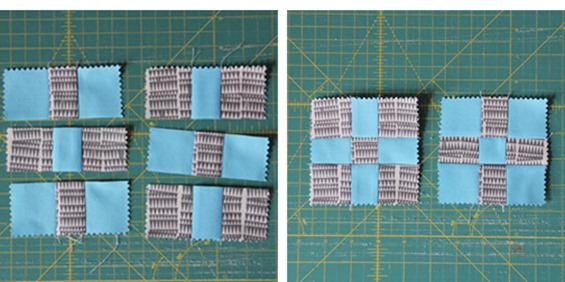
I stacked my 5” charm squares and cut a 1 ½” strip in the center of each. Then swap the center strips and sew back together…press towards the print fabric (so in different directions for each block).
![Charm-Square-Cross-Road-Blocks-Cluck[1]](jpg/charm-square-cross-road-blocks-cluck1.jpg)
Then cut another 1 ½” strip in the center of each, swap the strips, and sew them back together matching the seams. Again, press towards the print (if the center strip is mostly print…press towards center strip). The blocks measure 4” unfinished.
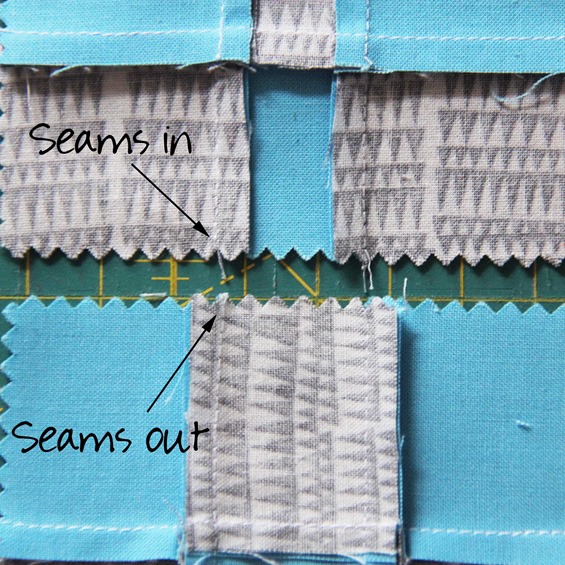
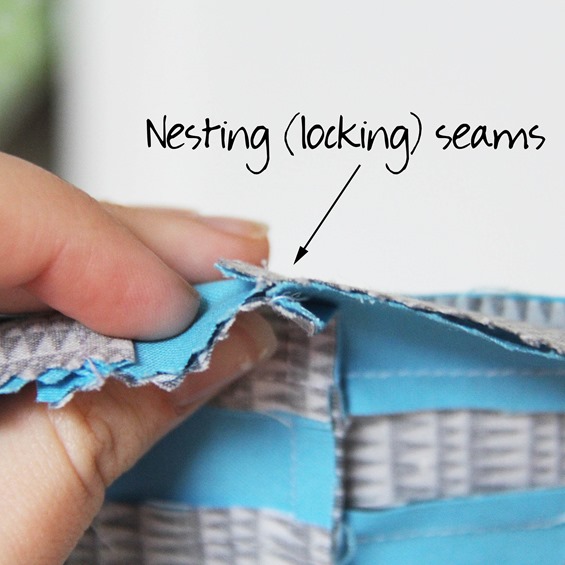
The trickiest part is remembering the pressing directions for each blocks so your seams will nest. Luckily it’s not the end of the world if they don’t…and you can always press your seams open and not worry about it.
Sometimes I flip the quilt over and look at all the seams and I’m a little amazed that I sewed and pressed each one of them. :)

I cut my green strips 2” by the average width of the rows, and if I remember right the Kona green is Leprechaun. This quilt measures about 36” x 45”…give or take a bit.

Have a Happy Thanksgiving!
Susanne vb
I like! Can't go wrong with 9 patch :)
Melissa Corry
Love that quilt top!!! And what a super fast way to make your 9 patches :)
shannyn kelly
Your seams are so tidy!! I don't know what I do wrong but I always end up with at least one or two sets that are just...wonky. Oh well. Practice makes perfect!
Mª Alba
Moltes gracies per aquest tutorial tant ben explicat.
petons des de Catalunya
margaret
thanks for sharing how you made the blocks, quilt looks great
Sewmotion
What a great idea, and so effective! Happy Thanksgiving from over the pond 😀
neweverymorningpatchworkandquilting
Thanks! Your lovely quilt and the bright photos have brought some light to a very dull November day here in the UK! Thanks for explaining and showing with such pin-sharp photos how you made the blocks.
Allison
Rachel Hass
I love this idea. Sounds like fun
Rachel
✾Jamie Lee Cooley✾
Oh I love the semi-matching green! It gives the quilt so much life! I agree, semi-matching is often the best choice. Have a wonderful thanksgiving Allison!
Jayne
Oh so pretty...the green sashing works!
kathy-o
I love simplicity in sewing! This is a darling quilt - kind of reminds me of a wonderful green salad! Happy Thanksgiving!
Ness
Love your little quilt! There is something theraputic to me about cutting it all apart and sewing it back together...LOL. I love 9 patch in any combination. :) The green is cute! Reminded me too...have you seen the ninja turtle blanket made with green stripe then colored stripe...in the colors of the ninja turtle masks and then they put a pair of eyes on the "mask" stripe. It's on my pinterest board. Need two for great nephews for Christmas! :) I think the original I pinned was actually knit or crocheted...mine will be quilted. :)
Happy Thanksgiving and I'm thankful for disigners/quilters/bloggers that share their talent, "know how" and cute designs with us . Thanks :), Ness
Doris Rice
A great nine patch quilt - my fav. And great tut to go with it too!
piecemakerquilts
Thanks for another great tutorial - I'm a little dizzy thinking about how many little squares are in this quilt but it is really nice.
Happy Thanksgiving to you and your family
Colleen
Lynne Shandley
Thanks for the 9-patch tute! That will help me use up some stash quickly :-)
Anina
I love nine patch quilts and you put a such nice original spin on this one.
Julie in WA
Nine patch is my most favorite block ever! Thanks for sharing the completed top, as well as how you made the blocks. What size is your finished top?
ParadiseBreeze Quilts
Thank you - you make it look so easy! Thanks for your inspiration all year - have a great Thanksgiving - from Australia :)
Mr. Briggs
Thank you for sharing this tutorial and the beautiful finished top. I would not have thought to use dashing the way that you did. Now I'm gonna have to get some Doe. Maybe Santa will be kind.
FLR
Lovely fresh nine-patch!
groetjes
Francisca
Rachel Hass
I love quilting idea, & just cannot wait for the nrw year to begin. Thank.you so much and hope you and your ones had a great Thanksgiving!
Denise Russell
Great idea to put in the sashing. I hope all of you are feeling better now!
Carla
Love the block and how easy you made it look with your tutorial.
Thanks for sharing
Kathy
I love this 9 patch...do you cut in middle sew, and cut again?? 1 1/2" each time to make them look different foe each block??? Ty
Jenny Sleigh
Just started to make these 9patch blocks. Suddenly realised I had no idea how to cut a 11/2" central piece??? Help!
Jenny Sleigh
Just realised I need 13/4" piece on each side of the block! Bit slow today!
Pam
I have lots of Kaffe strips. What a great way to use them! I love your patterns. Simple and always do good looking. Thanks!
Susan Ramsay
I don't see a finish on the sides. Is it a UFO? or are the squares tucked 1/4" in. Or?
Allison
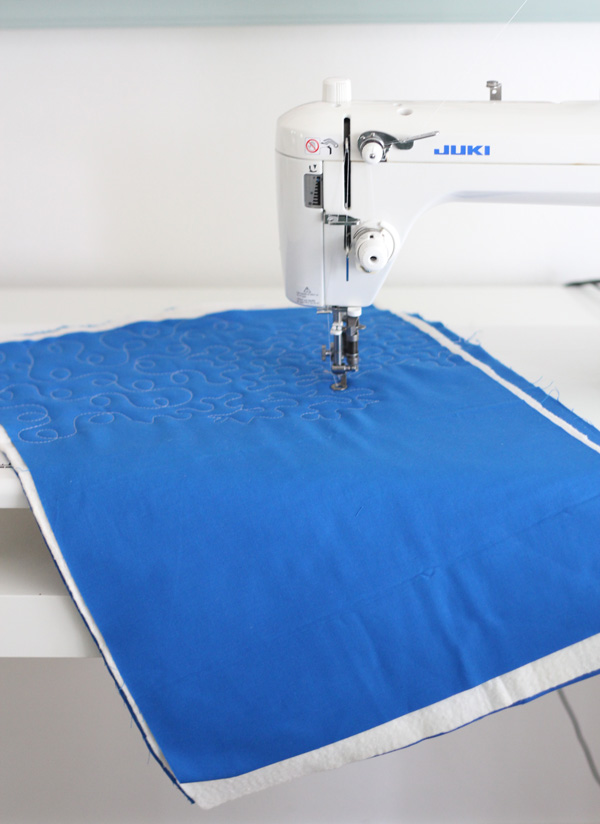
Hi Susan! I finished this one with simple quilting lines and donated it! Sometimes I forget to share some of my older unfinished projects I finish up quickly!
Pat S
Just browsing through my sewing closet, avoiding doing anything useful and found five rows of these that I did three or four years ago and then stopped. I think it was an effort to reduce the stacks of five inch squares I had. I'm amazed that I remembered where I had found the tutorial. I might cheat and use wider sashing so I can get these cute little 9 patches into a cute little quilt. Thanks!!!