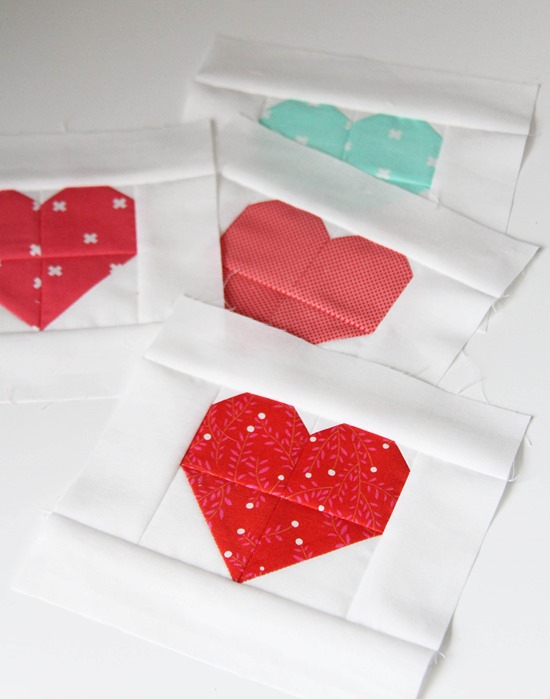
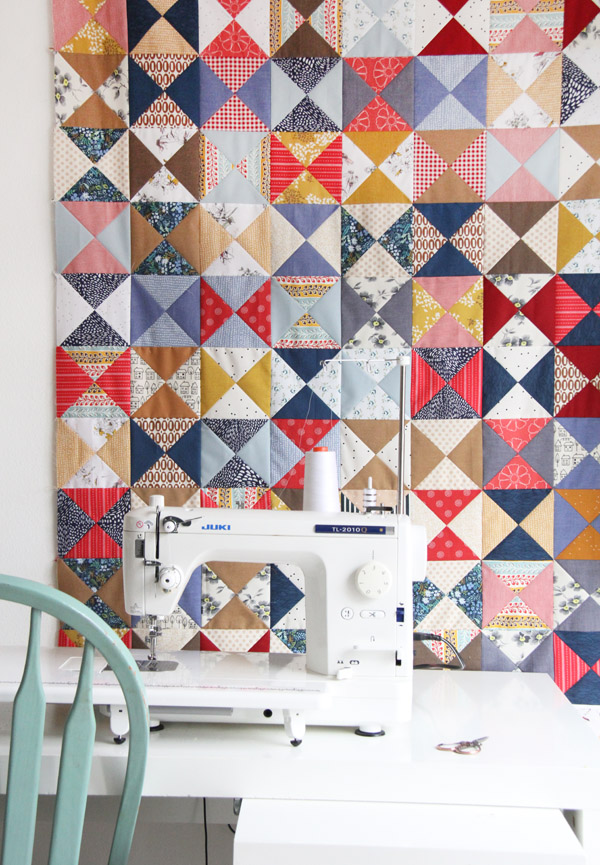
I revised this tutorial a bit so the hearts are 2 print pieces instead of 4 as in the quilt above. Now there are less seams and they are much easier to piece!
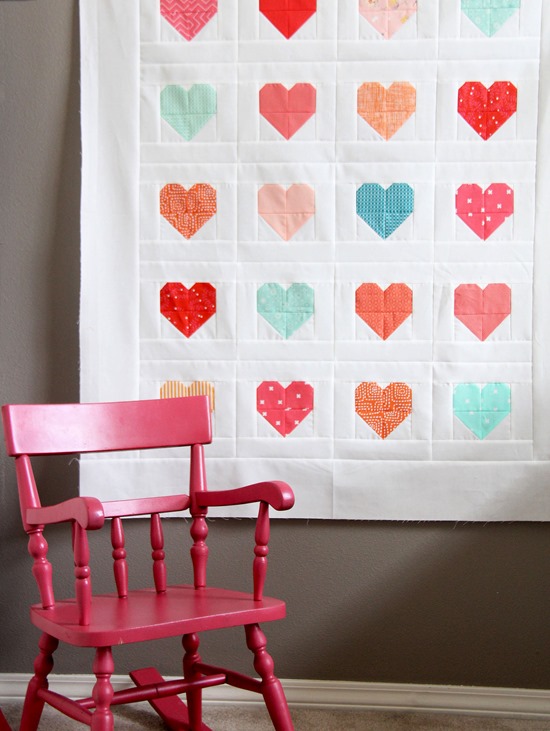
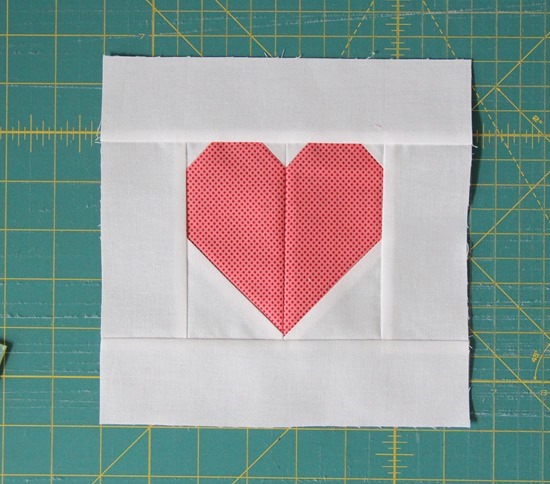
I was going to share this tutorial with you when the quilt was all finished and cute, but decided instead to share it with a month to spare before Valentines Day in case you want to make one!This post includes how to make the quilt including yardages, or you can just make one block. This little quilt measures 36” x 43” and will be even cuter once quilted in little swirls and bound in bright red. The blocks are 7” finished…so it’s easy to make larger or smaller.

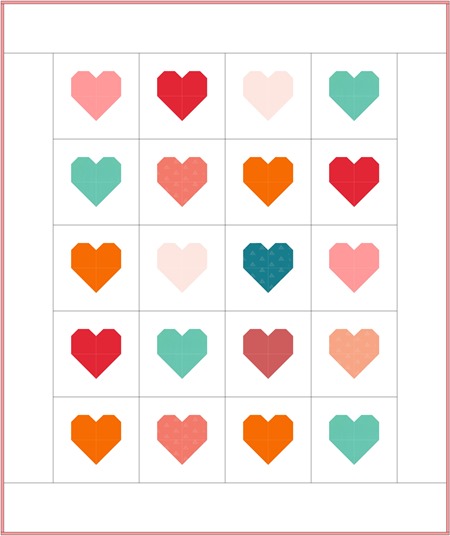
This layout was a last minute switcheroo…so if your planning ahead you could make this quilt with less seams by making just the center hearts themselves and use sashing (white strips vertical between the blocks, then horizontal between the rows). Since I will do almost anything to avoid sashing…I made full blocks with borders. You can do either…follow your heart. I had to throw a heart pun in there somewhere. ;)
For the quilt you’ll need:
-
20 print squares at least 5”, or 2 ½” x 9” print strips
-
1 ½ yards background fabric
-
⅜ yard binding fabric
-
1 ½ yards backing fabric
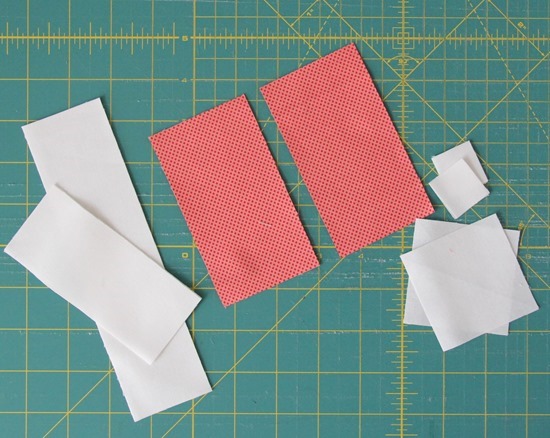
- Cut each print square into: 2 strips 2 ½” x 4 ½”
- Cut the background fabric into:
-
3 strips 2 ½” x width of fabric. Cut each strip into 15 squares 2 ½” (40 total)
-
2 strips 1” x width of fabric. Cut each strip into 40 squares 1” (80 total)
-
5 strips 2” x width of fabric. Cut each into 8 strips 4 ½” (40 total)
-
8 strips 2” x width of fabric. Cut each into 5 strips 7 ½” (40 total)
-
2 strips 4 ½” x 35 ½” for the side borders
-
2 strips 4 ½” x 36 ½” for the top and bottom borders
- If you only want to make one block instead of a whole quilt you’ll need: 2 print strips 2 ½” x 4 ½”, 2 background 2 ½” squares, 4 background 1” squares, 2 background strips 2” x 4 ½”, and 2 strips 2” x 7 ½”.
To make the quilt:
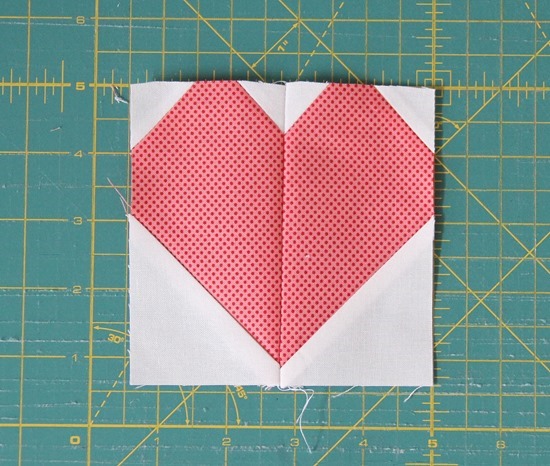
1. On each of the 2 ½” background squares draw a diagonal line from corner to corner. Place a square at the bottom of each 2 ½” x 4 ½” strip as shown.
2. Sew along the drawn line. Trim the corner leaving ¼”, and press out.
3. Place a 1” square in each top corner of the print strips. Draw a diagonal line (or eyeball it) and sew from corner to corner on each square as shown below.
4. Trim corners leaving ¼”, and press seams open.
5. Pin seams and sew the two sides together. Press seam open.
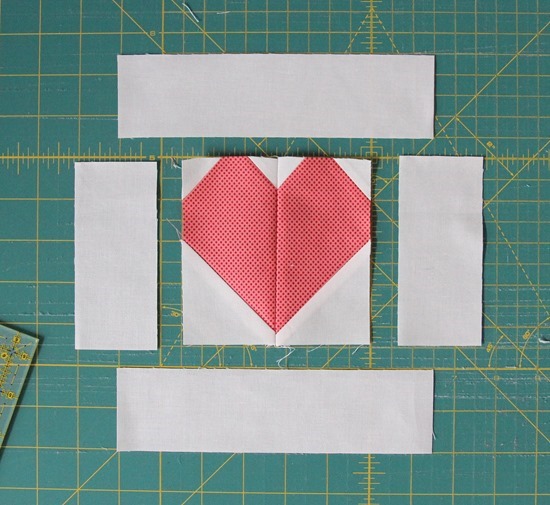
6. Layout 2 of the 4 ½” strips, and 2 of the 7 ½” strips. Sew the side strips to the block first, press out, then sew the top and bottom strips on. Block should measure 7 ½”. Make 20 blocks for the quilt.
7. Layout the blocks in 5 rows of 4 blocks each. Sew blocks together to form the rows(seams won’t nest so make sure to pin…or don’t…I won’t tell), press seams in alternating directions. Sew rows together to make the quilt top.
8. Add the borders. Cut 2 border strips 4 ½” x 35 ½”, then pin and sew a strip to each side of the quilt, press out. Cut 2 border strips 4 ½” x 36 ½”, pin and sew a strip to the top and bottom of the quilt. Press out. Done!!! When you get ready to bind, you’ll need to cut 5 strips 2 ½” x width of fabric.
![Simple Heart Quilt_thumb[3]](data:image/svg+xml,%3Csvg%20xmlns='http://www.w3.org/2000/svg'%20viewBox='0%200%20550%20728'%3E%3C/svg%3E)
![Simple Heart Quilt_thumb[3]](jpg/simple-heart-quilt_thumb3.jpg)
If you have any questions I’ll answer them in the comments. Happy quilting! :)
Joy
Love this! Thanks!
Lisa Blumthal
Love your beautiful 💗 quilt! How would I make just 1 10” 💗 block??
Thanks,
Lisa Blumthal
Linda
Such a pretty little girl, and of course a pretty quilt too.
So glad there is someone else out there who dislikes sashing.
Linda
Corrie H. @ Mountain Stitches
very nice! Thanks for sharing with us in time for Valentines day!
Sharon Bodoh
I love the quilt but I’m looking for suggestions on how to stretch the small blanket so I can pin it for quilting. Help would be so appreciated.
Allison
I think you are talking about basting a quilt? There are great tutorials on Youtube for finishing a quilt!
Quiltineering
Such a super cute quilt!!
Lisa
This speaks to me. Must make one!
tabbiegirl
Allison...every quilt you make is fabulous! Thank you so much for sharing this adorable quilt and the tutorial! You never fail to inspire me!
Lisa Walsh
This is so adorable! Thank you for the tutorial!
Auntie Pami
Thank you! Love the pic with Sophie!
Unknown
On my list to make! So cute!! Thanks for the tutorial! And oh my goodness Allison, when did your little angel grow up!! ;0)
Unknown
↑ it's me Trish not sure why my blog isnt showing up (notes of sincerity)
ParadiseBreeze Quilts
Thanks Allison - this is lovely! Sophie looks so adorable. I still have a rocking chair given to me by my grandfather. She looks so happy in her chair!
Jaia
How adorable! I'd love to make one for next year.
Buffy Skolnick
Thanks for sharing the love!
Donna
Great quilt! Thanks for posting. Your precious baby girl is growing way too fast! Happy New Year!
Tessa Marie
Such a sweet little heart! I always love the fabric choices you make, and these lend themselves so well to a simple design. Your little Sophie is getting so big (I have a Sophie too, who is now 13 - it really does go so fast!!)
Cindy
This is just too cute- thanks for sharing! I can't believe how much little Sophie has grown- just too precious!
Lia
Thanks for the great tutorial. I love the quilt and will be adding to my to do list
Nela Barrow
What a sweet quilt. I am so excited to make a couple mug rugs with the single block for the ladies in my daughter's school.
Thanks for sharing!
Patchwork and Play
Such a sweet pattern! Thank you fro sharing it with us!
Patty
This is cute and simple. I really want to try this block. Thank you for sharing.
Mª Alba
Moltes gracies pel tutorial !!!
Es un treball molt divertit.
Petons
Hildy
Cute quilt! Thanks for the tutorial:-)
Heleen Groot
Gorgeous! Thank you.
Melissa James
I was just contemplating doing a cute heart quilt. Decided to check my email and here was your tutorial for an ADORABLE heart quilt! Talk about perfect timing! lol Guess I know what I will be working on this weekend! :)
Allison
Thank you for this straightforward and inspiring tutorial. I've forwarded it to my friends on Facebook :-) Hope some of them get inspired and pay your blog a visit!
Noela
Beautiful quilt. Thanks for sharing how to make it. hugs.....
Leonie
Gorgeous, thank you for sharing the tutorial.
kitty
This is such an adorable little quilt!! Thank you for the tutorial! But even more adorable is your little Sophie!!
tiffany
Too cute! Thanks for posting before Valentine's Day... I think I'll make little heart mug rugs for my kiddos!
stephanie
Totally making this! Thanks for the awesome step by step!
abengel
I like the alternative to sashing. I don't mind sashing, but this would be allow a person to use low-volume prints in the background instead of white, or even tone-on-tone whites.
Mary Caldwell
Very cute pattern~! Thanks for sharing. Wondering how wide you cut your borders, I didn't see where you noted the measurement. My apologies if I missed it. Thanks again for sharing just in time for Valentine's Day.
Preeti Harris
Love the simplicity of the pattern. And so adaptable to a pillow/cushion. For those of us who have big intentions but little time!!!
Micah
This is SO cute!! I just finished a heart quilt, but I have to make this one too ;). One question! Does each print need to be cut in quads or could it just be cut in half, each hst at the top and then alternate the hst at the bottom? Does that make any sense at all?? It makes sense in my head but I'm not sure how that would change the diminsions!
Judy
Not entirely sure what you are asking. Are you asking if you can make this with 4 squares, instead of 2 rectangles? If that is the question, the answer is yes, but you would have to make your squares big enough, that when you sew them all together, you are pleased with how the heart looks. I would start with some scrap fabric -- maybe 3 inch or 3 1/2 inch squares -- and see if that works for you.
I am Just One Mom
Darling! May just do this for my grandchildren's teachers this year and change one heart into an apple.
Thank you for sharing this sweet quilt.
Colleen Potter
Thanks so much, love it ! I'm surprised at how much your little girls has grown too !
Libby
Cute, especially the last photo with the precious little girl!!!!
Also, I love the full blocks without the border, to me it makes the hearts "pop out" What a cute Valentine gift this will be !!!
Ness
Adorable! and the sweetie pie sitting next to it also. :)
Thanks for sharing how to! Just in time, think I can sneak this one in! :) I'm with you...would rather not sash!!
Melissa Corry
That is so stinking cute!!!
Deanna McNay
Very Cute valentine's tutorial!
allison
Micah - You could make the bottom half a flying geese unit instead of the two half square triangles...but for the ease of the tutorial and figuring it out I used the HST's. :) Thanks!
Mira Collins
Will this work with charm packs?
allison
The only way it would work with a charm pack is if you made the bottom portion (the 2 HST's) a flying geese portion instead. It's easy to do I just didn't figure out the sizing of the white squares. If you do it my way, you'd need a 5 1/2" square or large scraps to get the squares out of it.
Cindy M
Just found this link... Couldn't you cut the charms in half and just trim a 1/2" off one end of the charms making it 2 pieces @ 2.5x4.5, the required cut? Or am I reading it wrong:)
Allison
Yep! That is how the new instructions show...except I didn't use charms I cut 2 1/2" x 4 1/2" strips, but you can use charms if you like! You can even keep them 5" if you wish, your hearts will just be a bit longer.
Anita
This is awesome! I cannot stand sashing so I would use the block method. Thanks so much for this Allison! :)
Trisch
Thanks for the great tutorial. I think the quilt looks very cute with the blocks that way. (no sashing) I saw a very cute mini version of your quilt block on Instagram!!
suzanprincess
I do love hearts, and your block design has the best heart shape I've seen anywhere, so thanks so much for the tutorial, which I'll be using ASAP. Your color choices just make the quilt sing.
Laura Chaney
This is so simple, yet so adorable. Love it! Thanks for sharing the pattern with us, too!
Lynne Shandley
Thanks for sharing the hearts with us! Perfect timing for the Seattle MQG swap :-)
Also, that is your "baby" isn't it - she's getting so big!
Lisa
Thank you for sharing it really is so cute!
Lucy Daniel
What a SWEET & ADORABLE quilt! LOVE IT!!!!
Jana Janky
Very ,very sweet quilt. Thanks for your tutorial. I think I have to make at least cushion cover for my girl...
allison
I changed up this tutorial a bit so you can now do it with a charm pack for those that asked!! :)
Iva Adkins
Where can I get the pattern quilt of the hearts..
Micah
Yippee!!! Thanks for doing all the math for us!! I can't wait to try it out!!
Julie Cefalu
ADORABLE! That is the cutest little quilt! I'm going to pull some fabrics right now and get started. Thank you!
Julie @ The Crafty Quilter
Verena
So cute! Thanks for sharing!
Christine @ 12,450miles
Oh, I *love* this!! Thanks for the great tutorial!
Linda
Adorable!
Sue
Thank you! You are so generous and kind to share this great tutorial. :)
Sue
Thank you! You are so generous and kind to share this great tutorial. :)
Sherry
Thank you so much for sharing this wonderful tut - cute Valentine quilt. Hoping to start mine tomorrow. Wow, your little one is sure growing up - where does the time go???
Allison
So cute! Thanks for sharing.
scrappychica
I was directed to your blog from another blog I follow regularly, gluesticksblog.com and she used your tutorial and made pillows for her girls. I thought they were so adorable that the tutorial intrigued me. I am not a quilter, I won't even consider myself a sewer though I very much like to use my sewing machine and am slowly learning. I have a feeling that this post/tutorial is going to be "the one" that started it all if you know what I mean. I want to try this and am going to start by find out what a "charm pack" is. I love your quilt very much, the sweet little girl was just a cherry on top of it all, loved that smile!
allison
scrappychica - A charm pack is a little pack of 42 5" squares of fabric. Usually different fabrics from a fabric line. :) You could totally make these heart blocks!
Susie Murray
An adorable quilt for Valentine's day. What little girl wouldn't love this quilt? Speaking of adorable, your little one is just as adorable as the quilt.
Ashley Calder
ADORABLE quilt! Thank you for sharing this tutorial. :) I have four girls, so I think a quilt like this is a must-have in our house. :)
NebraskaNative
Thanks for sharing the great tutorial. Always, always love your creations and your unfussy-ness! :) Cheers!
StarSpry
What an adorable quilt! Thank you for sharing the tutorial :)
Milaney
What perfect timing. A dear little girl I adore is having openheart surgery and I was looking for just the right quilt to send her. Thank you for a great tutorial.
Sarah
OMG look how grown up Sophie is! I remember when she was born, and I guess she's nearly 3? But she looks about 5! It's the such long hair I think.
Lupe Quintard
I LOVE THE BLOCKS! It was so easy! My 8 year old granddaughter is making some now! She will make something for her teacher. Thanks and have a blessed day!
Ingrid
Could you tell me the measurements for a finished 8 1/2" block? Thanks!
Ingrid
grannib50
I just adore this quilt!!!! I am always looking for new fresh patterns for the children in the Primi ward at Phoenix Childrens Hospital . I make them to donate them. It just does my sole good :) Thanks again !!
Di~
Great tutorial, Allison. I've seen two blogs tonight which use this and link back. Very cute quilts too, plus my daughter made a table runner using this. Thanks!
Sue Niven
simply stunning.
Kim
I am curious about how you are going to quilt this. Trying to come up with some ideas.
Rehana Sulaiman
I'm trying out this quilt and just finished my first block. However, it seems my finished block is 1/8" short of 7 1/2". Would this make a tremendous difference to the final quilt? Do I need to start over? I'm making this for my daughter using Liberty prints - looking forward to the finished product! Thanks for a lovely tutorial.
Judy
I think the important thing is that all your blocks are the same size. So if they are all 1/8 inch short of 7 1/2 inches, your quilt will just be a little smaller. No one will know that, except you.
Allison
Your blocks will be fine Rehana! Mine are often a bit short, it's probably due to your seam allowance being a bit large. Just sew them all together as long as they are the same size (1/8" off should be OK) you'll be fine once it's all sewn up.
Linda
Love this blanket. So cute. I hope you won't mind me scheduling it to share on our social media :-D
Allison
Not at all Linda! Thank you! -Allison
Amanda
How do you recommend quilting this??? I found this pattern, love it and used my bridesmaid dress i wore in my best friends wedding to make some of the hearts. (Then going to give to her little girl). I just finished today and am now trying to figure out how to finish it off. My grandma recommend taking it to her quilter but I am not sure I want to do that because they can just do a pattern all over the quilt and I don't want to take away from those cute little hearts. I am very new at sewing so would love some recommendations.
Connie
did you receive a reply on ideas for quilting? I finished the top also and am looking for ideas of how to quilt.
Allison
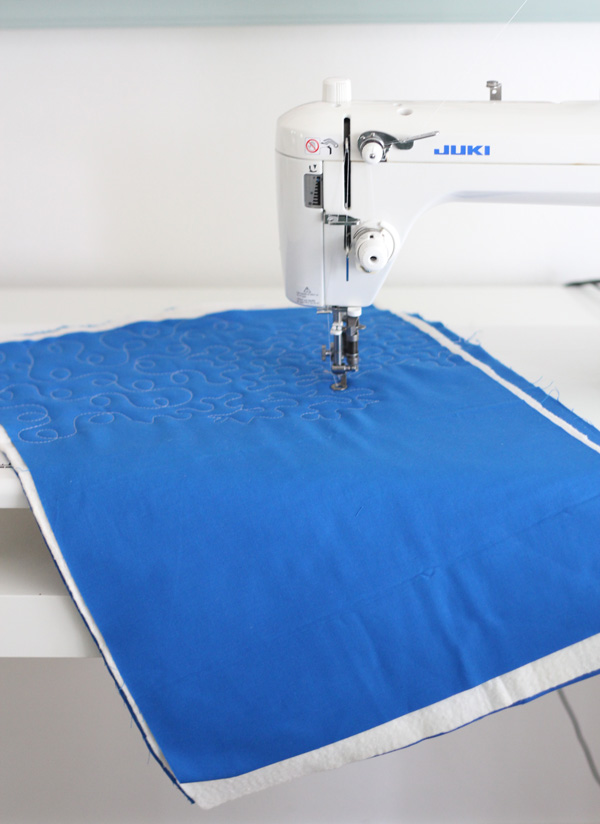
Hi Connie! I've seen it quilted all different ways, all over free motion swirls, stippling, or straight line quilting 1/2" or so apart also looks great. Anything looks great on the hearts! Good luck!
sjperona
Just loved this project, it was such a great way to get back into quilting. Thank you for the tutorial!
Karee
Thank you so much for this tutorial. I think we will use this for our next Granddaughter retreat.
Maureen R
What a cute pattern! Thank you so much for sharing.
Mimi
Hi Allison!
I was wondering if you could let me know what the finished dimension of the quilt will be? And here's a rather cheeky question: How would one go about making this with jelly rolls?
Many thanks in advance :)
Allison
Hi Mimi, this version is 36" x 43". To make it from jelly rolls you would just cut the strips for each block 2 1/2" x 4 1/2" from the jelly roll strips, you can make 4 of these sized blocks from each jelly roll strip. Thanks!
Lisa
so sweet...i am showing my 9 yr old daughter how I learned to quilt - by reading tutorials. She is impressed by the details! thank you
Hazel cox
Thank you for the Tut...x
Monica
Planning to use my pink scraps for this. Question: How do you press the middle where the 4 mini-blocks come together? Do you clip, smoosh, and swirl the seams in one direction?
JOANNE Westfoot
Loving this block! We are using it at an event to make a Project Linus Quilt, thanks so much!
Joy
I have been working on these heart blocks on and off for a few years...I just got them all out again and cut out the old measurements from your first tutorial...I had them written down. I just came back to your site to see the tutorial again and it has changed. Do you happen to have the old one anywhere? The one that was done with the four squares?
Allison
Hi Joy! I'm not sure I have the old one on my site anymore, but it's almost the same, except you cut the four print squares for the heart 2 1/2" square. Other than that it's the same measurements...I hope that helps! -Allison
Karen
How many blocks for a queen/King size bed? I would love to make a queen and a king size.
jibbi
Made this for a friend's daughter, turned out great :) thank you for the tutorial! http://imgur.com/a/espr0
Cláudia Barbosa
Hi! Why is the tutorial diferent of the first photo? It seems two diferent ways do make it. Thank you!
Allison
The original way had four squares...the updated tutorial just uses the two rectangles so its much faster!
Teresa
I would like to make this a 10 inch block. What with the dimensions for the pieces be to do that?
Allison
If you look under my "Tutorials" bar at the top there is a tutorial for just the heart blocks alone. I think the 10" dimensions are in there!
Jamie
Just cut out my pieces today. Tomorrow I sew! Thanks so much for posting the cutting directions for various sizes!
ginny
Just set up my new sewing room. This was the first project. Seems appropriate! Will be making a 3 heart wall hanging for a friend’s new home. The simplicity of the heart is stunning. Thank you for being part of my new room 💙
Mandy Holbrook
I love this pattern and I used it to make my grandma a quilt for Christmas from my mom's shirts. (She passed away three years ago) My grandma loved it so much and her shirts in the shape of hearts made it made it so special. Thanks for this great tutorial!
Allison
Oh I love that, what a special gift!
Bridget
what size is the color fabric? you saw 4.5 by 2.5 , but your color fabric looks 9x5... can you please verify
Allison
The photos were added afterwards (from the multiple size hearts tutorial also on my blog) so just pay attention to the written directions. Thanks!
Bren B
Hi
I'm trying to make a 10" block version of this quilt using your conversion pattern download. I've successfully made the heart but I'm trying to figure out the conversions for the background strips to finish the block and getting very confused! Have you converted those previously? Many thanks!
Pat Giarrusso
Wondering how you quilted it? Very sweet!
Cindy Kannenberg
Thanks for sharing this pattern. I too have a friend recently diagnosed and am going to make her a quilt as soon as I can. Thanks!!
Roseanna Chick Trowbridge
Loved making this quilt!! It's so simple and lends itself well to chain piecing. Did the top in a weekend. I will be making another for sure after I try out some of the other designs on this blog.