
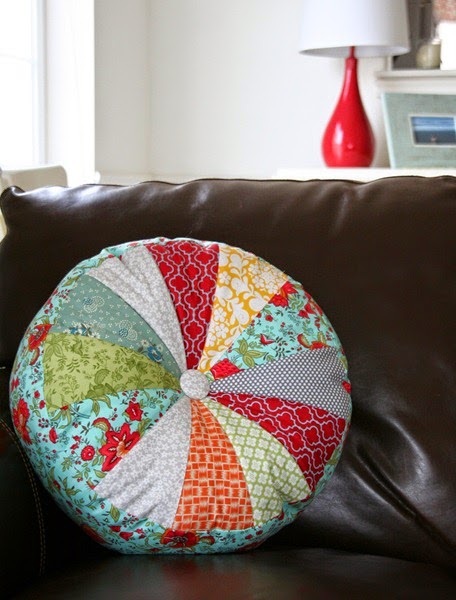
These are my favorite new pillows. They are fast and unbelievably easy to make…and I hope you love them as much as I do. I did my best to simplify the instructions/pattern so they are beginner friendly, and super fun to make. If you’ve never worked with a template or curves, and your nervous about it…these pillows are a perfect place to start. The only problem with them is that you can’t make just one…trust me …I tried.
Click HERE to view the new printable pattern for the Sprocket Pillows!!

There are pattern templates for two sizes:


Click the link below to download the pattern templates
*For best results, print the templates directly from google docs (click file on the left and print). If you are using explorer or firefox….make sure you hit "fit to printable area", or "print actual size" in the printer preferences.
** Please do not re-post the link to these templates on your own website! Thank you!
You will also need:
Large fabric scraps for the top wedges, a 5" x width of fabric strip for the middle (plus a little extra for the large size), a fat quarter for the back, a bag of poly-fill stuffing, and a button and thread for the center.
Let’s get started!!!!
1. Cut out the template for the size pillow that you are making. Using the template cut out 12 wedges.

2. Arrange the wedges how you like them. Sew the wedges into pairs, right sides together. Sew from the tip to the end. Use a ¼" seam allowance while constructing the pillow top.

3. Press and arrange the pairs. Sew the pairs into two halves.

4. Pin the edges and center seams of the halves together. Sew the halves together, slightly pulling or easing the fabric as necessary to get the edges and center to match. Don’t worry if your center seams don’t match perfectly…that’s what the button is for. Press well.


5. Make the pillow back by folding the backing fat quarter, and the circle top in half. Line up the folds, trace, and cut out the back.

6. Cut the strip for the pillow center. The strip sizes are:
Large Pillow: 5" x 50" strip
Small Pillow: 5" x 43 ½" strip
Sew the ends of the strip right sides together using a ½" seam allowance and press. You’ll use a ½" seam allowance from here on out.

7. Pin one edge of the strip to the edges of the pillow top. Start anywhere and work your way around, easing or slightly stretching as necessary. If you have too much excess, pin all the way around except for the last 6” or so and pinch the extra together and sew it together. If you don’t have enough strip and you can’t slightly stretch it larger…you can either cut and sew another small strip on, or pin the strip ⅛" or so in from the pillow top edge.

Remember that you can’t use too many pins!

8. Sew along the edge using a ½" seam allowance.

9. Now pin the other edge of the middle strip to the backing, right sides together. Do it the same way you did the front.

10. Again, sew along the edge using a ½" seam allowance…but this time leave a 4" hole for turning and stuffing.

11. Turn the pillow right side out and stuff with your poly-fill. I like my pillow to look full but still be really cushy…that way when you add the button it sinks right in.

12. Sew up the hole either by hand or machine.
13. Get your button, needle and thread ready. If you want to make a fabric covered button like I did…you can buy kits at any fabric/craft store….they are super simple and take about 10 seconds. I recommend using thick thread like embroidery thread to add the button….but I didn’t have any for the tutorial so just ignore the thread I’m using in the photos.
Knot the end of your thread and put the needle through the center back of your pillow and push it to the front center.

Loop the thread/needle through your button a few times and put the needle back through the front to the back.

Pull the thread until the button is depressed in the front enough for your liking, and knot the thread in the back of the pillow. You can cover the back knot with another button…or just leave it.

And there you go. Aren’t they fun???!!!! Now you can make more in no time!

jan
Those are really lovely!
Becky
Your tutorial was excellent. I made one of the larger pillows. Turned out cute. Thanks!
Aoife Ryan
Hi there, just wondering how you made the template? Im finding it difficult to create my own since its a curved piece? not sure how to go about doing it. Its for a class project. Any help would be very appreciated Thank you.
Cheryl
I am having trouble with buttons pulling through when pillow was used i used embrodiery with 4 strands
rubyslipperz
thank...THANK YOU...for taking the time to take pics, etc for this tute...It is REALLY cute... I sew wanna make one!!
hugZ,
annie
rubyslipperz106.blogspot
Holly
I made my templates from thin plastic cutting sheets i got at the dollar store. Easy to cut and they last forever. I use buttons front and back and then they never pull out. Thank you for this tutorial.
Allison
Great idea!
shez
Thankyou very much for showing us how to make these delightful cushions it is very kind of you ,well done they are gorgous.
Mary on Lake Pulaski
Thanks for the tutorial Allison and relax and catch up!
Q @ JAQS
Thank you for that great tutorial :). Can't wait to make some of these - they are absolutely adorable!
Venus de Hilo
These are fabulous... adding them to my future projects list right now. Thanks for sharing your creation with us, and showing how to make for ourselves.
Q
I lurve these they are awesome I also saw the words quick and easy in there so I am really looking forward to making loads of them! Thank you!
Kris
You can bet I will be making oodles of these fun pillows! I will blog them, and link you up!
Thanks!!! LOVE them!
Linz
Um... LOVE THESE!!! Thank you for hosting such a fun blog! I might just make one of these tonight... :)
Amy
very pretty,thank you for the tutorial.
Rocio
Thanks a lot for this tutorial! You make it look not so difficult. These pillows would be perfect also as an outdoor version. I may try soon... :)
Judy
Oh Thank you for being my first blog to follow and my favorite to this day! Thank you for helping the beginners. Thank you for being you.
Impera_Magna
I love the pillows.. thank you SO much for the pattern and tutorial!
Di~
Love the pillows, I want to get started tomorrow! Thank You.
Stacey
I seem to have a bit of a pillow obsession lately and I adore these. I'm making one today!
ara
Muchas gracias!!!!!!!!!!!
Es genial, me gusta muchisimo.
Besos.
CJ
Thank YOU! I loved the pillow you did awhile back like this and now I think I will make one of these to match one of my daughter's quilts. Which ONE will be the toughest decision I make this week. ;)
Amy
They are so adorable! I never thought I would you that word to describe a pillow!
flisa
Great tutorial! Beautiful pillows! Thank you for sharing!
junglewife
Thank you! I am making one right now! I am finding that if you cut a layer cake square in half, you can get two large template wedges out of one half, and then use the other half (5 x 10 inches) to piece together to make the edge strip. So out of 6 layer cake squares and then a piece of fabric for the back, you can make a large pillow, or a large AND a small pillow if you use a different fabric for the sides!
Madster
Greetings from Singapore, and thank you for wonderful tutorial. I just love your blog. Even if I don't really sew :)
bruinbr
These are too adorable! THANK YOU for the great tutorial! Can't wait to make some!
azucena
QUE BONITOSSSSSS
GabyLux
It´s so cute. Thanks for the tutorial.
Brenda
Well Done~ Enjoy your break. The blogging has been super...but me time is absolutely necessary for everyone.
quiltypleasuresonline.net
Oh my .... I'm going to need a longer sofa {sigh}
Leigh
Magalis Marisol
Hola amiga!!!!
Gracias por el tutorial....
Un fuerte abrazo desde Venezuela!!!!
Nell
Great tutorial! I have been meaning to have a go with curves, this may be a good chance! I like your choice of colours too. :)
Gwen @ Gwenny Penny
Awesome pillow, Allison. Can't wait to try this. Love it!
LJ
I love your pillows!!
Peggy
OH I love your pillows! They bring back memories of my grandma and her pillows. She had a love for round pillows... sprocket style, pleated, smocked, you name it... she had made it! Thank you! :)
Cathy
Oh gosh! Another great thing to add to my list of do's. Reminds me of my mom and gram's couch. I have so many irons in the fire, this one will have to wait till my sewing is caught up.
thanks cathy
Jodie
Wow these look great! So many things on my list to finish or start, but I may just put them all on hold to make one of these! Thanks so much for sharing your wonderful ideas with us. You really do give out such wonderful information and want you to know that I very much appreciate it. Jodie
Dawnmarie
Very cute pillows - I'm already thinking I should make some for my screen porch redo. Thanks for sharing
Cindy
Really cute! Thank you for sharing!
Barbara
you are an incredible human being - thank YOU for your dear blog and this awesome pattern
webbs
What cute pillows! I'm printing out the templates right now and going to make some this week. Thank you for always sharing your creative ideas with us.
b78ayers
You are just the sweetest thing and I love everything you offer up on this blog! Take the time -well deserved.
JCnNC
Those pillows are so beautiful. Thank you so much for sharing your tutorial. Always a joy to visit your blog. Judy C
randi---i have to say
cute! my mom just got a new couch and i am thinking a pillow may be nesessary! :)
tracy_a
thank you for always sharing so many wonderful projects!
Gerri
Thanks for the great tutorial, and have a wonderful time catching up with life!
Sandy
And a big fat thank you to you, Allison! What a great tutorial...easy with pictures...my kind!! Your blog is charming and I love visiting it...such eye candy! Have a great "time-off"...looking forward to your return.
VickiT
Awesome looking pillows. Great tute. Thank you so much. Have a great break to catch up on life. Get lots of rest and have fun. Will miss you so don't forget to come back. :)
Elsa
love love love these pillows! thanks so much for the template and the tutorial. If I weren't going to do a sew day with my friend (we're doing a quilt along of the Single Girl Quilt), I'd be making this pillow!
KRISTA
Those are REALLY cute! I may just have to give those a try, even though I haven't ever attempted anything like that! Thank you for sharing!!
Julie {CalleLillyCafe}
Love love love! my girls would love these cuties on their beds! Thank you for sharing tutorials. =)
**nicke...
Thank You so much Allison! They really are very cute and I can't wait to make one!
di
I LOVE these! Thanks so much for sharing this darling project with us!
amy smart
So darling, Allison.
Jamie Lee
Wow, I love these! Thanks so much for sharing the tutorial with us!
Gunilla K
Wow!! Lovley! and thanks so much!
Gunilla
Pepe
Wow! Simply fantastic! I'll make it!!!
Laura
Both pillows are wonderful! Thank you.
Hope you have some wonderful peaceful time to get caught up on non-blog stuff.
Tasha from Creation Corner
These are beautiful. I cannot wait to make some. Thank you for always inspring me and so many of us. You are amazing. I think we should be thanking you!
Sandra
Your pillows are fabulous! Thanks for posting the tutorial:)
mamaneedstowashherhair
hi! i've never commented on your blog before, but i have been following you for awhile and have to tell you that you have inspired me so much! i've recently started my own blog, where i have list YOU as one of my favorites! so on this little break of yours come visit me at http://www.mamaneedstowashherhair.com :)
Crystal Hendrix
Very pretty!! Love it and thank you for sharing!!! You inspire me!! in MANY MANY ways, I want to publish my own patterns-write more tutorials for my blog....so much!! Don't know how you do it!!???
toots2u
you are the best.... thank you! Enjoy your blogging break and will look forward to you coming back. Thanks again!!
Cheapo Mimi in Nashville
Love you, Allison! I've been casting around trying to find this pattern ever since I saw your pillow like this a few months ago. I can't wait to start cranking them out. I hope you have a relaxing and enjoyable break.
kathytypestoo
oh man! i wasn't supposed to want to sew anything this week while i get ready for my nieces and nephew to visit. guess i better clean up quick so i have some time to make a few hundred of these! thanks for sharing :)
Cheryl
bless your sweet heart for being so generous. I clicked on a link to your blog today from littlebiggirlstudio and the page loaded up with those awesome pillows! I love them! the fabric you used is just perfect. You made them look super easy in your tutorial. I have never done curves before, but I just may give it a try.
Lauren P
Thanks for the tutorial! I cannot wait to make one!
bethanndodd
These make me smile :) Definately putting these on my HAVE TO MAKE list...thanks for the great tutorial! Smiles
Julie
oh. gosh. i love these pillows. and i sure need something new and cute in my family room now that spring & summer are heading our way. this is a new item on my 'to make' list! thanks so much!! you're the best :-)
letrecivette
Thanks! It's very cute! I want try! Next time I'll show it!
Nice week,Monica
Laura Maxell
these are so cute. they make me think of my nana because they are something she would have had at her house. thank you so much for sharing this with us. i can't wait to make some :)
Rachel@oneprettything.com
You're such a fabulous explainer. You make everything seem so easy and totally doable. I love it! Thanks so much, I'll be linking.
lifeinredshoes
Woooo Hooooo! I have a Sprocket on the docket:)
Thank you!
Deb
Glad this showed up in my Google Reader this morning! Mondays are my day off and I was looking for a good project - it went together great! My new Sprocket Pillow is sitting on ours bed!
Kayla
I'm a loyal reader but lazy commenter..but those are sooo cute! I love them and can't wait to make some! =)
MARIZE ARTES DIPANO
Amei o tutorial. Muito bom! Vou tentar fazer! Felicidades e sucesso! Deus abençoe a todos!
Abraços com carinho.
Marize/Maceió-Alagoas/BRASIL
Thimbleanna
These are ADORABLE!!! Thanks for the inspiration!
Rebekah★All Thingz Related★
L.O.V.E. them!
Thanks so much for the fantastic tutorial!
Heidi @ Honeybear Lane
Allison--
I love these pillows and I love you! I subscribe to a bazillion blogs but I always have to read yours. You have brilliant skills and ideas but also I love that you don't update your blog every day. As a fellow blogger I honestly can't believe how other bloggers don't get overwhelmed with everything and still post awesome things every day. Good luck with all your tasks at hand!
Krista S.
Loved this tutorial!!!!! It went together very smoothly and quickly! You are a great inspiration, thank you!
Here is my finished product:
http://thehandmadehomemaker.blogspot.com/2011/03/sprocket-pillow.html
k_pusch
I love love love these pillows! Can't wait to try them. Working on the Raw Edge Circle Quilt now and it is so super cute. Thanks for all the fabulous ideas!
loves2spin
Oh, this is perfect! I have lots of fabric scraps and will make some of these for Christmas gifts. I like to start early. :) Thank you!
Septiembre
Thank you very much Allison, is a great tutorial and enjoyable to do.
Sue
Just added that gorgeous tutorial to my list of things to make, so cute :o)
Emily Elizabeth
Okay, my only question is how to keep your toddler from pulling off the buttons. I made some tufted pillows a couple weeks ago -
http://emmmylizzzy.blogspot.com/2011/03/past-project-friday_25.html
And i've already had to sew them back on 3 times!
redcedar
I'm a little daunted - but these look like so much fun! I've got some patio furniture that could use some cushioning this summer...
Monika
Mmm. I have just finished a cathedral patchwork cushion. I know this is my next project. I love it.
Prof. S
I lovelovelove these pillows!! Thank you *so* much for the tutorial...these are now on my to-do list.
Michele @ Frugal Granola
These are gorgeous! I'm doing my children's room in those exact colors- some of my favorites. Thanks so much for the tutorial!
Blessings,
Michele
Lucia
Love this!! Thank you for the tutorial. I can picture these in a future room of my girls. :)
Emily.
Thank you so much! I just had to make one this afternoon and it turned out SO nice. And yes, you're right, you can't make just one...
Aimee
super cute! Thanks for sharing!
auntie
Love this!!
Amanda Murphy
These are adorable! Great job!
sewemily
LOVE these! Thanks for the tutorial! I'm new to sewing and have been looking for my next project...one for a beginner. I've found it! THANKS!
Misty Russell
Love these pillows! Thanks for the tutorial, i've been wanting to spice up my pillow selection!
Marianne
Nice!
Greeting from Sweden
Joy @ Light Bulbs
So great. Thanks.
WendyB
You make it look so easy! I love the fabric selections you use!
Sew on! Wendy - the Fabric Quarter
Melody
These are so cute. I gave my daughter a sewing machine for Christmas in 2009 and she's sewing up a storm. She's looking for a new townhouse right now and I can see us sewing up a boatload of these for her new place! Thank you so much
tkkey423
Thank you for sharing. These pillows are really cute and I do plan on making some. I enjoy your blog!
Teresa
These pillows are SEW cute I can barely stand it! I'm getting my Bernina next weekend! Can't WAIT to learn to SEW!
Love your blog!
Thank you for all that you share!
I tweeted about this tutorial!
Do you tweet?
xo
Jenny
Wow this is a fantastic tutorial, love it! I have so many fabric scraps left over from my work that it would be a perfect way to use them up.... will give it a go and link back to you when I do! This is the first time I've been to your blog, it is lovely :) Have a lovely weekend, Jenny x
PunkiePie (Jen)
I am going to dig through my scraps this afternoon and make me a few dozen! I love these! Thank you!
Pinkadot Quilts
Very cute! I will keep this wonderful tutorial in mind!
Ana Seixas
Lovely pillows! Thanks for just being there sharing your life and projects with us. It's always a nice surprise to visit you here!
Ana from Portugal
Cara
I am in LOVE with these pillows! They look so cheerful, and that pattern seems so simple. Thank you for sharing. :)
Heartsdesire
Oh my gosh, these are cute pillows. Thanks so much for the great tutorial on how to make them.
Ashley
Thank you for the tutorial, it was very simple and the pillow turned out great!
http://sisterdontshakehands.blogspot.com/2011/04/sprocket-pillow.html
mama2five
Wow these pillows are so cute. Great tutorial, perfect for me to be able to follow - you took so many pictures it must have took you an age, huge thanks
beccy
Beautiful, like all your tutorials! :)
ChezVies
This is fabulous...Thanks so much for sharing it
Sharon
Oh dear, my husband has had a moratorium on decorative pillows but I think that's about to come to an abrupt end. Thanks for the tutorial! ;)
Sarah
Thnak you so much for the tutorial. I have made four so far and I have modified the pattern to make a 3' floor pillow for my daughter. They all turned out great.
Thank you again, Sarah
sewemily
LOVE these pillows...they are my next project. Linked to your blog.
http://sewemily.wordpress.com/2011/04/05/here-sprocket/
Thanks!
Amanda
Love this! I featured it today on Today's Top 20!
Amanda
http://www.todaystoptwenty.blogspot.com
Purple Quilter Queen
Allison! That is the cutest pillow ever! Of course your fabulous fabrics help too! Thx Jenn
Rebeca
Obrigada por compartilhar! Adoro almofadas redondas!
Kristen and Ryan
I love your site and these pillows! I had to make some once I read your tutorial. Check out my log to see a picture of it!
http://www.allsnugasabug.blogspot.com/
CreativeMama
Clever! Nice way to use up scraps! I have made floor cushion earlier but never thought replacing it with bits of fabric or was i was too lazy to actually sit down and join pieces.
Thanks for the inspiration!
CreativeMama
I am your newest follower! Would be elated if you drop by over at my blog - Adithis Amma Sews and also may be have a look at the Tutorials Page
Jennie
These are so cute, they have been promptly added somewhere near the top of my crafty to do list!
Nerd Mama
I found these over at agaagg... I hope they're half as easy as you make them look, because if I can do it properly these would be perfect for using up a bunch of fabric scraps I have collected over the years! Thank you so much for sharing!
Amanda
These look amazing! Your tutorial is great, will be trying to follow along and make one or two!
Rikki
Stopping thanks to agaagg! This is gonna be my next project for my little girls room. Im some what new to sewing and this looks like a great tutorial! Thanks for posting! Now following!
Kimbo West @ a girl and a glue gun
featured this on my blog today!
kimboscrafts.blogspot.com
Denise
I really love these pillows! In fact, I scheduled a mini feature of it at Extreme Personal Measures.
for this afternoon!
Denise
Extreme Personal Measures
Eleni
Ooooohhh I'm in love:-) <3 pure love at first sight!!! Thank you so much for sharing this tutorial!!!!!!!!!!!!!!!! Definitely on my to do list on my blog @http://sewhappiness.blogspot.com.
Eleni
Kassi @ Truly Lovely
LOVE these pillows! So cute! Thanks for the tute on how to make them! Stopping by from AGAAGG!!!
Jennifer Golden
I saw you on a girl and a glue gun... these are the cutest pillows!! Thanks so much for sharing. I'm going to make some today!
The Drama Mama
Oh my word, LOVE this! I might have to attempt this (attempt being the key word!) Thank you so much for sharing!
Ima Broad
Love these pillows! Can't wait to make one, thank you so much for creating and sharing this tutorial!
Liz
These are great! Thanks for sharing. I can't wait to get started on mine. I will be featuring you on our blog ziggycrafts!
Tina @ Squirrel Acorns
Absolutely LOVE these! I think I might need to make two for the boys for Easter. Great way to use up some of those favorite fabrics.
nicoledemana crafts
thank you so much for sharing these amazing cushions,they are so sweet done in that fabric I hope you do not take offence but I am going to make the large on for a dog bed well I will give it a whril ttfn Nicole
manu
W O N D E R F U L!!!!!!!!!!!!!!!!
Thank you very very much for this tutorial!!
Kisses
Emanuela
Annalee
I love this! I am going to make some with the scraps leftover from the quilt I made (using your pattern) for my daughters bed!!! THank you!!!
Charo
Thank you for sharing, it lools really easy and it's a cute pillow.
I'm going to make one this Easter holidays!
Greetings from Spain
Sarah @ FairyFace Designs
Wow, thanks so much for this tutorial, these are absolutely gorgeous!
pinkbrain
I just made one for my son and he loves it. First he stood on it, then threw it, and finally hugged it. Toddler approved!
I'm definitely going to make more of these! Thanks!
Claudia
Thanks for this beautiful pattern! And thank you for all your trouble. I will be making one that's for sure! Greetings from Germany
Rebeca
Muito obrigada pelo tutorial! Viciei nessas almofadas: elas são lindas e é uma delícia fazê-las! Você foi muito gentil...
Sonia
Awesome, and thankyou, can't wait to make me a few.
Carlin.Ashley.Liam
Thank you for putting that tutorial up! They are so amazing and I can't wait to make a few!
Stacey
Just wanted to say thank you, Allison. I made one of these for my sister last month (finally just got around to blogging it) and am so jealous. I can't wait to make one for myself. Thanks for your generosity!
Stacey
http://boyohboyohboycrafts.blogspot.com
Chrystal
I love these. Can't wait to try making some!
Hexe
Danke für die schönen Kissen und Danke für die tolle Anleitung.
LG Hexe
jessicajane
Thanks for the tutorial!! I ended up making one of these recently and I blogged about it :) http://jessicajanehandmade.blogspot.com/2011/06/being-suzy-homemaker.html
bbw1942
ryan sent me and he said to tell you that your pillow is yummy but his is yummier, LOL! just teasing. having a pillow give-a-way?? here i am, with my arms outstretched!
Nicole Follow the White Bunny
Followed the link from Ryan's blog, I'm definitely going to make one of these too. Thanks for sharing :)
Cathy
Ryan sent me!!...your pillows are stuffed more than his...but they are all wonderful. Just finishing up a quilt for my great-nephew and will make one out of the scraps (John Deere fabrics) should be a fun pillow for him.
Will be following your blog now that I know about it.
Linda
What a kewl idea!!! love dresden plates anyway so why not make a pillow.. thanks for the tutorial,, by the way Ryan sent me..
Linda J
VA
LJeterpudd@aol.com
Uli
Those are great! I esp. love your fabric choice.
I made something similiar from my scraps last weekend. See pics on my blog, I linked to your tutorial for anyone who might be interested. I hope that's ok.
I love all of your designs btw. you truly have a hand for chosing the fabric.
love
Uli from Germany
Hexe
Ich hab jetzt auch ein Sprocket Pillow genäht. War Dank der tollen Anleitung total einfach nachzuarbeiten. Wer möchte, kann es gerne auf meinem Blögchen bewundern. ;-) Zur Anleitung hierher hab ich auch verlinkt, ich hoffe, das ist in Ordnung. LG Hexe
Amy @ Positively Splendid
These couldn't possibly be more fun - or gorgeous! I shared this in my Saturday Seven lineup this morning. http://www.positivelysplendid.com/2011/06/saturday-seven-no-16.html
Shelly Hickox
These are adorable!!! Will be so cute on my new porch. :-)
urbancraftmama.com
I just saw these on "positively splendid" - they just got added to my pinterest 'crafts I MUST make' board. Thanks for the fun tutorial!
sewsewgirly
Many thanks for the pattern and tute Allison! This looks like lots of fun.
You are even more generous than Ryan said you would be!!
Cheers
Tania x
Mel
Thank you so much for this tutorial - I just finished mine off (my first real sewing project completed!):
http://i52.tinypic.com/161x9na.jpg
Khris
Love the cushion...thanks for sharing your tutorial. I have linked to you on my freebies blog. Hugs Khris
quilary
They look wonderful. Thanks for such lovely clear instructions.
NoMimikry
Hello Allison,
what a great tutorial. Thanks so much and now I will take a trip to your blog and other postings.
Greets from Germany
Mimi
Magdalena, The Craft Revival
I just wanted to say thanks for the awesome tute. I have just made my first sprocket pillow and it turned out fabulously - thanks to your easy instructions and printable pattern. I will be writing a blog post with a link to you.
coolkat
Hi Alison,
Ryan sent me.... :)
I just love this cushion and I had to whip up a couple. They look sensational. Your tut is great. & sorry im not that neat. I just threw it together.. You can link off to my blog and see how mine turned out. Thanks again from down under.
kath
Lisa Margreet
Hi there, these pillows are gorgeous. Thank you so much for the tutorial. As a way of a thank you, if you are still in need of fabric for your humanitarian quilts then please let me know as I have a large fabric stash and I would happily send you some.
Lisa Margreet
Michelle
Oh gosh.. I just made a sprocket pillow and I have to say I am IN LOVE with the pattern. I made one for my niece's birthday and it was so quick!
I blogged about my pillow here if you're interested.
Thanks again for the lovely pattern.
Michelle
Bok Bok B'Gerk
Lalawear
Thank you very much for this great tutorial!
I'm Dutch but and even for me it was very easy to understand!!
Love it!!!
Lori
Sprocket
So nice to see a pillow named after me. If I ever get any spare time from crime blogging to get back to sewing, I might try making one of these. You did an excellent job of presenting the steps on how to make this pillow.
Laura Ann
I loved this tutorial so much that I featured it on my blog: http://everaftercraftscompany.com/2011/07/19/sprocket-pillow/
momi_dini
I love this tutorial...can't hardliy wait to make it...thanks ^^
Janice
So cute, so easy... I love love love them. Had to make them. I made quilts for my kids (6) and now am making matching sprockets. http://robandjanbishop.blogspot.com/2011/08/using-up-scraps.html Thanks for the wonderful tutorial.
christy @ linbry lane
wow, such an awesome tutorial and sweet pillows! Thanks for sharing!
naop
Hello. I landed here through a friend of mine and I was so inspired by these pillows that I HAD to make them. The tutorial was so easy (very well explained)to follow and I am happy with the outcome. I make quilts myself (well, used to.. now I have moved onto a different "addiction") Your quilts are all so beautiful and I love coming here to look at all the pretty fabrics and what you make with them.
Thank you for sharing and thank you for inspiration!
I featured your blog on mine.
http://naopcapps.blogspot.com/2011/08/blog-post_08.html
Marketa Taylor
HI, ok I am having a lot of trouble with the band pefectly matching the two round shapes. Can you help me out? Thanks Marketa
Kim
Love this tutorial! Thank you for all of the inspiration. Your blog is one of my favorites!
Cindy
Your tutorial inspired me to make "pincushion" versions, which make me smile every time I use them. So, of course I had to feature your tutorial on my blog, SEW that!
http://www.sewthat.blogspot.com
kat
I just made one, and am by no means experienced with sewing. It was a lot of fun...and I LOVE the outcome!!!!!!!! Thank you for sharing!
katrilli
Thank you for this lovely, lovely tutorial. I love this pillow.
Many creetings from Finland !
Katrilli
http://www.artfire.com/users/auntiechrisquiltfabric
What a great look.How pretty.
Jamie Lynn
Thank you for the wonderful pattern and tutorial. I am a beginner, and I am constantly feeling overwhelming by blogs and tutorials. Yours was easy to follow -- and it was my first successful sewing project! Thanks again.
Unknown
I saw your Sprocket Pillow made up in Halloween Fabric at LolaPink fabrics today. I have not sewed in years, but, now I am inspired. I cannot wait to give your pattern a try.
Yellow Suitcase Studio
Thank you so much for the pattern and tutorial! So awesome!
I modified the pattern for use as a chair cushion. I quilted the top, added ties, and made it skinnier! You can see it here: http://bit.ly/pJKqDW
FELTRO POR MIM
Lindo trabalho!
Vou tentar fazer, espero conseguir.
Beautiful work!
I'll try to do, I hope to achieve.
Debbie
I'm a fairly new subscriber to your blog.
I can't wait to make one or two of these pillows. They're just beautiful!
Thanks so much for sharing!
Debbie
jim
@Emily Elizabeth: In case no one else has suggested this, try buttons on both sides and Size 92 nylon thread. By the time your little one is strong enough to break eight or ten Size 92 nylon threads (120 - 150 pounds test), they're likely old enough to know better than to eat buttons! Check this link for other info on nylon thread:
http://www.thethreadexchange.com/miva/merchant.mvc?Screen=CTGY&Store_Code=TTE&Category_Code=nylon-thread-information
Cassandra
Great tutorial! Thanks for sharing. You can check out mine here http://casscansew.blogspot.com/2011/11/2-cushions-2-ways.html
I have linked to you in my post.
Cass
blkenigma888
This is SOOOO cute! This is a perfect Christmas gift for my sister in laws! Thanks so much!
Alyssa
http://www.cupcakeapothecary.blogspot.com
gale
Thank you for this tutorial! I decided at the last minute to make one for my MIL and it was truly as easy as you said. I managed to get it done in just a few hours. Here's how it came out:
http://img.photobucket.com/albums/v88/gale2/projects/sprocketpillow.jpg
Jody
I think these are great! I'm very new to quilting, sewing and of course pillows. I have made pillows with the embroidery blocks but never pieced pillow's. You're tutorial makes it very easy to follow!!!!
Dale
Very Pretty!! Great tutorial!! I sew, so your instructions are easy to follow!! Thanks!
samadhya
Thanks so much for this wonderful tutorial - I've never tried pillows like this before and it was so straightforward! I'm going to make a heap of them :-)
I had just finished a baby room collection with a quilt and bunting and now I have a lovely pillow in matching fabric!
Wonderful stuff, thank you for sharing.
ais x
Melissa
so cute! As always, you have the best taste! Thanks for posting the tutorial and pattern, this is on my to do list for my daughter's room, I think these will look so cute on her bed!
Mrs Shilts
Thank you for such a fab tutorial. I've made my very own cushion and blogged about it here...
http://www.mrsshilts.co.uk/2012/01/sprocket/
x
Nowa Ja
How sweet pillows:) I wish I had such a pillow:)
Axa
awesome! I can't wait to make one!
Colors of Timeless
Many thanks for this wonderful tutorial.
I love it.
Janet
These are terrific, thank you for the great tutorial!
Jen
Thank you for the wonderful tutorial! I made one for my girls' room and it was so fun to make!
http://www.leaandlars.blogspot.com/2012/01/sprocket-pillow.html
Raspberry Lane Primitives
Love this round pillow! Thanks for the tutorial...Def going to make some. Love your blog!!
patti
Dita
Very lovely pillow and great tutorial. Can't wait to make one (or a lot of them!!)
Bibiê
Boa noite!
Parabéns pela linda almofada!
Muito obrigada por disponibilizar o tutorial, e ainda por cima, muito claro e objetivo.
Continue produzindo coisas lindas!
Fica com Deus
Bjinhos
"Inté"
Joice, Ateliê Bibiê, http://ateliebibie.blogspot.com,
myoriginalsin
Wow! Brilliant tutorial. I have been looking at heaps of other tutorials similar to this and they are all a bit complicated. Thank you for the simplified instructions.
I would like to make a few of these but much bigger, to use as floor cushions. I am a newbie sewer and have know clue how to enlarge this pattern to make it bigger. Any help or suggestions appreciated!
sewingbreakdown
Nice and easy way will I try it Thank you
limefish studio
Just wanted to share that you've been featured on our SMITTEN: SPRING 2012 GUIDE! http://limefishstudio.blogspot.com/2012/03/smitten-spring-2012-guide.html
Pamela Nevins
Thank you for posting this tutorial. I love the pattern. I have made two thus far. My points aren't meeting up exactly but with a button in the middle or an appliqued heart like I did the last one, a person would never know. I just sent the link to a friend who loved it and wants to makes these for charity. God bless you. I enjoy your sight.
Pizzazz
Hi, I'm Angela from Italy, your tutorial is great! It was so fun to make it !
http://uncinetto-pizzazz.blogspot.it/
Diane
Your pillows and tutorial are terrific! Thanks for sharing!
Amber
Thanks for lovely tutorial and sharing your wonderful ideas. I love this Accent Pillows its nice and easy way.
Regina
love these pillows...i'm moving into a new house so i'm excited to make some for my bed!
Gloria
Thanks for another great tute .I will be making a few of these cute pillows. Fun and easy ...love it. Even have a few newbies to sewing trying some tutes.
Sue B
Wow, I have seen a few of these on blogs and loved them, thanks so much for the easy to follow tutorial I now have another item on my must make list.
Kate B
My friend has pillows almost IDENTICAL to this, but she paid a ton of money for them at Urban Outfitters! Good on you!
MOLLIK
thank you for a great tutorial :)
http://molliksystem.blogspot.co.uk/2012/04/okraga-poduszka.html
Linda @ it all started with paint
I am in pillow love! Serious swooning ...
And serious pinning.
I need to make me some sprocket pillows ...
I'm just as excited about this pillow as I was when I first saw the Pom Pom pillow on another blog and ran out and made me one of my own!
:)
Linda
Inspire Me Heather
I love your pillows - they're gorgeous! I've got this linked to my pillows post as well today, for inspiration!
Muns
Just loved them! Thank you for the turorial!
rebekah @ justfordaisy
This is fabulous! :) I'm printing the pattern today and will make a few of these tonight for my daughter's playroom! :) Thanks so much for sharing your pattern/tutorial! :)
craktpot
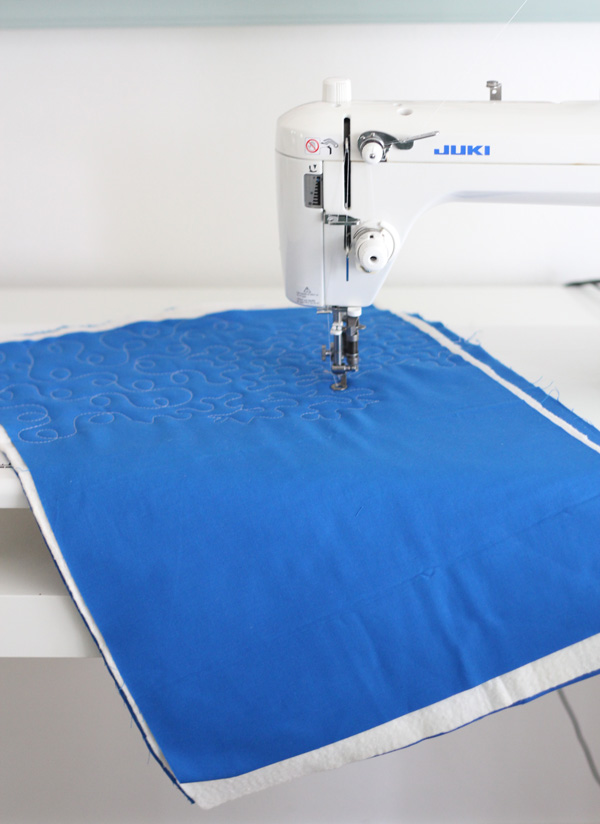
Thanks for a great tutorial! I made one last night for a swap (I have to run out for a covered button.) FYI, I quilted the top, only stitching out 1/4" from the the seams on all sides, and I really like the way that looks and feels (I always put a layer of batting close to the outside fabric so it's nice and smooth with stuffing. :) Thanks again!
Patricia
Thanks for the great Tute! thought i would share what my Little Man thought of it all! he loved sewing from your pattern! and is very proud of what he made when raiding my fabric stash https://www.facebook.com/photo.php?fbid=457151410980267&set=a.264732240222186.78702.115161361845942&type=3&theater
decoguy
wow what a great tutorial and idea! thank you =)
i see that you used a machine, how long did it take for you to finish a pillow? and would it be possible to use silk or satin like fabric to create this pillow?
Hannah
So adorable!!!! I couldn't help but make one, and I can't wait to make more!!!! If you want to see mine, it's here:
http://mamawhimsy.blogspot.com/2012/06/pillow-power.html
Thanks again!!!
Mª Rita H. Fagundes
Olá!!
Sou fã de seu site, e agradeço pelos moldes e tutorial, as almofadas estão lindas!!Parabéns pelo trabalho!!
Tomei a liberdade de coloca-las em meu blog com seu link...voc~e me dá autorização?
Obrigada!!
Xo
Mª Rita(Janelas e Caminhos)
Petite Puck
A big thank you from Holland!
So sweet of you, sharing this on your lovely blog!
Margaret
What beautiful pillows! Love the fabric you used. Thank you for the tutorial. I made two today!
Allie
I can't wait to make this pillow!! So cute!
Just because...
Saw this this morning, baby slept twice and this afternoon it is finished - woohoo!!! Thanks heaps
chiddada
VERY FUN. I'd like to make a big giant huge one and stuff it with fabric I'm tired of looking at;)
Susie
awesome tute! Thank you!
MamaLadyBug
I really love these pillows! Thank you for sharing this tutorial!
Val
I just love this pillow. Thanks for the tutorial. I have just pinned it.
Julia
I made two sprocket pillows since I've discovered your amazing tutorial and both turned out beautifully! Thank you for sharing this.
dsc
loVE THESE!! I remember my grandmother having some when I was a kid!!
The Chickens' Auntie
These pillows are great! I can't wait to make them -- thanks for the instructions.
Jan
These are adorable. Thank you for the tutorial. : )
lyulala
this tute is really lovely and the results are gr8 even to me, that i'm just a beginner.
u really rule!
do u mind if i give u a little 'trick' i used:
quen you put on the butto, and u pass the thread from the top to the bottom, it' is very useful to pass another small transparent or matching button, to prevent the thread to break the fabric because of the pressure.
it's just a little trick, but might make ur pillows last longer ! :)
Valery
I really like this colorful pillow.I like its shape very much!
Lisa Van Dam
Just totally fell in love with these and am off to make a few of my own!! thanks for the great tutorial - I don't think I would have tried it just looking at the picture : )
CurlyGirlMom
Oh my goodness... I'm so excited to give these a try. THANK YOU FOR SHARING YOUR TUTORIAL!! :)
Christine Welsh
Gosh these look really nice! I am inspired to make some myself! Thank you for sharing! :)
Christine
- ChrisW Designs
Annette
Thank you. These look really pretty & I will try them.
.emiliana.
Great tutorial. Thank you very much from Slovakia(Europe). I really like your blog and tutorials. I wish you all the best :-)
.emilia.
Nanske
Thanks for the tutorial! I made 5 pillows and it was very fun to do...
Thanks...Nanske.
Jules
How awesome, just back to sewing after quite some time, so the middle is not looking so great, but with a button I'm sure it will be fine. practised on really old scraps so looking forward to making another with prettier material. managed to do it over two days which is pretty good for me! thanks for the inspiration.
Donna Laster
I love the pillow. I am working on some similar I have a pattern for but I like your pattern better. Patchwork pillows are so pretty. Love your choice of colors. Thanks so much for posting the tutorial.
Donna from http://blackberrywintercrafts.blogspot.com/
Deana Tankersley
Wow..these are fabulous..Great tutorial..thank you so much..can't wait to try it..=D
Luanne Pang
Love this pillow! I must try this one. But first I have to find lovely fabrics.
Bunga
Thank you for the sharing idea.I just bumped onto this pillow at the mall and just thought of trying it.
Nancy Reinke
Hi Allison! I want to thank you for this tutorial. It led me to make sprocket pillows for my grandchildren for Christmas. I just finished yesterday and blogged about the three pillows. You can see them here: http://www.ajoyfulcottage.com/2013/12/sprocket-pillows.html. I also included a link back to your tutorial. The pillows turned out so cute. Thanks, again! Nancy
anam
This tutorial was by far the best and so easy.your pillows look amazing.
I just had to make these the minute i saw the tutorial. I posted the pictures of my pillow on my blog. Heres the link http://deliciousanddiy.wordpress.com/2013/12/29/diy-sprocket-pillow/.
Plus i mentioned you in it aswell because without your tutorial i doubt i could have made it. So Thankyou
Dragonlady
I guess I am coming to the party a little late, but I just had to say how absolutely lovely the pillows are! I am definety going to make these!
Shahnnon Hawkins
I just made the larger version of this pillow as my first true sewing project! It turned out really well, and I intend on making a set to serve as decor. Thank you very much for this free pattern! I wish there was a way to share a picture of it with you.
Kelli Marshall
Allison, these pillows are great! Thank you for the wonderful tutorial! Our followers love your book so i'm happy to show them more of your great works! Thank you!
Kelli Marshall
http://www.southernfabric.com
Kelly @ Lucy's Daughter
A few years after you posted this tutorial and it's still being made and loved! I'm not a fan of sewing circles - they scare me! - but I made the smaller version of this pillow tonight and, you're right, you can't make just one! I'm going to start another one tomorrow!
Naomi Holt
These are gorgeous cushions,I'm in the middle of making a black and white themed fabric one right this minute,can't wait till it's finished.
Thanks for sharing your patterns and tips :)
Alcira Ramirez Cardona
acabo de terminar el cojin, me quedo precioso. después de res años,y seguro que seguiran haciendolo. gracias muchas gracias. felicidades
Deni
WOW this blog its wonderful! thank you for sharing such wonderful projects!
I have so much fabric left over from Quilting that I need these ways to use them up and I can see I will end up with a lovely gift to give away
Thank you again
Jacqui Copeman
Hi! Thanks for the tutorial, they are great cushions! I've started making an unmatched pair for my Mum, I'm terrible at finishing projects though, so I thought I'd say thank you now, rather than waiting until they are done! There's a couple of photos of my progress here :) http://mijipaints.blogspot.com.au/2014/06/monday.html
Thanks again!!
DoubleL
Wanted to acknowledge and say thanks. I have used your tutorial to make myself two sprocket cushions to match a quilt for my bed. All worked perfectly and I love them. Thank you so much. I will send you a picture
Ägyptische Rezepte
Thank you so much for this great tutorial--- I have made 3 sprocket pillows already (large template) and they turned out perfectly. I can really recommend it. I used scraps from my children's old clothes. One only from denim and it's really nice. I will make many more, but some even a bit bigger , as floor pillows. Thanks again, also your quilts look super! Greetings Wera
Sewing Shop
Hi, thanks for this wonderful tutorial! I linked to it from my blog, you can see it here: http://www.sewingshop.net/blog/charming-cushions-to-lighten-up-every-room/
Linda
Love these pillows!!!
nannnanna
I was so inspired by these "sprocket"(sp" pillows, I made one the 14" one this afternoon. I love it and I was surprised that it wasn't hard, going to gift it to a granddaughter and going to make her brother (grandson) one, also. Thank you for showing such detailed instructions.
A picture of it is on my FB page
Kiki
Hola, gracias por el tutorial me quedo bello el cojín, saludos :)
Joy
Love these!!! Can they be washed? Pillows at my house need baths every now and then....
Charity Treat
OMG !! I absolutely ADORE these pillows! Can't wait to see up a few! I love all of your work and designs. Thanks so much for all of the free patterns and tutorials!! Sending love from NW Arkansas! 💜💙😍
mommermom
I just made one of these adorable pillows and it turned out so cute. Thank you for an excellent tutorial. I'll be making them again for all the grand daughters.
Val
Hi, thank you for such an excellent tutorial! I made 2 pillows, and i am planning of doing some more!
mommermom
I found your sprocket pillows on Pinterest. Thank you so much for this wonderful tutorial. I made two pillows and in the process of making more. I've given them away and really need to think about making one for myself! I would like to post pictures on my blog and of course would link back to you for the tutorial because you've done such a marvelous job at this. I saw the pictures of the new baby. Congratulations.
Polly
Hello, I been wanting to make a few of these with all my scraps but the only part of the sprocket pillow how to that can be printed is the 2 wedges for the 2 different sizes. I attempted to print out the tutorial but I got everything except the tutorial. Which means I have to go to a different part of my home to read the tutorial then run to the other end to do that step. Is there anyway you can make the tutorial printable. It would be sooo much better. Thanks
judith ann
Just saw this today,this morning and made one this afternoon. Took longer to sort through and pick out fabric than to sew it. I cut out enough for 3 pillows. Thanks for sharing. j
Cindy
Great tutorial - thanks for sharing it. I made one this evening and am really pleased with it.
Cheryl Bennett
I found my next project! Thank you!! Mom will love these for Christmas,
Sharon Worley
I know it's been a really long time since you posted this but I'm new to sewing and just found your tutorial. I wanted to say a great big thank you for such wonderful directions. They were super easy to follow and my pillow turned out stinkin' cute! THANK YOU!!!
Prfctlildvl
I loved how easy this pattern was to follow. I made the larger one for my great niece's birthday (she just turned 2) but before I sewed the opening closed, I made a little strap handle out of some of the extra material and attached it where the opening is. Now she can pick up the pillow and drag it around the house and then use it to sit on to watch her favorite cartoons. I love that this can be made with just a few fat quarters, a great project for the beginner sewer!
Kathy
love love love your pillows. I'm going to make some to go with my king size quilt that is almost done, they will be so cute with my quilt. Thank u for the design.
Rita
Thank you for the great tutorial and template. Super easy to put together BUT I didn't sew in the side piece, which really looks so much nicer. The next one will have it.
Sara
I know this post is 6 years old but I wanted to say thank you for the pattern and tutorial. I found it months ago and made 6 of the large pillows out of my grandmothers clothes. She passed in December and I made them for my father and his sisters for Christmas. I just searched again for your tutorial so I could make another pillow for myself. Thank you for sharing.
Allison
I'm so glad you've enjoyed it!
Carol
I just found you pattern for the sprocket pillow today. I can remember everyone had pillows like this when I was a little girl. Lots of good memories. I want to make my granddaughter one by this pattern. Maybe some day she will look back and have good memories too. Thanks for sharing.
Margarita
how to wash this pillow?
Allison
Hand wash. :)
Trish
These are so beautiful and you've made it so easy to make. The photos help so much. Thank you!! Trish from Massachusetts
Teach You To Sew
This is a really well-done tutorial. Going to try it this weekend with the kids. Thanks so much -Joe
Kaz Musa
Fantastic tutorial thanku very much 😊
Jean 'Eckert' Imholte
Just made a couple with leftover fabric from my Christmas Quilt kit - now I have the whole room looking cheery! Thank you so much for this tutorial!
Allison
I LOVE that!
Karla Coffey
I love the sprocket pillows you made and wanted to make the 14" one but nothing happens when I click on the link to the templates.
lissany
Thank you for this pattern! I sewed it completely together without leaving a hole for stuffing. I then seamripped the side seam making an opening for turning and filling. I stuff in all my fabric scraps and bits as stuffing, and when it is full I hand sew the side seam back up and continue on with the buttons. Great way to not feel like I am wasting any fabric!
Satta Matka
Website and content are both very wonderfull for tutorial . satta Matka
Sussie Stokes
I love your pattern for this pillow. I am making a memory pillow with premie clothes for the fabric and this will be perfect. Just to let you know this pillow will be cherished so much. Thank You.!.
Liline
Hello
thank you for the pattern
they are so beautiful. I am French so I would like to be sure that the measurements are in inch in order to convert them correctly.
Thanks in advance
prabhat matka
Hi Good day
It was really useful for me
Thanks for putting it on your site
I come to your site every week – thank you
OKBET game
Very interesting information! Perfect just what I was looking for! My site: Beginner's Guide to Football Betting
Emery
These are super cute I love them soo much.
Allison
Thanks!