The past couple days I’ve been experimenting with stack n’ whack block making.
This is a simple and fast fast fast way to make blocks. The blocks below finish up at 7 ½” square but there are instructions at the bottom if you want larger blocks like in the orange quilt. You can also make these "wonky" like in the Baby Boy Bug Quilt, just cut one side slightly smaller or larger and cut your square off center, then sew them together normally as shown below!
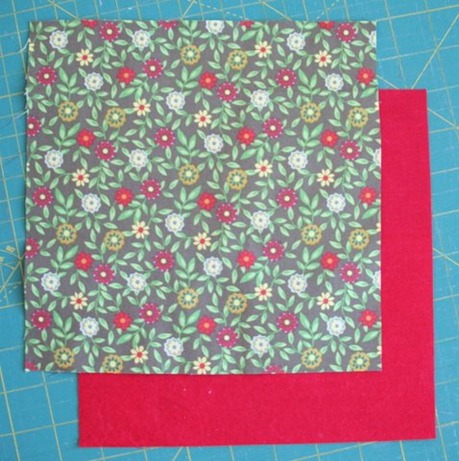
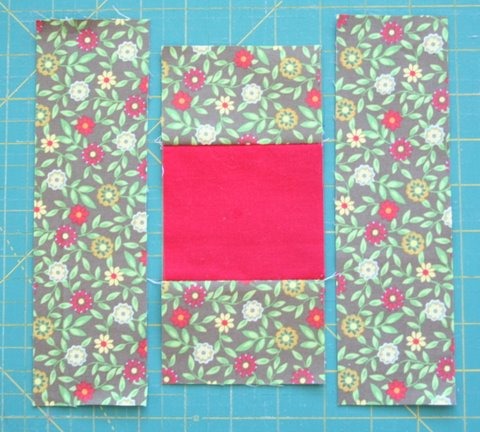
Start with two 8 ½” squares.

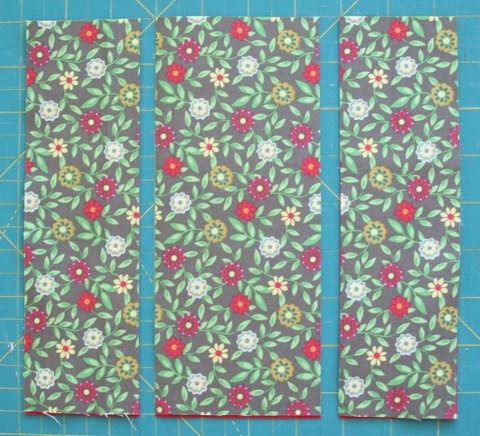
Make a cut 2 ½” in from each side.
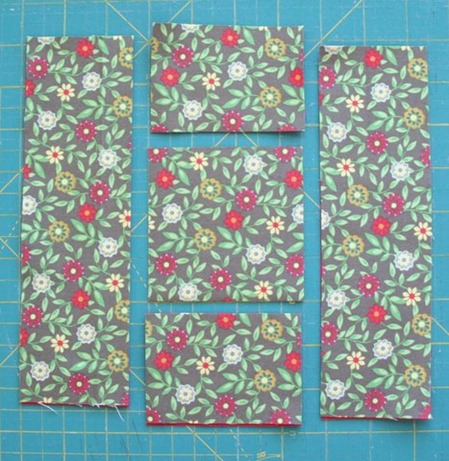
Cut the center strip horizontally 2 ½” in from the top and bottom.
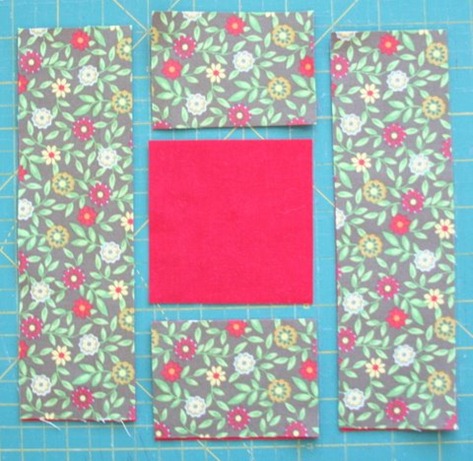
Switch the center squares.
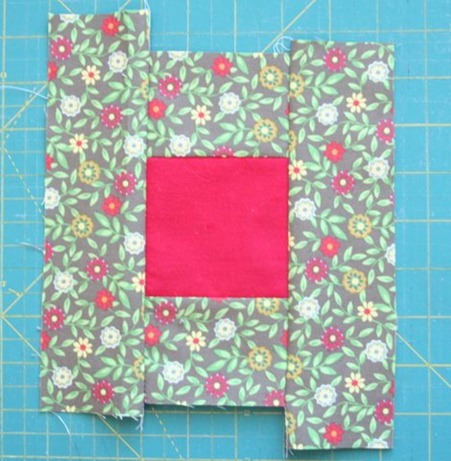
Sew the center strips back onto the new center square, right sides together and press out.
Sew the side strips onto the center strip right sides together and press out. Don’t worry about lining up the side strips as you’ll be trimming off those extra pieces anyways.
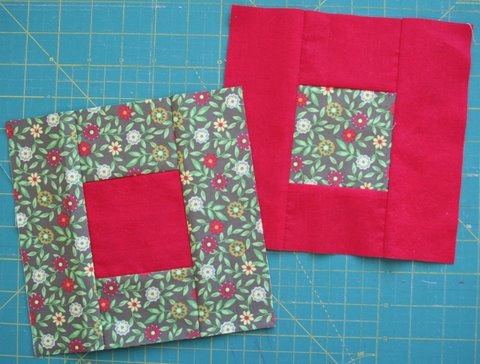
Trim off the top and bottom first, and the sides ¼” or so until you have a square block that is 7 ½” square.
If you want a larger block….lets say 8 ½” finished, start with a 9 ½” square and use the same cutting instructions and sizes. That will give you this same block as in the orange quilt….just easier. To make the same quilt with 72 blocks, start with 36 colored squares and 36 white squares, then stack n’ whack away to make it extra fast!

allsewnup
Thanks for this. I do like quick and easy cutting. Love the "orange quilt".
Carolyn
Jen
what a great idea! I hate cutting, so this seems easier!
michelle
That looks really good!!
I am a papercrafter and I think this type of layout would look good on a scrapbook page as well!
Funny how every type of craft inter-links:)
love
Michelle x
Kate
Smart. :)
Erin
Oh my am I glad! I thought you were referring to the oh-so-popular "stack N whack" quilts of the mid 1990s, that were as ugly as all get out (IMHO). Your interpretation is MUCH better. =)
PioneerValleyGirl
Hmm, I'll have to try this, it looks like it might be quicker than regular cutting.
Susan
What a great tip - thank you! LOVE the orange quilt!
Vickie
Cool. This could be used for nine-patch, four-patch and so on. Thanks for sharing.
Brenda
I'm so glad to get insight into making this quilt.
Your orange version is so lovely and ought to be aptly named: "Creamsicle". Sorry....the hot weather and ice-cream have taken over my brain.
Thanks for great tips.
Cheers.Brenda from Oshawa
by Daisy
thanks a million for this tutorial. I love these blocks and i didn't know how to make them. you make it seem so easy that i'll try to do it soon.
i share the links to my favourite tutorials in my blog, redirecting people to the blog where the tutorial was posted, so I'll add this one too.
Gale's Goodies
This looks like a great use for one of my layer cake packs. Thanks for showing how you would do this!
Simone de Klerk
How very clever!!!
Rachel@oneprettything.com
I love this method and the blocks look great! Thanks so much, I'll be linking.
Jill and Cameron
I just ordered fabric for a baby quilt and I want to do this one!! I'll send a pic when its done :) Thanks for the super easy tutorial!
adnilenaj
You have so many great ideas that I want to make them all! My favorite is the circle quilt..I call it my Happy Quilt because of the bright colors. I have made one other of bright colors too..I think it is the one in the boys room. Each time I see your new ideas I want to get busy! haha I am working on a gorgeous queen size quilt I started two years ago. I love making the tops but since I hand quilt I tend to put that part off. I adore this new quilt with the circles and squares...my next project..thanks....Ur great
Bonny
I made a baby boy's quilt per your tutorial! It was the easiest pattern I have ever sewn:) Thank you so much - go to my blog to see it:)
http://www.noloosethreads.blogspot.com
tracy_a
genius!
Kerri Horne
thank you so much for the great tutorial over at sewwequilt!! It does look easy when you show it this way! Kerrihorne@hotmail.com
wilma
Va un Gran Saludo y Agradecimiento desde Venezuela. Gracias por este Tutorial. No tenía idea como hacerlo. No tengo Blog, wilperez38@gmail.com
Nancy Zarse
I used the Stack-n-Whack pattern at a Hospice quilt workshop today. The quilt top turned out great and everyone liked the effect of this simple quilt. Thank you for the great pattern. Nancy in Virginia Beach
melissa
Would there be any problem with just sewing a long strip together of pattern, solid, pattern, and then cutting it into the size of the one you have in the center? Seems like it would be much faster. But I'm a total novice quilter, so I don't know if there's a reason people don't do that...
Jayne
I would think so! I’m fairly new but I have the stripoligy ruler and it makes strip cutting so easy!!
Rhonda
WOW!!
Kathleen Boden
I like this. If you wanted it even bigger with less cutting you could use a layer cake. They come 40-42 squares in a package. I watch for them on sale so there not to expensive.
Bonnie Marie Wilson
Would flannel work with this pattern ?