Disclaimer: I am totally embarrassed to show you the state of my ironing board cover…pretend it’s something cute and I haven’t scorched it.
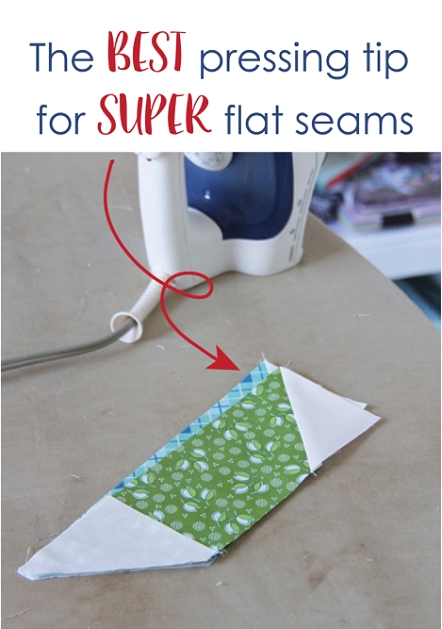
I had a question a few weeks back about getting quilt blocks to lay flat, so I thought I’d share with you my favorite pressing tip…I use it always.
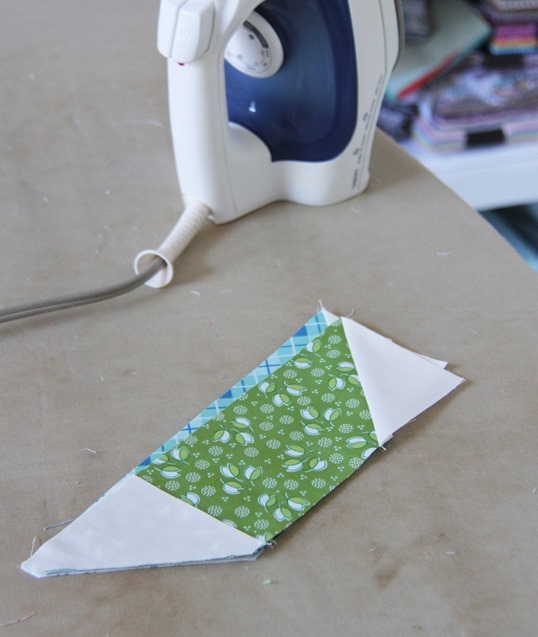
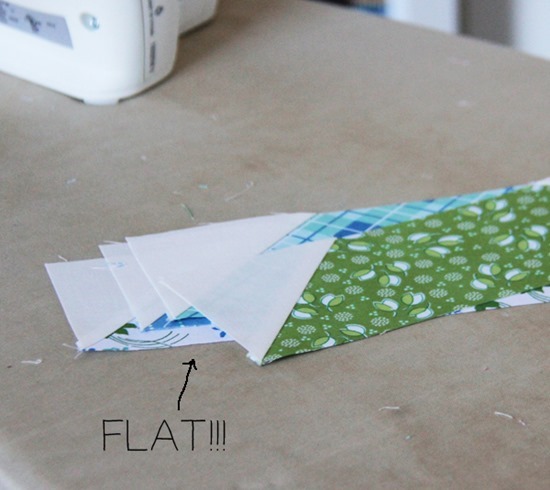
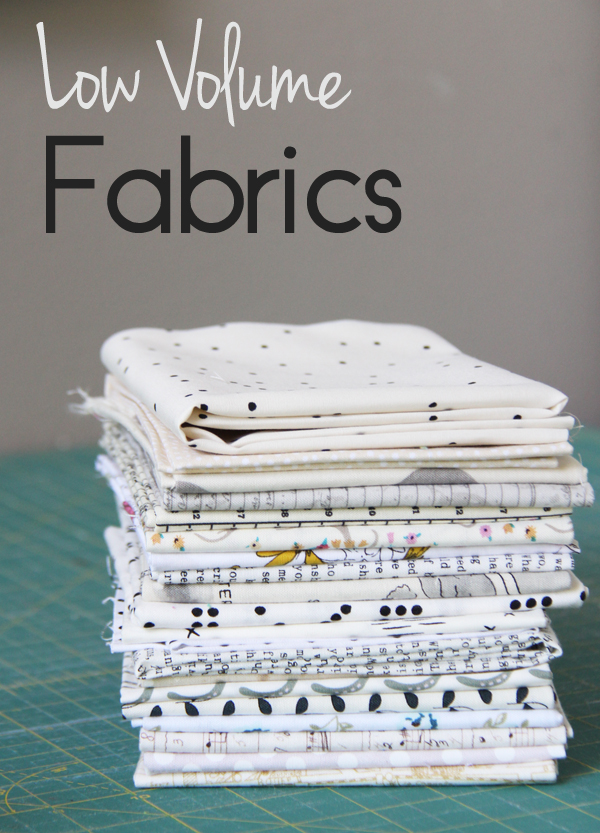
I’m pressing these units of a quilt block (in my new fabric line…I’ll show you soon!!!). I’m pressing the corners out, and I stack them as I press about 4 or 5 units high…it makes those seams bend backwards a bit and get extra flat.

Then, stick a floppy book or magazine on top! Leave it for 30 seconds to a minute, so they can start to cool as you press the next batch, then take off the book and move it to the next batch of pressed pieces. Leave them there an extra 30 seconds or so to cool.
When you are done the seams will be super flat…and they will stay flat as you sew them into a block. You can repeat this every step of the way.
Most importantly…don’t move your freshly pressed blocks until they are cool (still slightly warm is OK). The fabric fibers expand when they are hot, so if you move them while still hot they won’t hold the flat shape you want them too (just like curling hair!). That goes for whether you use a book or not…let those fabrics cool!
Other stuff: I use a couple of floppy books I bought at a yard sale. The covers have become very slightly warped after months of sitting on really hot blocks. Don’t do this with a book you love. I’ve never had any book or magazine transfer onto the fabrics, even when slightly damp. I mist lightly with water if my seams are being stubborn and on the final press of my blocks. Other than that I rarely use steam or starch alternative.
If you don’t do this already, try it and see what you think!

Karen
I love this tip. I will be trying it out. Thanks.
Melissa Corry
That is brilliant!! Totally going to try this. Especially the not moving them while they are still hot ;)
Paula Louceiro
Thank you for the tip. I will try this soon.
Angie
Thanks! Great tip :)
ThirdMargaret
I will certainly try this tip, thanks!
(and that green print is incredible!! I cannot wait to see more!)
Beth
Great tip!
StubbsFamily
I would do this with my farmers wife quilt blocks. I used a charm pack that I had on my board and then would put the starch bottle or the random hammer that always is in my sewing room.
Gail Lizette
Fantastic Tip! Thanks for sharing, I can't wait to try it myself!
Kirsten
Thanks for this great tip! I am sewing some blocks today so will do this for sure:)
Judy
Thank you, I'm going to try this. I am excited to see your line and want to buy it!!
Louise
Thanks for showing us (1) a real, working sewing space that looks like ours, and (2) a great tip for holding those seams flat!
celkalee
Much like using a wooden clapper in sewing and tailoring, the book traps that steam and moisture in the fabric and the weight of the book seal the deal...so-to-speak! My clapper is not large enough for a quilt lock so I will try this, thanks for sharing.
cute 57
Thanks for the tip! I will be doing that tonight. The new fabric line looks fun!
jinsnapp
What a great tip, thanks!
Mama Mel
I just started doing this but with a wooden block I found in the garage. It makes such a difference!
periwinklesue
Yep, sounds like the same result of using a pressing block. But the soft books would be more plentiful if doing several at a time. I would think the pressing block would absorb the moisture from the fabric better than a soft book with glossy pages. Just a thought.
Allison
Yep it is just like using a pressing block! Except I actually like the "floppiness" of the book better...it seems to lay more flat and let the seam lay more flat. Both work just the same though!
Jenny L
My ironing board cover is great deal worse.... Great tip and one I shall be trying out as getting things really flat is a real trial not helped by irons seeming to be a lot less hot than the past.
Charlotta
Thanks! It's amazing and great how there are always new things to learn. And quilters are always so generous in sharing with each other.
I will definitely remember and try this!
Allison
Thanks for this useful tip and your lovely clear photos - no need to be ashamed of that ironing board cover! (I've been planning a blog post about learning on line - I'll put a link to this post!)
PatG
Great tip! Just made 3 Hazel Hedgehog blocks yesterday, wish I'd known this BEFORE making them!! Thanks for sharing, Allison!
ParadiseBreeze Quilts
Thanks Allison for sharing your normal looking ironing board! Good on you - it helps keep us all sane! Fabulous tips about the book and waiting - I'll definitely be following your tips! Your fabric looks so lovely - looking forward to the big reveal. Cheers! Michelle
✾Jamie Lee Cooley✾
Lol! I sort of do something similar...that's how I store all my blocks after making them but before joining the rows. I keep them stacked under a few heavy books for a day or two so they are perfectly flat. It works great, especially for little blocks with lots of seams.
More importantly...new fabric line? Yay!!!!
Cathy
What a great tip. I am going to try this one. Hugs
Karen
Love this tip....especially the part about not moving the blocks until cool. I notice you are pressing to the light side....does that give a flatter seam, or personal preference?
Xina
I do this all the time...except I use a square quilting ruler. Love the flatness!
Julia
Allison, thank you for taking the time to share little tips. I've learned so much from your blog... starting with (years ago) how to baste batting together, which I use constantly! Also - I found your last blog post so helpful, about the sewing machines. I have a Bernina 540 (which I love), but think that {someday} I would really love to invest in a juki, since I machine quilt all my own quilts.. And it seems like a great machine for little kids to learn stitching on, and I have 3 daughters all wanting to learn to sew. Thanks again!
Stacy
I sure appreciate the tips since I feel that my blocks are never flat enough. I have a question about the pieces in your picture - you've pressed toward the lighter fabric (white) instead of toward the darker (green). I recently sewed some similar pieces and pressed toward the darker, but it would have been flatter if I had pressed toward the lighter. Do you have a certain rul of thumb?
Patricia
Thanks for the tip. I never get them flat, flat.
✾Jamie Lee Cooley✾
Got my I Want Her Stash fabric today! Love the fabrics you picked and I had to tell you your yellow crosshatch fabric goes great with the bundle. I even like the block pattern so I pulled more fabric to make it!
Terri Ann
This is such a great tip. It's totally one of those things that when you put it that way (about the fibers still expanding) it makes perfect sense and I wonder why I had never thought of it that way! Another thing I found greatly improved my seams was setting the stitches before pressing the seam allowance. When the stitches are pressed (and then cool a bit) before I move the fabric to press the seam allowances either open or to the side it makes a world of difference. I think a lot of people know about this technique but when I first started I had no idea.
allison
Karen and Stacy -
I usually press towards the darker fabric or open, except on corners like this where I'm pressing a diagonal corner out. If I would have pressed towards the green, the bottom angled portion of the seam would have made a lot of bulk, and hard to press down. So in this case...I press towards the white but it's personal preference! :)
Marianne
Haha! I've been doing this for years. I usually do the finished block. I use a stack of quilt books and sometimes will leave the block overnight. It does work well. I thought I was weird! Glad to see I am not alone.
Lisa J.
Thank you for this tip....and by the way my ironing board cover looks worse than yours.
SewPsyched!
Awesome! I cant wait to try it!
Jayne
What a great tip! I cannot wait to give it a try! FYI ~ my ironing board cover looks exactly like yours...
Susanne vb
Great tip!! ... GASP ... the new fabric line! :)
Helen L
Great tip!! In my sewing classed in college they had a "pressing block" (just a smooth piece of heavy wood) that was used for the same thing. Sure saves the fingers!! :-) They had us use it on wool, but since cotton is a natural fiber, it makes sense that your trick would work. I'l be doing that, because I hate it when I've gone to all the work to press a seam flat and it decided to pop up again. I'll show it who's boss!! :-P Thanks for sharing!!! Hugs, H in HEaldsburg
Helen L
And PS: we wouldn't believe that you really do sew if your ironing board cover didn't look scorched!! Mine is getting in need of a cleaning too! Hugs, H
Sew Stitching Cute
This is an amazing tip and super thank you for sharing!
Live a Colorful Life
What a great tip! I love my I Want Her Stash Bundle. And, yes, thanks for the honest ironing board. I always see the really cute ones but if anything leaks, it leaves a stain ring. So I never make a cute one...
Laura Hadland
Reminds me I need to make a new ironing board cover!!
Kay
Thank you for this great, new tip. x
Niki Estes
Thanks for the great tip! Could I ask what iron you use and if you would recommend it? I'm needing to replace my old iron and trying to decide what to get.
Dolly
I want to thank you for this tip. I started a new project a few days after you posted this, and I tried your way, taking it one step farther. Since I didn't have a nice flat book within reach when I first remembered your tip, I grabbed an 8-inch-square metal canister that I have full of fatquarters, and placed it upside down on top of my pressed triangles. Let me tell you that it worked WONDERFULLY. I think that the metal just reinforces the remaining heat from the iron. Probably takes longer to cool and relax, but still, I credit this wonderful stack of flat blocks to your genius !
Thank you so much !
allison
That's awesome Dolly!! I'm so glad it worked!!!
allison
Niki - I use a Rowenta iron, I love that it gets hot really fast (and really hot) and the rounded tip at the end helps with pressing seams open. The only downside is it's really heavy and my wrist will ache after a lot of pressing, so pick a light one! :)
Nancy
I use a block of wood to do this. I got a nice piece of wood in the craft department at Michaels.
kimberlier
What an awesome tip. Thanks!
Allison P
I have used this trick for ages - plus a variation. If I have a stack of pieced units made today to sew tomorrow, I stack them up and then make a tower on top to leave overnight. Current preference for the tower is a glass pie dish, 4 or 5 thick paperback novels, and then a cast iron saucepan or big glass jar of pickles!
Next morning they are as flat as a pancake and I'm good to get straight into sewing
Kristin Thomas
Somewhat unrelated question: Scorching the ironing board cover... Is that just a natural consequence of repeatedly pressing quilt seams with the iron on HOT, HOT, HOT? My muslin cover looked just awful so I recently replaced it. I tried to be more careful with the new cover but sure enough, it's turning brown, too. Is my iron up TOO high, or is this just inevitable?
Allison
I think it's just inevitable if you use a hot hot iron! I love my iron scorching....so I burn every cover I have. When it gets bad I just replace it or make a cover for it!