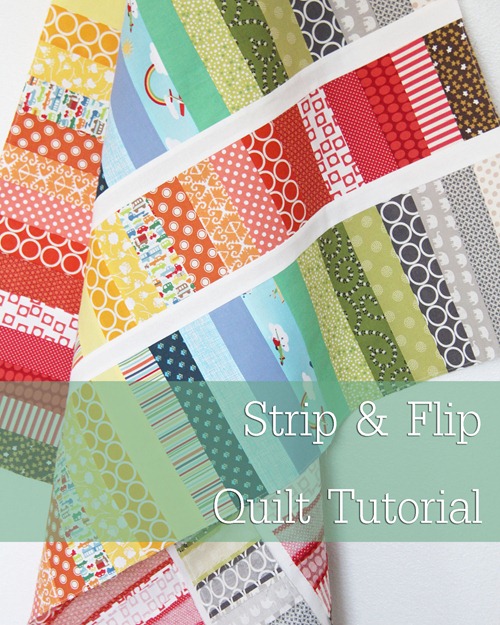
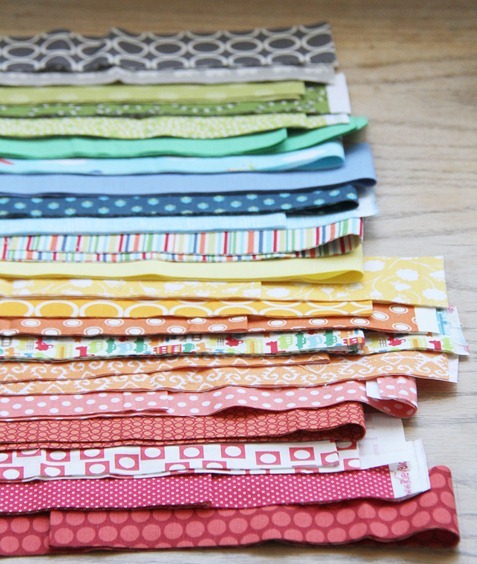
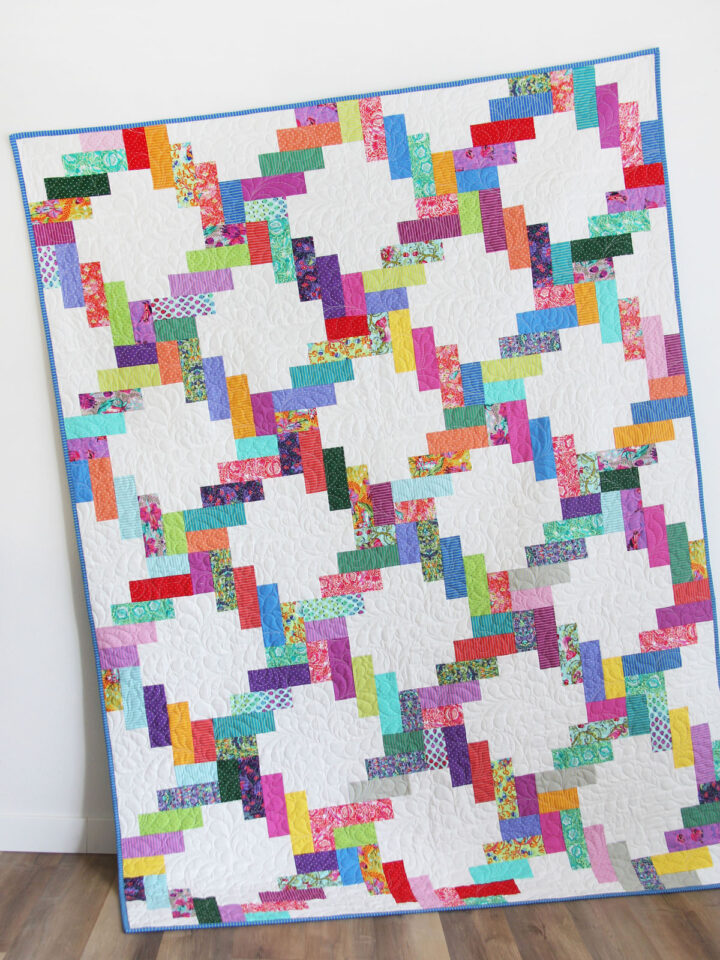
This fun scrappy quilt is quick to put together and great for beginners. Use lots of different colors to keep it bright and fun…or just a few colors to keep it calm and simple.
Finished Size: 36" x 41"
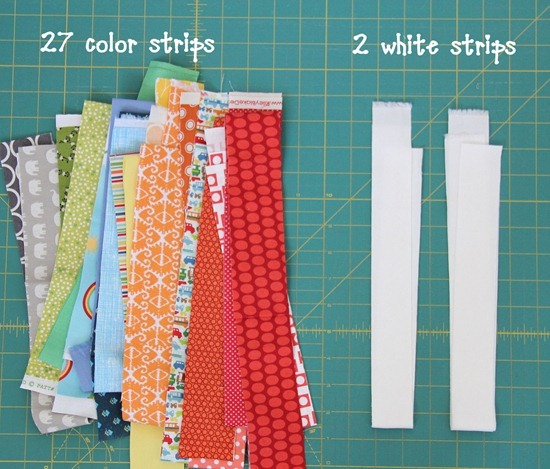
1. You’ll need to cut 27 color strips 2" x width of the fabric (at least 36") and
2 white strips 1 ½" x width of the fabric (at least 42").
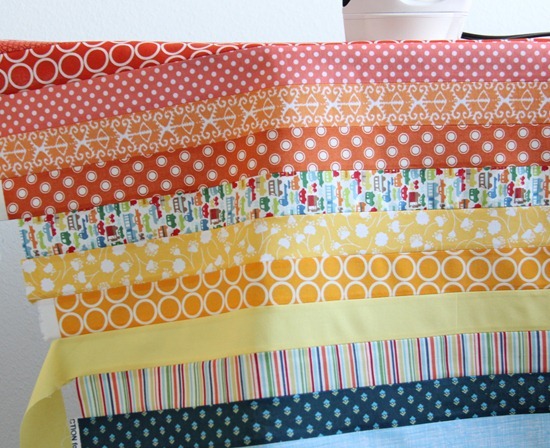
2. Lay the color strips out in the order you want them.
3. Using a ¼" seam allowance, sew the strips into pairs first…then sew the pairs all together. Alternate the sewing direction when sewing the strips/pairs together, and don’t pull the strips…this will help prevent stretching and keep the strips straight.
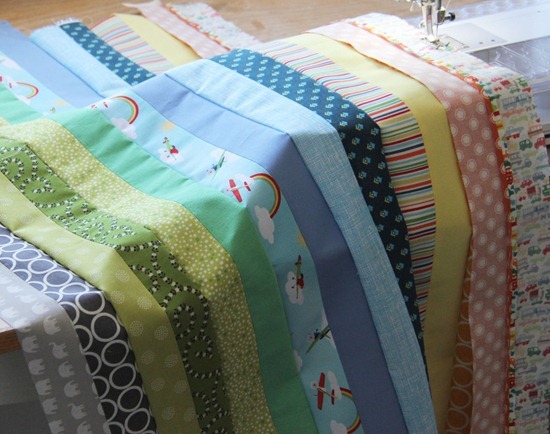
4. Press the seams open. This takes a bit more time but the nice straight seams are worth it!
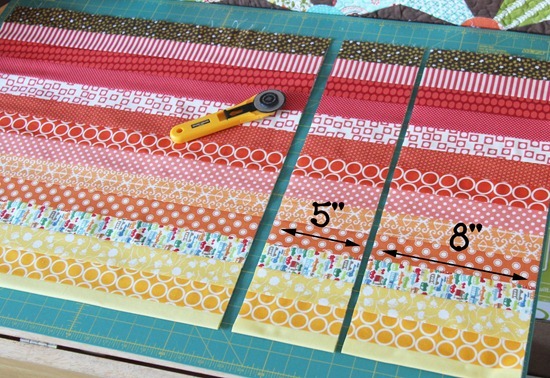
5. Fold the length of the quilt top in half and align it carefully on the cutting mat. Trim the edges straight until the quilt top is 35" wide.
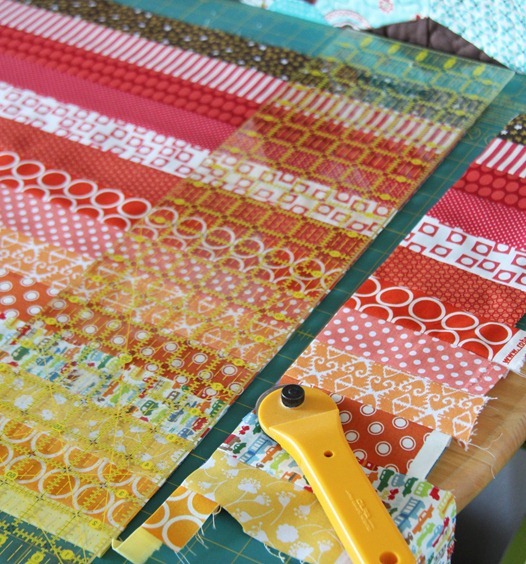
6. With the quilt still on the cutting table, make a cut 8" in from the right side. Make another cut 5" in from the last cut.
7. Sew a white strip onto each side of the 5" strip. Press towards the white strips and trim the ends.
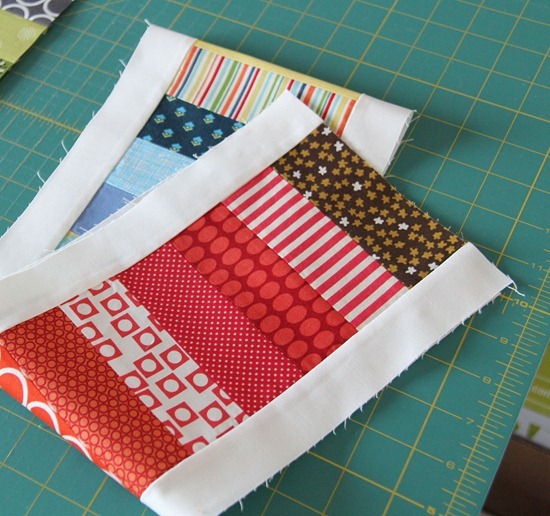
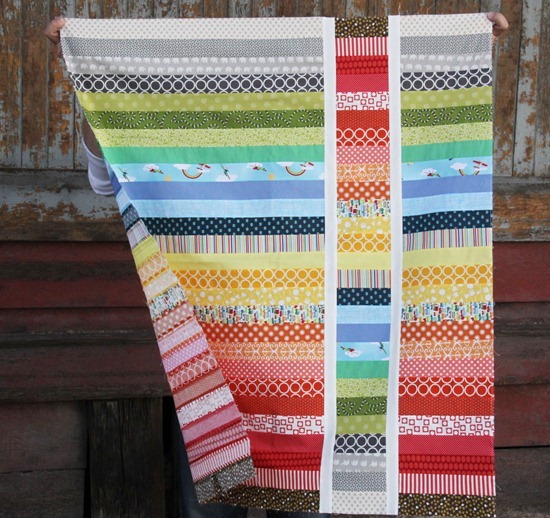
8. Rotate the strip 180 degrees, and sew the strip back in between the larger pieces to make the quilt top. Press towards the white strips.
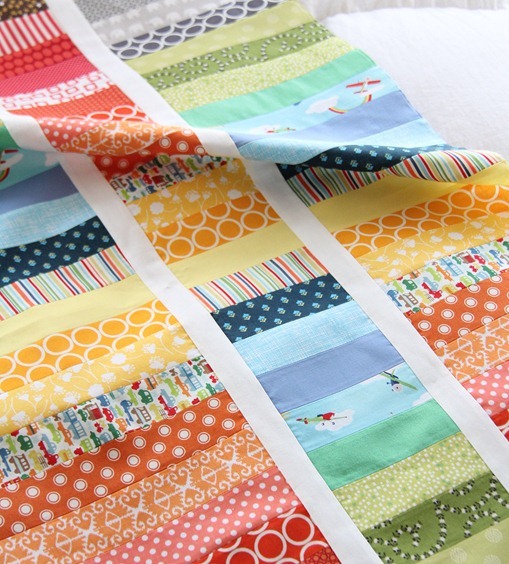
Fast, fun, and CUTE!
Kara
This is adorable, and looks like you can whip it up in an afternoon!
Daisy
Love the quilt ! Your directions are very thorough and easy to understand. Am going to make this. Thank you, will be following your blog. Have a blessed day!
frances reay
Love the quilt but did you use any batting between your quilt and the backing fabric?
Jacqueline Cunningham
Really appreciate the directions!! I may do wider version for a throw but I was really clueless about how to do it at all!! Thank you!
Mimi
Love the variety of designs and colours!! Thanks for sharing this tutorial and the tips!!!
Katie Fleming
This is so simple but awesome!!! I love all of the colors! Wonder how it would look from a jelly roll...maybe with a Robert Kaufman Kona Cotton Roll Up!!!
- Katie Fleming
Kate Michelle Designs
Niltza mayers
Wondering, did you ever try this using the jelly roll? If do, what changes did you you make! Thanks...... just a beginner but trying to learn !
Allison
I haven't used a jelly roll but I've seen it done...I would just make it a tad wider!
Kathleen Riordan
I made it with a jelly roll yesterday....calling it my Mother's Day Quilt...I saw that the strips were 2" instead of 2.5" and said "no way am I doing all that trimming" so I used 21 strips total instead of 27 which is almost the same finished dimensions, and now I have 20 strips left that I can make another quilt! I used the Confetti jelly roll. Love it! Wish I could post a picture of it.
darlene
i have also made jelly roll quilts like this, however, i follow the jelly roll race directions on missouristarquiltcompany site ... jenny doan's site ... they have all come out gorgeous, way more beautiful than i thought they would and i'm hooked on making each grandchild a quilt similar to this one ... i think of all the little pieces that need to be cut and sewed together, then trimmed and i think of 19 grandkids who *need* a quilt and this, to me, is the absolute easiest ... I also don't trim my jelly roll strips, they're 2.5 inches and i'm perfectly good with that; it gives the kids room to grow into their quilt and use it for a longer time ...
sorry for the above essay ... i love jelly roll quilts ....
Sally J Becker
I would use various strip widths to make it even more interesting & of course, use more of ones left overs then when you flip the smaller section you won't have to worry about matching seams.
Allison
Great idea!
Dawn Marie Odya
This looks nice and fun to make great way to use jelly rolls up. I'll have to make one.love the bright colors.
*katie
Love this! Thanks for sharing :)
Elsa
Fast and easy ~ my kind of sewing! Thanks so much for the tutorial ~ such a bright and cheery quilt.
Linda at Roscoe's Ma
Thanks Allison! I always love your work!
Palak
I love this! It's super clever. It might become my go-to baby quilt pattern!
Auntie Pami
Very nice. Wish I had a lot of those colors in my stash, but a perfect inspiration to keep adding...Thanks!
Carla
Brilliant! Thanks for a fun little quilt : )
{northern cottage}
Absolutely gorgeous but oh so fun!!!
Sheila
Thank you for a great tutorial for a wonderful little quilt.
Peggy
What a great way to use up some of the bits of fabric I have laying around!!
Lynne Tilley
I just love this, and especially the way you flip that one piece and put it back in. Love that!
Kimberly
lovelovelovelovelove!
And if you go with 2.5" strips, it's jelly roll friendly! Yay!
The Perfect Trio
this makes me want to quilt. well, i do want to already...this makes it look do-able for me!
Lori
I love this quilt so much! thank you for the tutorial!
Ric Rac and Polka Dots
Super cute, fun, and fresh. Love it!!!
Julie
Chaotic Crafting
I love this! I am rather new to the sewing world and was wanting to find a simple to understand pattern for a quilt. I am getting a cutting mat and new rottary cutter for my birthday, so I will have to try this out!
marysza
I looooooooooove it!!! I'm sure I will try to make one in the future! :))
Des
Thanks so much for these awesome quick tutorials. They are so good!
toots2u
Your ideas and tutorials are awesome and achievable. Thanks so much for sharing!!
Tiara
You are so smart. I feel so dumb to not have realized the middle was just upside down
Mary Grace McNamara
Too cute! Great way to use up scraps too!
MGM
Kelly O.
this is sooo cute! thank you for sharing!
Sinead
thanks for sharing this, my best friend is having a baby and now i know what I can 'attempt' to make her.
TLB
Love this!
Carol
Beautiful quilt and your tutorial makes it look achievable. Thank you.
Hope you have a lovely weekend.
Carol xx
Quilty Conscience
What a wonderful, fun pattern! Thankyou! Toni
Jaclyn
When I saw this the other day I secretly hoped you would put up a tutorial! Love it!!
Mull3g
Thanks for this great easy, but effective quilt. I love it!
Lana
Great quilt. Love the colors. The strips would be super fast to cut with the AccuQuilt cutter, or the Go Baby cutter.
Truffle queen
Thanks for sharing! What a cute and quick and simple baby quilt! I'm thinking that cutting out the piece and putting on sashing would make one of those 2 1/2 strip "race" quilts more interesting!? ding, ding, ding!!
Lucy @ Charm About You
Brilliant! Love this design! Thank you :)
MartyrQuilters - piecemakers reluctantly giving up housework!
Many thanks, I tried it this afternoon, more random colours for a baby boy. Love it. Will try and post a pic on my blog in the next day or two. You are very clever. Lovelovelove it
Mercedes
I love yours tutorials!
Thank you.
Best regards!
cat and vee xoxo
love this idea, it's so effective but super fast and easy!!
Am going to 'pin' it now so I don't lose it. thanks so much for taking the time to blog it. Cat.
themissymom
Fast, fun, and cute is such a satisfying way to sew! Nice work, as usual!
Amanda Rose
This is great work! Thanks for sharing!
http://sewmuchtosay.blogspot.com
simplesew
fun
Sabs
This is lovely! I'm going to pin it if that's ok so I can save it to make for later. I'm definitely going to try it! Thanks so much x
Yvonne W
Thanks for the tutorial. You make it look so simple-- would love to give it a try.
Amanda Joy {Joy in the Jumble}
This came at just the right time. I have been searching for a simple, fun pattern to make. We found out that we are having a Christmas time baby, and I have a Merry and Bright Jelly Roll I got a couple of years ago. This is simple enough for my exhausted preggo brain, so thanks for the tutorial:)
Andrea Turner
Really pretty and super fun! I think this would be a great project to do with a jelly roll (just so I don't have to cut the strips).
dani macsnider
i just found your blog... where has it been all my life! haha...ive spent the past 2 hours exploring and im so excited about what iv'e found! this quilt in particular. i will be whipping it up soon! thanks for sharing!!!
LaLa Kids
Love your tutorial and the quilt is just beautiful. Love the fun colors. May even give it a go this weekend.
Live a Colorful Life
What a great quilt! Another winner from Cluck Cluck Sew!
lugarandcompany
Lov'n your blog and you are making me want to sew again! Beautiful work!
amandajean
this is BRILLIANT! thank you so much for the tutorial! love your fabric choices, too!
Mary
I just want you to know, I found your site through Pinterest, a post of this adorable quilt ! I am primarily a food blogger, but sometimes sewing, quilting and crocheting are what relaxes me more ! You have an absolutely beautiful site, and just browsing through has relaxed me for my day ! Thank you !
Jenny Lynn
simply wonderful and creative. I love that it flips the pattern and that it uses so many different patterns, and colors.
Flash
OMG! I LOVE this!
Jenn Mellott
How fantastic would this be with a jelly roll from V & Co's new Simply Color line? So easy and pretty!
Becky
I've been out of town for a couple of weeks and unable to check your latest posts. I have some catching up to do! I just loooove this quilt! Perfect to make for my grand-babies...and your baby is just adorable. We have several red-head babies right now and I really want them to stay little and cuddly :)
Kate Brown
really cute!
Jen
My first attempt at making this quilt is at the link below. I found the idea here on your blog so I thought I would share. Thanks so much for the great idea!
http://jencrutchfield.blogspot.com/2012/08/quilt-stripes-for-charlotte.html
Eugenia
Love this!
Susie at ProsperityStuff
This. Is. Awesome. Just saw the link at "The Name Game" at "Live a Colorful Life". Now you've got me inspired. Beautiful simplicity. Thanks for sharing!
Angela Mccormick
This quilt is just perfect. I have just discovered this site and I think it's fantastic. Thank you. No. 1 fan.
Lynne Shandley
Brilliant. Just totally brilliant. Thanks for sharing :-)
Wendy
how lovely! I love the colours. thanks so much for sharing
DivaMomCarol
Hi Allison! I love this and it's in my "quilting queue" that's for sure. I just heard that someone placed the child's name on the strip...wouldn't that also be awesome? So many options on placement on that one, huh? Blessings on your New Year!
Sandra Coleman Clarke
Cute, cute quilt! Thanks for the tutorial!!
Kathy
Made one this weekend for my daughter. I love it - it was so simple - yet stunning results. Thanks for the tut!!
Jacqueline Maxman
<3 <3 <3 THANK YOU! I needed a quick finish and a new blankey for my foster baby. With one modification, this was done in a couple hours. (I did 4" strips instead of 2") Came out SUPER cute!!!!
Linen Blue
I love your designs. But I have one question for this lovely quilt. How did you cut the long strip straight? Did you fold the fabric half the WOF? I had a difficult time doing a straight cut when I folded the fabric before. Thank you.
Linen Blue
I love your designs. But I have one question for this lovely quilt. How did you cut the long strip straight? Did you fold the fabric half the WOF? I had a difficult time doing a straight cut when I folded the fabric before. Thank you.
mysweetiepiepie vintage
Hi,
I've pinned your wonderful tutorial here:
http://pinterest.com/pin/191332684141823791/
Cheers :+)
MrsArtLady
I'm fairly new to quilting but I just had to try making this one. The excuse I used was some friends of ours were expecting their 2nd child. The color scheme was grey, purple & lime green (in the new nursery.) I used purple minky for the back & purchased lime green satin blanket binding to finish the edges. I couldn't believe it turned out as neat as it did! Keeping all those strips straight was a bit tough but I managed some how.
I highly recommend this pattern to anyone who is new to quilting. (I wish I could show you the finished quilt but don't know how to post a photo here!)
scarletcalliope
I came across your blog when I saw a pin on Pinterest. This is amazing. I really want to start quilting, but all of it seems so difficult and confusing. This seems like something even I can do!
Thanks for sharing!
Christine Barker
http://www.ScarletCalliope.com
nanna
Do you have a video tutorial of this ? I am much better with that type of directions that the written ones. Are the strips on both sides with nothing in between? Thank you. Nancy
nena
wow, I really like this quilt pattern. I am going to make it for sure. they would make great gifts. It looks very fun and easy to make.
Jenninbrissy
Wow!!! Love love love :). Thanks for sharing the tutorial. It's now on my do make list :).
Cheers,
Jenn from Mellycoddle :).
ann
I used this tutorial to make an ombre quilt! Thanks so much for sharing!
http://sweetmariesewing.wordpress.com/2013/04/23/ombre-waves-quilt-finished/
ann
I used this tutorial to make an ombre quilt! Thanks so much for sharing!
http://sweetmariesewing.wordpress.com/2013/04/23/ombre-waves-quilt-finished/
Kelli Marshall
What a fantastic use of scraps. I love how easy it is, but with a simple flip, looks difficult! A must show to our readers at http://www.southernfabric.com
Thanks for this great tutorial!
Kelli
Kathy
I just found your tutorial post through Southern Fabric. I like the simplicity but being somewhat new, I have a question: How do you keep track of alternating sewing direction for the strip pairs? Thank you!
Linda Molden
I love this idea, but the pictures don't show up in the tutorial. I would love to see them.
racheariel
Just wanted to add my praise for this quilt. I love it! I was inspired to make it when MakeIt-LoveIt featured it. Here's my post with my version:
http://www.silverbobs.com/blog/?p=392
Thanks for sharing the quilt and directions!
-julia
I was wondering how you'd quilt this? Try to follow the stripe pattern or do something more flowy?
Pam @Threading My Way
Your baby quilt is stunning, Allison!!! Thanks for the inspiration. Here's a link to my strip and flip quilt...
http://www.threadingmyway.com/2014/07/barcelona-strip-and-flip-quilt.html
AuntieBetty
I would recommend pressing the seams AWAY from the white strip (... press to the dark side).
allison
You can press either way Auntie Betty...normally I press towards the dark but with this and all of the seam allowances, the quilt top lays much much flatter if you press towards the strips, and most people probably won't be using white which is why I suggested it. Either way works though!! :)
lorrwill
I love the way the white helps contain the strips. I love scrappy, but it can be a bit much. This is a great balance of crazy and calm.
I bet this would work fabulously with strings (strips of varying widths), too.
midnight hysteria
I LOVE THIS QUILT .... LOVE, LOVE, LOVE .... every time i see it, it makes my heart smile and my eyes happy .... i need one just like it ....
darlene
WPBMOMMY1
I love your quilt. I'm going to use a smaller variation of your technique to create a tote bag or perhaps a journal cover. I love it so much I want to be able to look at it all the time!!
Sharon
How did you quilt this? Machine or free-motion! And what pattern did you use?
Allison
Hi Sharon! I quilted it with an all over free motion stippling pattern. You can see it here: http://cluckclucksew.com/2013/01/strip-and-flip-qui.html
I'll also stick the link at the bottom of the post in case the link in the comments doesn't work. Thanks!
Melanie
I saw someone show their version of this quilt today at a local quilt shop and it was amazing. She made it bigger which i think I will adopt the larger size of this quilt. Too fun with scraps! :) Thank you for posting. Cannot wait to make it! :)
quilter's momma
The perfect quilt for a beginner. My granddaughter made her first quilt just before her 6th birthday. It was simply sewing twenty 8 inch blocks together, enveloping and tying it. she is now 7 and this one is perfect for her next pattern. It looks easy to do from a quilter's standpoint but non quilters with think it was hard to do. Thank you for giving us such a cute pattern. Her cousin's baby is due in September, so we better get started. P.S. Grandma still does the cutting.
Vicky King
Made this as a baby quilt for a little boy. Used batiks and blue fabric for the plain strips. I embroiders the name and birthdate of the baby in the blue strips. Fast and easy and a great gift. Thanks for the tutorial!
Angie Runyan
Love the pattern. I'm headed to my stash right now! Thanks!
Yoka Bazilewich
Your quilts are gorgeous and the colors also. All your quilts are so fresh looking. I never bought material in just a plain color. Thank you for sharing your tips from now on I will try it also.
Thanks for the tutorials and the beautiful pictures.
Happy quilting,
Karen
Guess not understanding how this is a quilt as you go....no backing, no batting.
Allison
This is not a Quilt as you go quilt Karen...you are right!
Andrea Aken
I made this out of Christmas fabric to donate to charity, super cute and easy to follow!!!!!
Tera F Callihan
Great easy quilt, love seeing the process pictures and the full Quilt :)
sbw500
I plan to make this with 1 change. I will substitute a piece of plain fabric for the 5" flipped section and use the cut out one in another quilt.
Allison
That will be really cute!
elizodop
Very nice! I really like this! But how do I get it as a pdf?
Martha Adams
I stripped and flipped a jelly roll for my granddaughter in England. Baby and parents love it as much as I do!!
Danielle
Thank you so much for this! I used a jelly roll with 20 strips so it was wider but maybe not quite as long. I trimmed to 35” and then cut as explained. Then, I split my backing into two strips and used the trimmed part on the back! It turned out great.
Laurie
I love the pattern, but have you considered a printable page? I just printed 25 pages of comments...
Amy Willis
So cute... looking forward to making this for an upcoming baby shower. Love the clean lines and colorful palette.
How could you make this design into a twin quilt? What would the measurements become?
okbetbetting
OKBET is one of the most trusted online betting site in the Philippines!!! Want to know more about site? visit here --->> https://www.okbetcasino.live
okbetsports.ph
Excellent to the point article and news.. Well appreciated, My sites:
okbet agent
Kim A
I made this quilt for a baby using flannel animal prints. It was simple and beautiful, but it was not easy. The 27 quilt strips when sewn together were 2 inches longer on the left than they were on the right. Apparently, I sew downhill! Even though the strips did not line up when I flipped the 5 " section, it was still lovely! What I needed to do was measure each time I added one of the 27 strips, then I would have noticed it was getting longer on one side.
I highly recommend this quilt, it did turn out really nice.
Joy
Thank you for this guideline
Jo
I used flannel fabric with animal designs to create this baby quilt. Although it was straightforward and lovely, it was difficult. When the 27 quilt strips were joined, the left side was 2 inches longer than the right. It seems like I stitch downward! When I flipped the 5 "part, the strips did not line up, but it was still gorgeous! If I had measured before adding each of the 27 strips, I would have seen that it was lengthening on one side. So now I can enjoy playing games and chose the best payment options https://gamblorium.com/nz/payments/ Highly recommended
Linda
Hi Jo,
I learnt somewhere that you need to sew each row in opposite directions for the quilt to stay square. What I mean is sew two strips together, then when you add the next strip you start from the end that you finished up at. That way each strip is sewn in the opposite direction. This has worked for me each time. Hope this helps.
David
This is one of my favorite stress relief games Candy Crush
Sarah
I love your site. The patterns are both cute and relatively easy for a beginner like me; I just downloaded three. I can't wait to get my seam tape--lots of quilters recommend it.
Thank you for what you do!
bos-sobat
very nice, this article is very useful for everyone, thank you for making a blog like this and I really like it