I woke up to lots of emails asking for a pattern for the Grayscale quilt, and since I'm not planning on writing a pattern for this one I threw together a quickie tutorial. Literally...I threw it together...user beware.
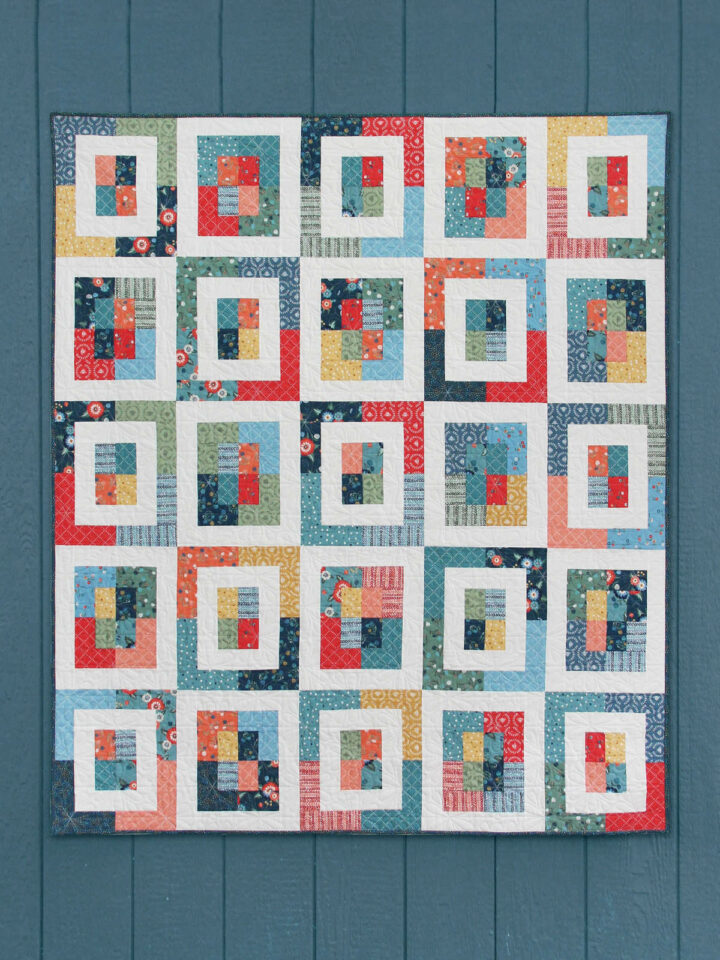
My quilt holder uppers were at school and work...so here's a full-ish (dang tree!) shot of the quilt top:
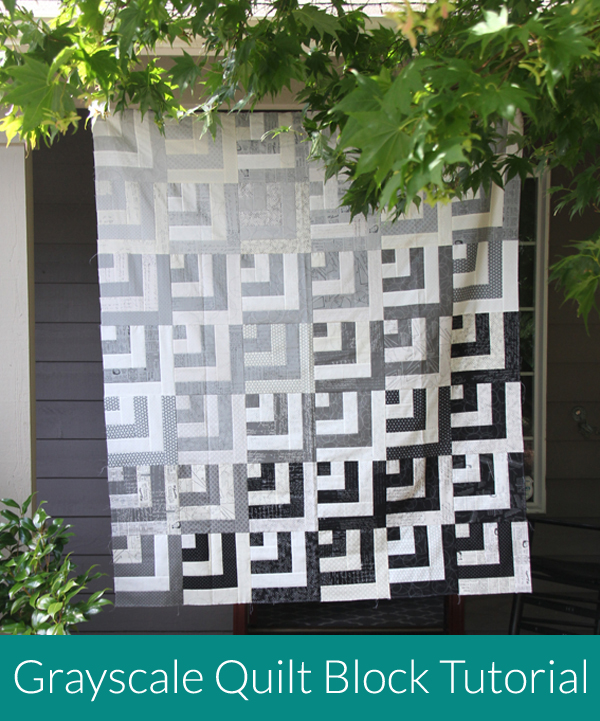
This top measures 60" x 70", with a 10" finished block size, so it's easy to make larger or smaller.
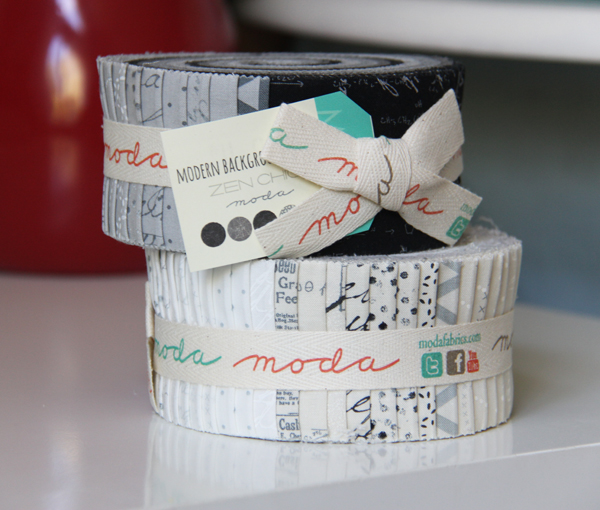
I used these two jelly rolls as mentioned in my previous post, but you could use one print jelly roll and solid jelly roll to cut down cost. If you want to lay out the blocks with with a gradient effect like I did, just make sure your darker jelly roll has some light and dark prints in it. If you're new to jelly rolls, it contains 42 (but can be more or less) strips 2 ½" x the width of the fabric.
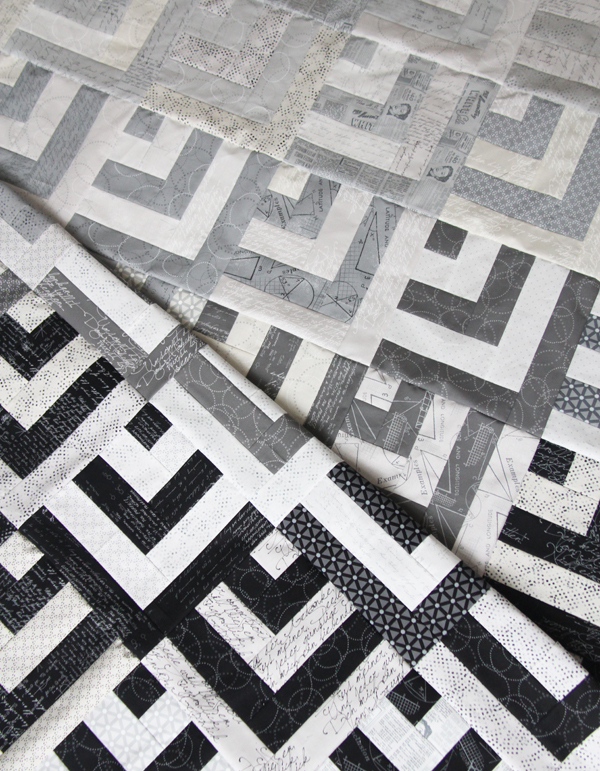
You'll make 21 of Block A (white at the corner square and outer strips), and 21 of Block B (dark at the corner square and outer strips), 42 blocks total.
To make the Block A blocks, choose 21 white/light strips, and 21 dark strips.

Cut the white 2 ½" strips into: 1 square 2 ½", 1 strip 4 ½", 1 strip 6 ½", 1 strip 8 ½", and 1 strip 10 ½".
Cut the dark strip into: 1 square 2 ½", 1 strip 4 ½", 1 strip 6 ½", and 1 strip 8 ½".
You can cut all your light and dark strips together and whip out the cutting in no time!

Start with a white 2 ½" square and sew a dark 2 ½" square to one side, press. Sew the dark 4 ½" strip to one side, press. Repeat with the light and dark 4 ½", 6 ½", 8 ½" strips, and finally add the white 10 ½" strips, making sure you are sewing them to the right side as you go! The block will measure 10 ½" square.
To make the Block B blocks....cut and sew the blocks the exact same way, except switch the white and dark fabrics that I have above. You'll choose 21 light prints, and 21 dark prints again, but this time cut the dark strips with a 10 ½" strip instead of the white, and start with a dark square in the corner when sewing.
Lay them out alternating Block A and Block B, and if you use dark strips with lighter/darker prints in it, you can lay them out with a gradient effect like I did.
Make sense? I hope so...it's pretty easy and a fun/fast quilt to make, especially when you cut all of your Block A or B blocks at once and chain piece like crazy!

Sophie's not a fan of this one...not enough pink. Or princesses.
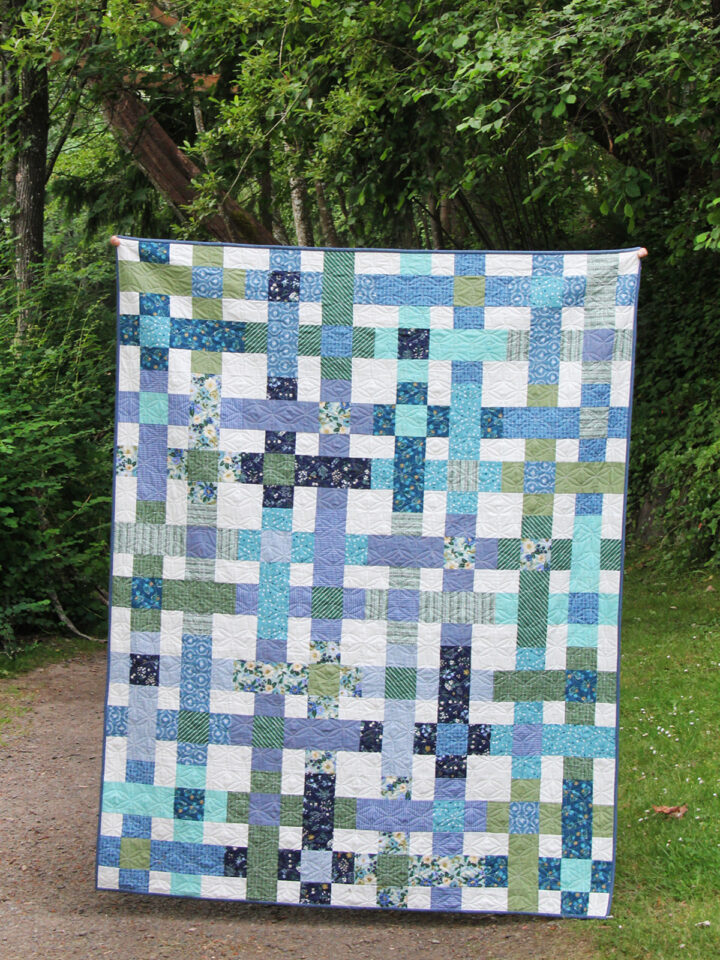
If I re-made this quilt I would probably add more dark/black blocks, or a color like navy blue so there weren't so many gray/beige blocks. If you use two jelly rolls and the same cutting methods you'll have lots of scraps left over to make pillows, a table runner, or maybe even a baby quilt!
Rike
I really love the pattern. I would add one red block or stripe to add a color spot.
Greetings, Rike
darlene
love . love . love this beautiful, grayscale quilt ... you do such amazing work .... <3
Dianne Ross
Thank you for doing all the maths. Cheers
Susan
Love this quilt! The gradual change across the quilt is very modern! And the design would be perfect for a male too! Thanks for sharing it!
Hildy
It's a really great quilt and thanks for doing the math for us:-) Perhaps you can make a pieced backing and add a pink block there to make Miss Sophie happy;-)
Kirsten
Such a great design and it would be perfect for a guy too!
Lesley
This quilt is fabulous! Thanks so very much for sharing your tutorial with us!
Sigi G
Thank you for sharing this quilt tutorial (you did a great job) :). Love the way the quilt colors go from light to dark.
Anja @ Anja Quilts
Thanks for the tutorial. It's a great pattern.
mdlatter
Thank you so much for the tutorial!! So sweet of you.
kathy o
Wow - and more WOW! It's such a cool quilt! Maybe throw some pink on the back....just for Sophie! Thank you for the tutorial - you're awesome!
Elizabeth
I love it!
DreiPunkteWerk
Very well done! I Love the colour gradient! I would choose a neonyellow binding:-)
Thank you for the pattern!
Best regards from Germany,
Kathrin
Cindy in N C
Thanks for the instruction. Impatiently waiting for my jelly rolls to arrive.
Cindy in NC
laurelsstitchery
Oh I love this!! So pretty! :)
Kathy
My new favorite quilt! Love this! Thanks so much for the tutorial, I'm determined to make this...this weekend!
Amanda
I am loving this quilt! I'm getting really enamoured with the grayscale idea.... Thanks for sharing the tutorial! xo Amanda
camilla
Love this quilt! Thanks for sharing XXXX
Helen White
Thank you so much.
Eva Tzagaraki
Excellent work!
cindy-liveacolorfullife
I have been so tempted by this fabric line. Now I want to buy both the jelly rolls. You are an enabler...
Tulle
This looks very effective! I will definitely try it out.
Debbie Rogowski
My grand daughter loves this pattern and wants me to make a queen size quilt. I'm thinking if each jelly roll is 3 yards of fabric and you use 2 it makes 42 blocks. So I'm going to need roughly 12-14 yards? Yikes lol she wants it in black white and blue. Any thoughts on this?
Kristi
My pieces didn't line up. It's almost like another 1/4" is needed on some unless I did something wrong. Sewed the two 2 1/2" together and the 4 1/2" one was fine. That left a block 4 1/2" by 4 3/4". If I put the 4 1/2" under the other 4 1/2" the 6 1/2" didn't line up properly. Not sure what I'm doing wrong.
Muriel
I made a black and while quilt for my son in law,and did a red binging...stunning! Just finished it off...
Betty Morgan
Hi, thx so much for the calculations. I first saw this pattern in a quilt hanging in the Springfield IL airport in September. The entire quilt is black and white with the exception of one block in grey and white and one in light green and white. And, the blocks were set on point. Liked it so much I took a picture so I could do the calculations myself, but now I don't have to. Hope to try it after the holidays and my quilt have have at least one red and white block. Thx again, and if I can figure out how to get the pic from my phone to the tablet I'll send it to you. And I love ur website.
kissmarianne43
What a beautiful idea! Thank you very much!
Denise M Murdock
What kind of topstitching did you do. If any, I can't tell by the photo. Stich in the ditch or something else?
Charlotta Bright Norby
Lovely - especially, the redhead 💕But why isn't there an emoji with red hair?
Allison
True there should be!!!
Vanessa Wallace
☺Beautiful quilt. I have been trying to find the fabrics. Where can they be purchased? Thank you for your assistance.
Jennifer Wiltrout
May I use your tutorial for my stash bee block? We used it for a lottery block for our Las Vegas Modern Quilt Guild and I love how it turns out.
Allison
Yes go ahead!
Jennifer Wiltrout
Many thanks Allison. I will, of course, give a link to your tutorial and giving you all the credit for a great design and tutorial.
auntiepatch69
This is lovely!
Glenda Dexter Marsh
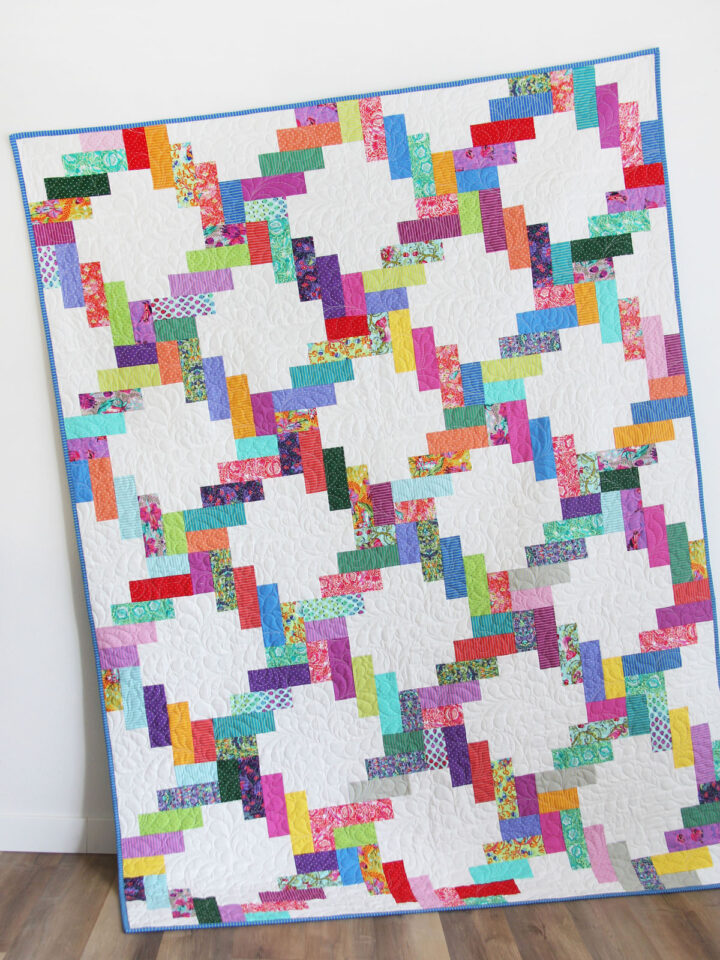
soooo is that quilt with 'zig zag' pattern white background with the purple heart in lower right corner done this same way just turning blocks differently?? (it's beside the grayscale photo first line under instagram)
Lori
It turned out to be a lovely quilt! I used black and red for my quilt and it looks really sharp thank you for the tutorial and quilt pattern
Dee D
I made this with pinks and white and it turned out so cute! It's one my favorites that I have made. Thanks so much for the pattern.