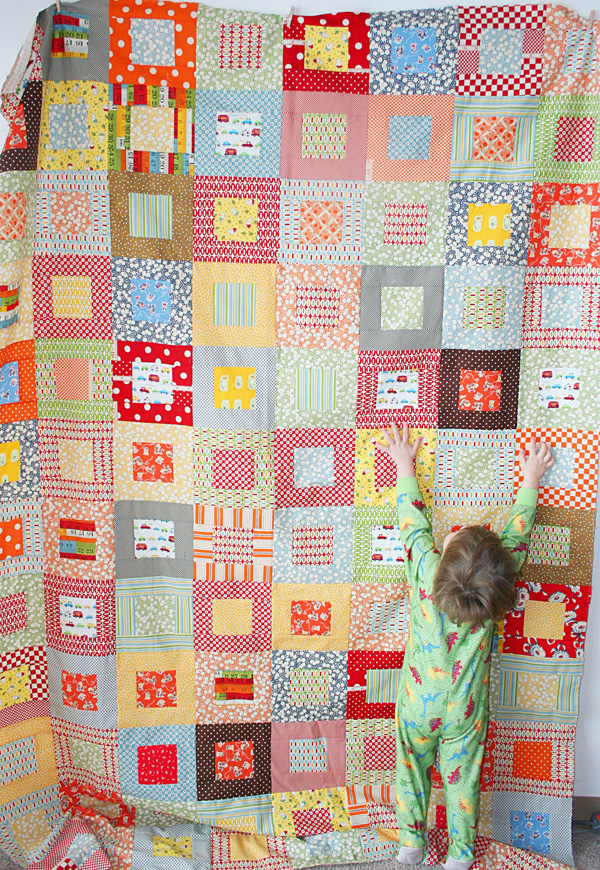
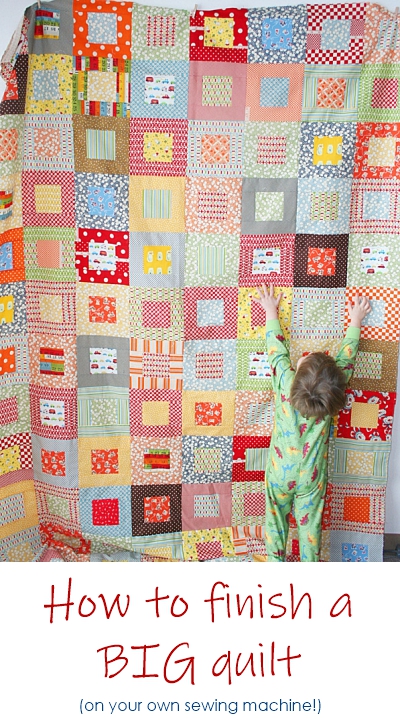
That's my son Ben up there with the first Twin size quilt I ever made in 2008! Block tutorial can be found here (click here).
I received a question about quilting a large quilt on a home sewing machine, and while it was on my mind I thought I'd post a few tips for quilting a large quilt!
- First you should decide whether to quilt it yourself or not. Let's say you have a Queen size quilt that needs finishing, and you are deciding whether to send that bad boy to a quilter or tackle the quilting yourself. There are a few things you may want to consider to help you decide, like if your sewing machine is sturdy and handle the weight and size of the quilt, if your back and shoulders are strong enough to hold up the weight of the quilt for long periods of time, and if you're prepared to baste a large quilt (and if you have space!). If you are confident and want to try it...then go for it! Everyone should quilt one huge quilt themselves at least once, and it's pretty awesome to make a big quilt from start to finish by yourself!
These days I pretty much send everything a Twin size and over to a long arm quilter, because I don't have the space to baste it, I never have the time, and it kills my back. I also send out anything that is for display at a quilt show or will be hanging in a shop. Basically anything that will be looked at closely by other people I send to a professional.
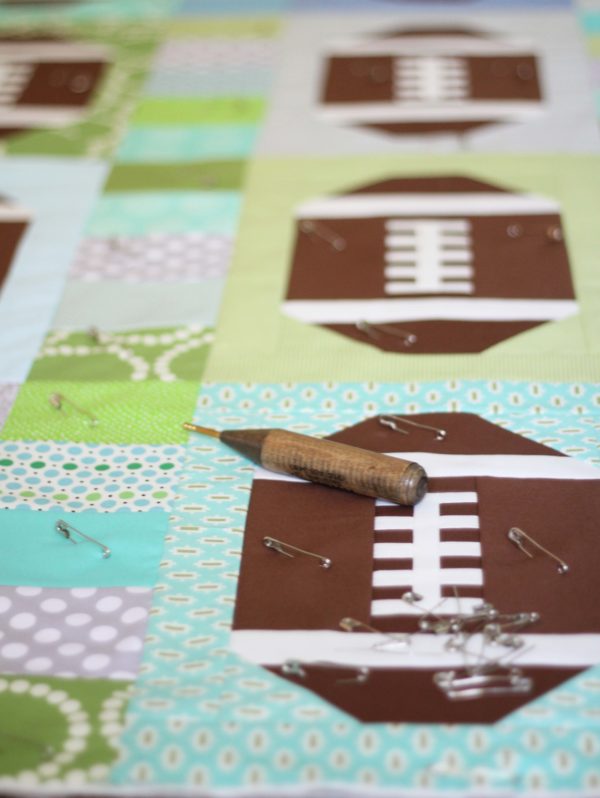
- Baste it really well. If it's not basted well you'll end up with bumps and folds and extra fabric in the center. Spray basting a large quilt can get expensive quick, but you can spot baste it and just do the center, or use a dot of spray baste every 6-8" or so. Then use pins to go over everything again and make sure it's all very secure. I have a tutorial on spray basting here. Also that tool down below is the Kwik Klip and I can never baste without it.
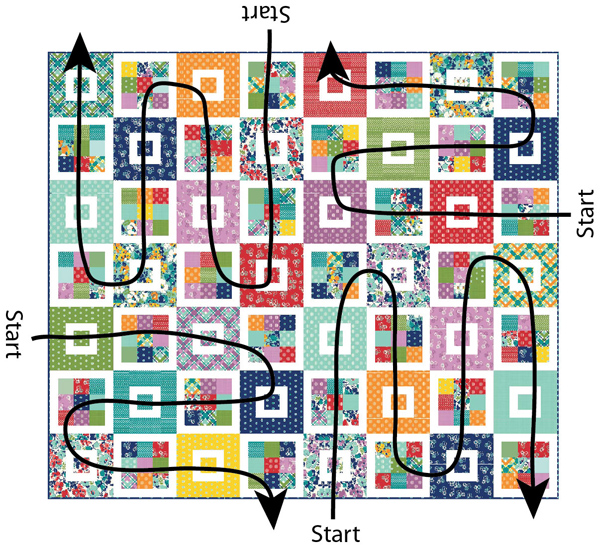
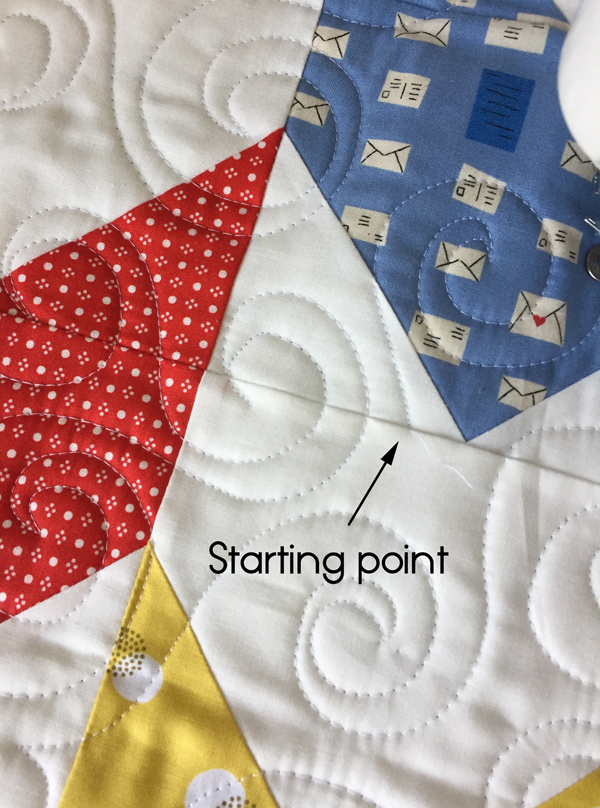
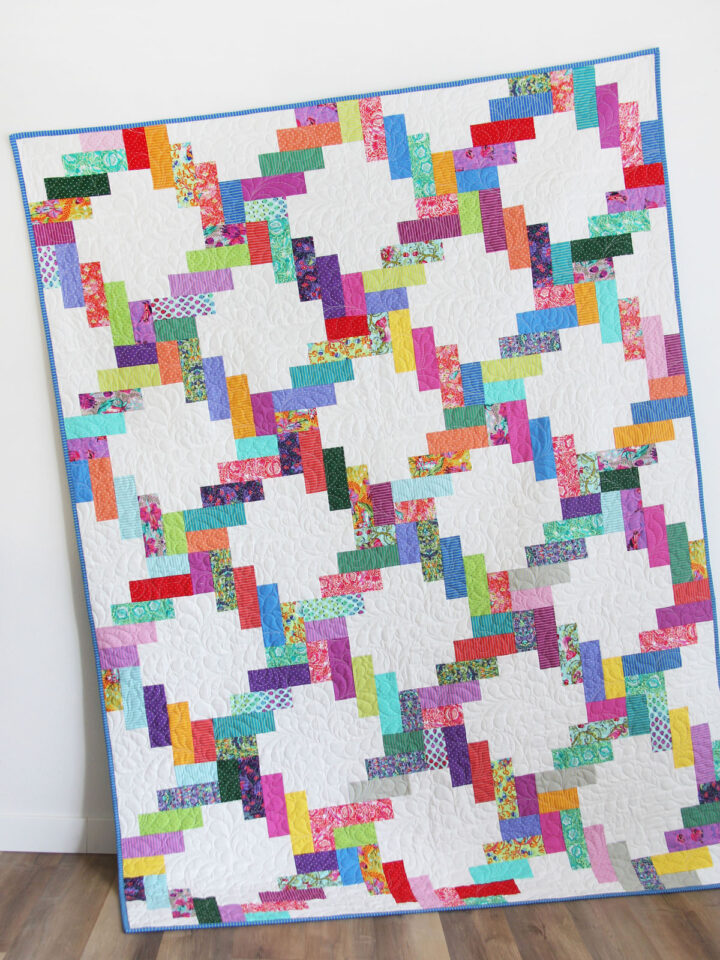
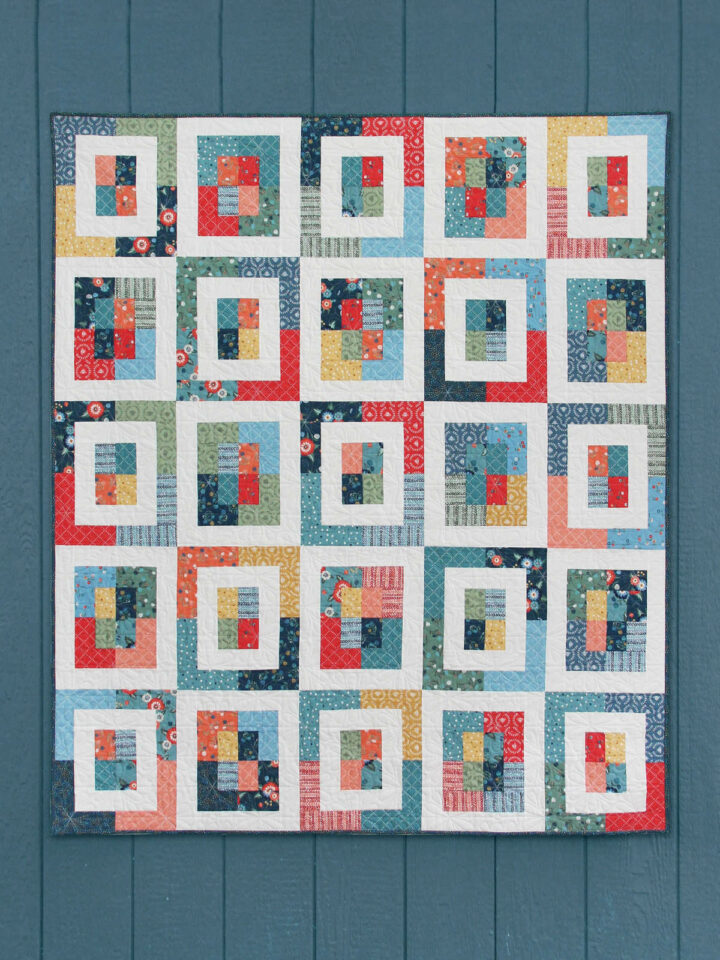
- Make a quilting plan of action. Layout your quilt and figure out where you are going to start and stop quilting. I find it easiest to break my quilting into smaller sections. The image below is of a Throw size Shortcake Quilt, and imagine if I was sitting right at the START points. I quilt up and down the rows until the section is done, then I turn the whole quilt and start at the other section. Breaking it up into sections makes it less overwhelming and easier to handle under the machine.
- Don't be afraid to start and stop in the middle! You don't have to start and end on the edges...and it's really hard to smoosh the whole quilt through the machine neck to get to the center. Instead just start in the center, quilt a section, and end in the middle. Just stitch in place a few times back and forth to make sure your thread is secure, and bury your thread if you prefer (or not!). You can start/end stitching in a seam to hide it even better.
- Choose a design that you can keep consistent. Don't pick something super complicated or that requires moving the quilt around a lot.
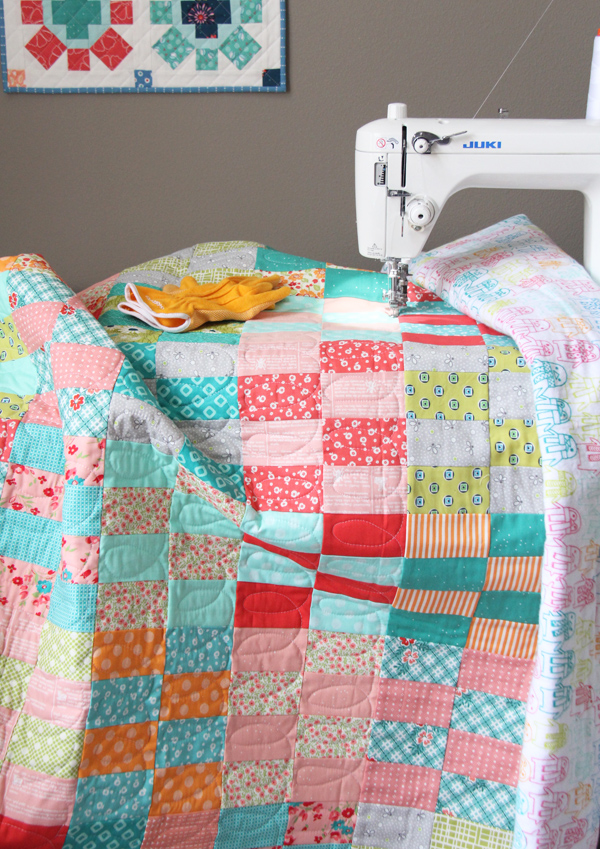
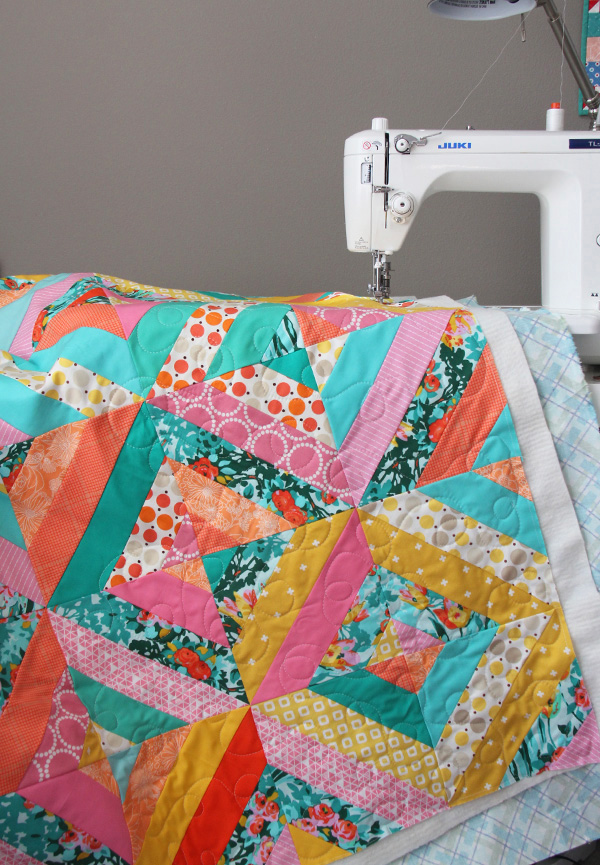
- Support the weight of the quilt. Use a table or ironing board, or whatever you have that can support the quilt to the left and back of the machine. It will save your shoulders and back if you are not holding all of the quilt weight by yourself! I move to my huge dining table when I'm quilting something big.
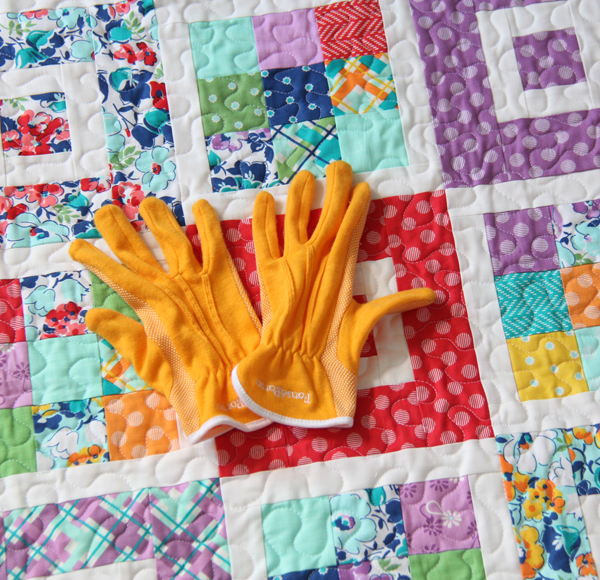
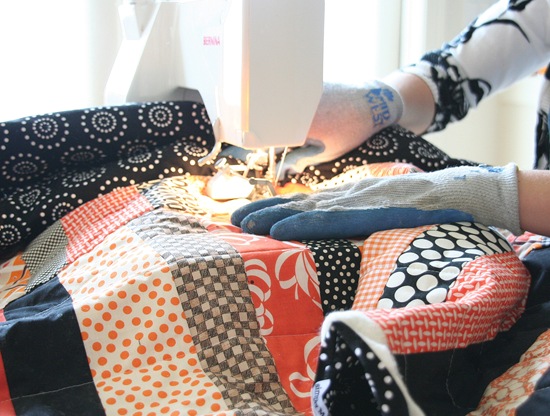
- Use gloves. Quilting gloves (these are cheap and have great reviews) make gripping the quilt so much easier, especially in the center of a large quilt. Trust me, you don't think you need them until you try them. You don't need fancy quilting gloves either (see my photo below from 2009 using my yucky-but-clean gardening gloves)!
Most importantly I'd say don't worry too much about perfection or screwing it up when your quilting . Just relax, have a plan, and go for it! You gotta start somewhere! That being said...if you are a beginner you might want to practice a lot on smaller quilts before you jump into a king size. :)
Happy quilting!
jennifer ziehl vacca
I've quilted more than one king sized quilts on my Janome 1600P, I work at my dining room table and it's like a wrestling match some days!!! LOL. The only thing I would add is make sure to take breaks, it can be hard on your back and shoulders. I've also ripped out a lot of quilting if it's just not right.
Excellent tips!
Allison
Yes...taking breaks is so important! I usually give myself a few days to do big quilts and come back to it now and then so it's not a huge task all at once! Thanks for visiting!
Janie
Thanks for the great tips. I agree with you, practice before starting in on a king size quilt.
And Jennifer's tip, 'take breaks'; great advice.
Vicki
I've quilted a couple twin-size quilts, and my cheater trick is to quilt in rows down the length of the quilt -- a dogwood pattern, or an orange peel works -- and then you can roll the sides up nice and tight. This gives you a nice flat work space, and you can use those rolls as handles. :)
Jean
I'm fairly new to quilting and I've quilted each of my own quilts; my first being a king log cabin that I did 'in the ditch'. Boy have I learned since wrestling that one round and round for each block! Basting your sandwich well, working from the middle out in quadrants, and taking breaks often, are good tips. Never let the weight of the quilt drag on your machine...therefore, stop and readjust your FMQ often. And just enjoy It! You'll get better with each quilt! -Jean
Allison
Thanks for this Jean!
Jean
Thank YOU, Allison! You are a treasure!
Carolyn Phillips
Who is that sweet little thing holding up that whole quilt all by herself? I can't believe how big she has gotten!
I quilted my Tahoe quilt on my huge dining room table, it was like wrestling a soggy wet blanket. The quilt was about 86" x 73". It took me a more than a week to quilt it. Once I figured out how to distribute the weight and bulk of the fabric, and was about a third of the way finished with the quilting, I was finally felt pretty comfortable and confident. I don't know if I would do it again, but I probably will. What surprised me most was how physically exhausting it was! The really good part, though, is that the quilt turned out to be beautiful! My daughter loves it!
Danice G
Very helpful and practical tips. Thank you so much. We probably all fear quilting large quilts :)
Kathleen Smith
I split a large quilt in half, quilt each half separately, then join them together and do the last bit of quilting to join the design. I even quilted the borders separately and added them afterwards. You have to plan the whole process from the get go, but I don't think I'll ever send out another quilt to the longarmer. I'm now experimenting with quilting individual blocks in a spiral design then joining them together. There's a variety of techniques for covering the seams on the back.
Allison
Love that! Thank you for the tips!
María
Nice works.
Un besín
Barbara Esposito, The Quilted B
Oh My Gorsh! Early on in my quilting adventure I made a queen size and at that time I had no idea what a longarm was. The quilting is messy and the binding is all wonky, but we use it on our bed all winter. It was made with love and high hopes and it reminds me that this quilting journey is a process and an adventure and when I find myself fussing over perfection more than I loving what I am doing then it's time to quit! When friends ask me about the quilt my instant reply is, "Never again! I will either stick with smaller quilts or send them out!" ;o) Thank you for the tips. I may just have to try my next queen size on my home machine!
Carolyn Phillips
My thoughts exactly
Allison
YES! I love this comment!!! I did the same thing with my first larger quilt...I had no idea what long arm quilting was, and my quilting was TERRIBLE but I still love that quilt and was extremely proud of it!!! Love your comment about fussing over perfection...so good! Thank you!
sewtiopa.blogspot.com
When I started quilting on my own I jokingly remarked that I was the Present of the American Association of Quilt Wrestlers! I learned by trial and error. That was about 25 years ago. I certainly appreciate your hints. I started quilting on a domestic machine. Learned lots of lessons. Then 6 years ago I bought an HQ Sweet 16 sit-down long arm. My oh my, what an improvement for me but at the same time I was still moving a big quilt. I made many on that machine but with age and arthritis I have adjusted yet again to a Baby Lock Coronet. Love it. No joint stress, great stitches, I am happy.
Ben
A machine with a generous harp space makes a big difference in reducing the amount of quilt wrestling required.
As for basting, I've had a couple of large quilts basted on a long arm, then quilted them myself.
Annie
I have only ever done hand quilting which I always find relaxing but it does take a lot of time and my 82-year-old hands tire too easily these days. I have three 'unfancy' sewing machines, all in the Singer family, and have quilted small pieces with them but been too timid to try larger ones. Your advice is clear and encouraging and I may try a larger one. It IS costly to send quilts out for long arm quilting but I am tempted, especially when I'm crushing to get out a few at the same time for gifts. I don't have access to a long-arm quilter in the New England area where I live - do you or any of your commenters know of one?
I just began receiving your blog and love it. You are a sweetheart!
ws rupp
I do know of someone in Maine that does long-arm quilting.
Judy
Quilts can be sent to Missouri Star Quilt Company. They do excellent work. They also gave wonderful products and a knowledgeable staff. You can find their quilt tutorials on You Tube.
Alicia Key
Excellent Map for Quilting!
Rosemaryflower
These are such great tips. I do not know if I could do a quilt on my machine. So far, I have anxiety about that and I have not attempted fully. -- okay, I have a small quilt under my hard working machine right now. .... it has been a while since I have looked at that. The dining room is faaar far away from my sewing area next to the kitchen haha
Allison
Starting small is the best advice!
peggy
If you have the room get yourself a ping pong table (craigslist - $75.00)...sure helps when doing basting (I swear by spray basting) and for doing your quilting...I got the table when I was making a T-shirt quilt for my sister and we've used it for more things than quilting...right now it has about a bushel of hazelnuts drying on top and using it for storage underneath...
Allison
My husband loved this comment Peggy...he wants a Ping Pong table! ;)
Peggy
I use a ping pong table for spray basting. Works well.
Joann
Me too!Me too!!😂😂😂
ws rupp
Great tips! I was just looking for ideas to move forward in doing machine quilting.
plysjopropell
Great advice! I loved reading this, as I am far from an experienced machine quilter. I do practise on smaller items, like mugrugs and table runners, but there's quite a way to go until I feel ready to tackle a "proper" quilt.
Ellen in North Florida
Thanks for the comments. I love your quilts and have made a few. I just want to add that spraying does not have to be expensive; I spray very sparingly and a single can has lasted for a few queen-size quilts. Just be sure to press the quilt on both sides after spraying to fix the bond and give yourself a nice flat surface. My quilting is mostly with a walking foot (thanks, Jacquie Gering) and it is slow! Even with my big-throated Juki the quilting takes almost as long as the piecing for many quilts.
dondim
I loved reading this! The mistakes I have made quilting! That would make a three page blog...But doing your own quilting does teach you so very much. I won't do anything larger than a double now. We do need to take care of our bodies since we are only given just the one. I think your quilting looks so great. Few people ever find our errors. I don't make my quilting look too uniform so that the little mistakes looked like individuality. A little weird to build this in, but I know I will make some errors. There, I told the truth again and I am free.
Allison
Love this comment! Yes the mistakes no one else notices but us and it gives it personality and teaches us a lot!
Linda Chin
Is that a Juki TL98Q you at using? I just inherited one and I am kind of scared of the speed. All my be ever used is a Singe Featherweight. Is there a ay to slow it down a little so I can practice?
Allison
Mine is the 2010Q I think...but virtually the same as yours! You'll get used to the speed quickly! I did a post about my machine a while back, search JUKI in my toolbar at the top and you should find it!
Phoebe Ingraham
These are really helpful suggestions, Allison. I followed your advice for my second quilting project and got gloves. I won't quilt without them now! Such a difference in your muscle tension when the rubber grippers work to hold the quilt in place and move it along, instead of your gripping and tensing your muscles! I just finished a top from your pattern, Easy Bake, and I love it! I plan to use fleece for the backing and have checked out your suggestions for this as well! I learn something new with each quilt. I had never thought of ending on a seam. Of course! Your advice is always helpful, whether it's a new idea or a reminder of a better way to do this. Thanks so much!
Allison
A fleece backing sounds heavenly today...what a great idea! Aren't gloves the best? It drives me nuts to quilt without them!
Suzanne
I agree with all your points. I tend to sew large quilts and FMQ them myself. My only suggestion to add is that instead of quilting an all over design, work using filler patterns in individual blocks or sections of blocks. That way you are only moving a small amount of quilt while you are sewing. Note that even doing that I still split the quilt into quarters and use a similar plan to yours, and work from the middle section towards the outer edges.
Allison
Great tips!
Rosanna
Thank you Allison! I'm just ready to quilt a pink log cabin quilt for my one-year-old and this is SO helpful!
Debbie Huber
I know this is well after your post, but I want to thank you. Because of your diagram and instructions, I was able to complete the quilting on my small lap project much easier. Having a direction in mind, helped me to be more organized instead of so random and it really worked out much better. Thanks again.P.S. I love your blog and I think Hazel is still my all time favorite fabric line.
Allison
Thank you Debbie! I'm so glad it helped!
Ava
Is the machine flat in the table or above the table. I'm wondering if you need the machine to be flush to quilt such a big quilt?
Carolyn
Beautiful quilts! I love your colors. Thanks for sharing your designs.
Jackson Watkins
Hi Allison, I love CluckCluckSew! All of the comments here are very informative and incouraging. I have been quilting off/on for a few years and understand the importance of having a small pile of practice sandwiches so you can practice each new design you are learning. To improve my skills, and also do good in the world, I started volunteering with an organization "Quilts For Kids", and always FMQ their quilts. The quilts go to children in hospitals, homeless shelters, etc. Once I started FMQ their quilts, approximately 40" x 50", my skills improved tremendously over time. I continue to work with the organization, but am also increasing the size of my personal quilts to get more experience quilting larger quilts on my new Janome 6500P, which was a recent birthday gift. Something I read from another FMQ blogger "You can practice until you are blue in the face, but at some point you just have to dive in and do it!" It has worked well for me, before reading that comment I was stuck in the "Practice Phase".
Janna Payne
Just found your blog and enjoy it very much!
I am new to quilting, only about a year and have been going quilt as you go since quilting a quilt top is scary to me. Most of the tutorials and articles I have read stress that you should always start in the middle of the quilt, SHOOT my throat isn't that big. LOVE LOVE LOVE the idea of breaking it up into quarters so only a bit is in the throat at a time! Next one I am making is for my brother, I am definitely going to try your method. I have some fabric I was putting aside to make my daughter something, might make her a lightweight quilt to try this out before I tackle a larger one
Kathy Pappert
Hi Allison, I love your blog and am getting tons of good info, thank you, I've been reading everything I can about quilting, and ready to start. Can you suggest a great Beginners sewing machine for quilting? I will start small, there are sooo many quilts that I hope to make. But first I need a sewing machine. Thank you,
Kathy P
Allison
Hi Kathy! I don't know that much about sewing machines, only the ones I have. I have a Bernina 440, and a Juki 2010QE I did blog posts on both. It totally depends on your price point. The Juki only has a straight stitch, but I would highly recommend it!
James Walter
These are such helpful tips for taking on the ambitious project of quilting a large quilt. Breaking it into manageable sections, carefully basting, and using supports to ease the physical burden are great strategies.