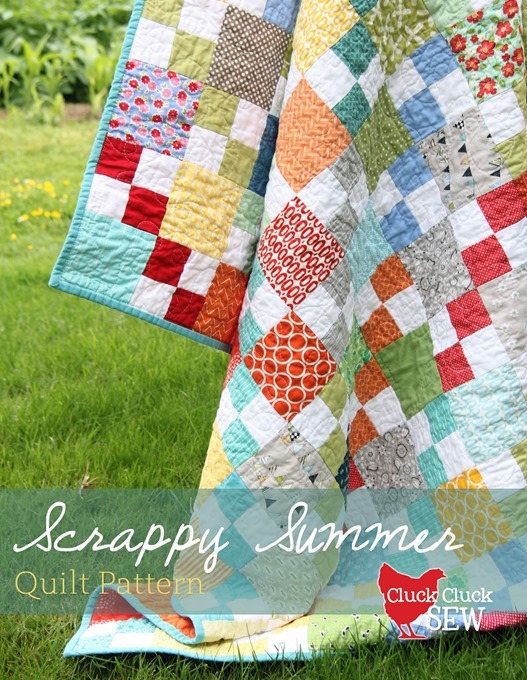
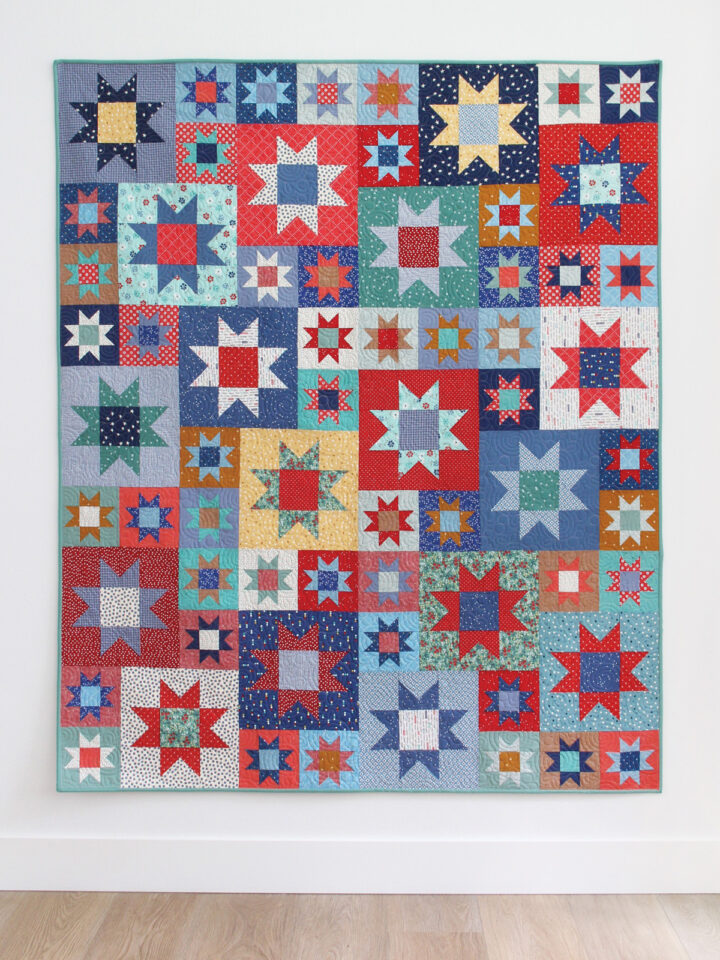
This is a fabulous quilt for using up scraps…and since my inbox was full of questions about it I figured I’d post a quick free pattern. I’ve seen many antique quilts in this pattern. It’s been around forever…and is a great way to use up extra strips, squares, or extra pre-cuts you have lying around. If you want a more detailed version of this pattern with yardage requirements, sizes, and color options, you can find a pattern in my shop.
For a 64" x 80" quilt you’ll need:
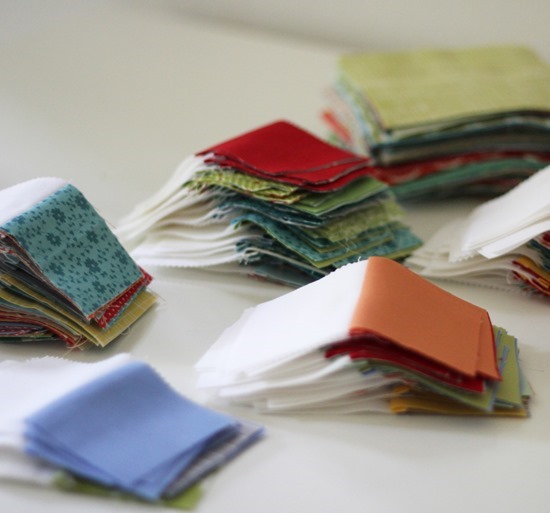
Print fabrics: 160 scrap 4 ½" squares
Solid or small print for the chain squares: 20 strips 2 ½" x the width of the fabric
White fabric: 20 strips 2 ½" x the width of the fabric

Step 1: Sew each of the color 2 ½" strips to a white 2 ½" strip. Chain piece to save time!!! You should have 20 strip sets when your done. Press seams towards the color fabric.
Step 2: Cut each of the strip sets into 16 units 2 ½" x 4 ½". You can cut 2 or 3 strip sets at a time to speed things up!

Step 3: Sew the units together to create four patch blocks. Press the seam in either direction or open. You should have 160 four patch blocks when your done.
![making the 4 patch_thumb[3]](jpg/making-the-4-patch_thumb3.jpg)
Step 4: Layout 2 matching four patch blocks, and 2 scrap squares. Sew them together as shown, the arrows indicate pressing direction (press the last seam in either direction or open).
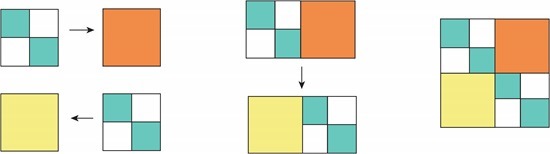
Repeat until you have 80 blocks.
Step 5: Assemble the blocks into 10 rows of 8 blocks each. I didn’t worry about creating locking seams…a pin in the seam while you sew will help the seams match and everything should line up nice and neat!
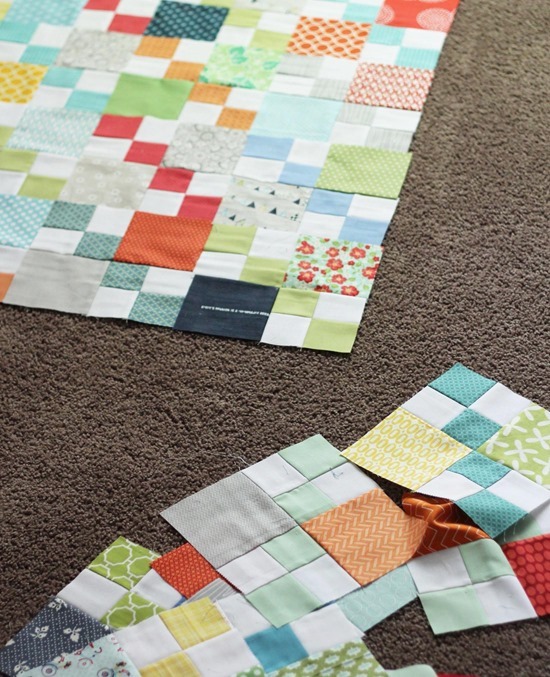
Step 6: Sew the blocks together to form the rows. Press seams, alternating directions with each row. Sew the rows together to finish the quilt top.
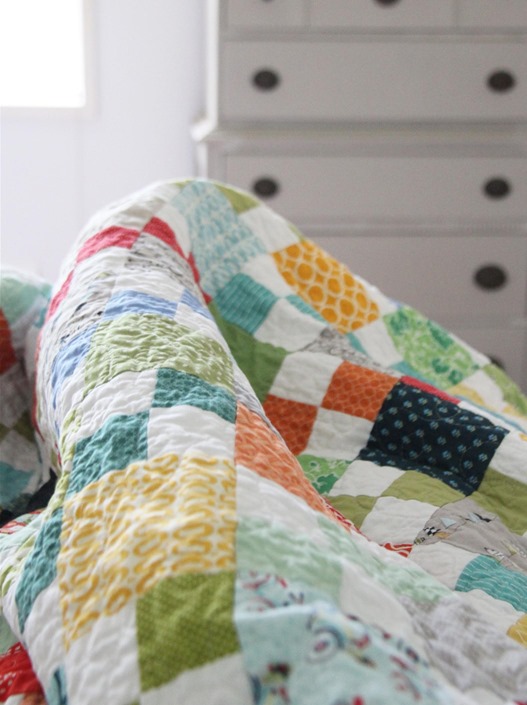
This quilt is a perfect Picnic Size. More sizes and detailed material requirements can be found in a detailed pattern here.
Now go sort through your scraps…and happy summer quilting!
Emily
I've got a ton of 4" i-spy fabrics that this would be perfect for. Should I cut my strips to 2" or 2 1/4"? Thanks!
allison
Cut them to 2 1/4" Emily! With the 4" squares that will leave you with a 7 1/2" unfinished block.
Lori
Up above in the cutting instructions you say to cut the strips 2 1/2. Not 2 1/4. Which one is correct? It looks like a great pattern.
Debra
The 2 1/4" strip size was in reply to Emily's query not the pattern. Emily is going to use smaller squares hence the smaller strip size.
Melia Mae Quilting
I love this quilt and pattern. I think I will have to try this for a quilt for my husband! It would be perfect for him! Thanks for doing this.
Denise Briese
Wow Allison Thanks this is perfect for beginners..:0) I appreciate your work so very much.
Sally Evans
Ooh that's gorgeous. My sister just gave me loads of offcuts from vintage sheets (she loves thrifting). I think I now know what to do with them! Yay!
Maudy
This is a good idea fir a raffle quilt! Thanks for sharing.
Allison
Great idea!
Lynne Tilley
This looks like an easy fun project for all those little scraps I've accumulated! It will go into my "to-do" folder. Thanks for the tutorial! Great job.
Lesley
Your quilt is so gorgeous! So fresh and summery. Thanks so much for the instructions!
JoAnn
Thanks for the lovely instructions!
JoAnn
kathy-o
Perfect for scraps - you are always to generous to give freebies! Thanks!
Sandy D
Just printed the tutorial.Thanks for a great idea for my scraps.
Trudie
What a great quilt. Thanks for sharing the tutorial.
Di~
Thanks Allison. My cousin wants to do a quilt, has never done one...we are getting together in Island Park this month. I think I will make her a kit with my stash and we can go to town on this GREAT quilt!
Adrianne
Lovely quilt - thanks for sharing the pattern!
✾Jamie Lee Cooley✾
What a great quilt! Thanks for sharing your method for making it!
Sew Nomadic
Simple and beautiful. Love it!
N. Maria
What a DUH moment! You make it look so simple when my brain was making it so difficult. Thank you so very much for posting this fun and refreshing quilt pattern!
Martha
I made this quilt from your tutorial several years ago! It turned out beautiful; gave it to my daughter who has used it many times!
Grammasheri
Thank you for the tutorial! Perfect for my own "summer of scraps" efforts this year!
Jojoquilter
I made a scrap quilt like this years ago, no set colors or print design & it is by far my favorite one out of all the many quilts I have made, just so cheery & colorful.
Gwyn Cornelius Jensen
Thank You so much for the pattern. ♥ your Blog.
nerospost
Hi! This is so beautiful and adorable quilt! Tahnk you for sharing the pattern! I love your colours and fabrics!
Lynette (NZ)
Lovely. Such happy summer colours
Ellen
Wow! Thanks you for the lovely pattern!
Mercedes
Thank you. It's a quilt very nice.
Best regards♥
Jocelyn
Thank you! You're the greatest & we appreciate your tutorials & free patterns!!
Carie
What a fabulous way to use up the scraps - it would be so much fun to have the other quilts I've made represented in one, especially those I made to give away.
Elisha
I adore your blog and quilts that you make.. I love to have more time to make things, maybe in my next life? thank you for the instructions, i save them for my next life!
Kelly O.
there is nothing you touch that I don't love! thank you for your generosity in sharing your patterns with us--free or otherwise!
Angela Atkins
Thank you for posting the tutorial! I was just gonna try to figure it out and forgot about the strip piecing for the smaller squares. I am trying to work through my stash and scraps in the next few months before I start buying more. No where to put the more!
Jean Burke
Thanks for your generosity! It's a wonderful pattern for me to work on downsizing my scraps this summer! Awesome......
sandi s
Thank you for sharing your pattern, that is so sweet of you. It is a cute quilt and I love how scrappy it is!
Lisa C
Thank you so much. I was looking for something scrappy to make for my son before he returns to school in the fall. This will be perfect.
terrieannie
You are such a kind soul! As soon as I saw this quilt last week, I got started on my own. I like figuring out my own piecing layouts (math nerd), but I bet there are many who would pay $5 for a PDF version from you. I sure enjoy the freshness in all your work!!
Francis Paul
sweet!!!!
ckeller219
Thank you so much for sharing. Love your quilt and I can't wait to start cleaning out those scraps.
Ali
Great tutorial for a lovely quilt. Thank you!
Emarie21
YES YES YES! I am in the middle of making my scrappy squares for my daughter's quilt. She wanted some large, uncut squares in it as well. Your timing couldn't have been more perfect with the pattern! We both thank you :)
Kat
Thank you so much!
the girlfriend gap
I love it! thanks for the how to :)janita
Tina
Fantastic! Thanks for the tutorial!
Brooke
I love it! It is so cheery. Plus, there's nothing better than using up scraps and loving the finished product.
Cindy
I just love this!! Thanks so much for sharing- a definite do!!!!:)
Judith Blinkenberg
I remember the first time I started following you. You had some free patterns and here you are again sharing with us. You are and will always be my favorite blog. I look forward to your fabric and even more patterns than I now have, why because of you! Thank you for the pattern and thank you for being such a genuine, wonderful person!!
allison
Your too sweet Judith!! This made my night. :) Now come be my neighbor! ;) -Al
Angela @ Cottage Magpie
I was wondering -- what do you use to make the little drawings showing how the blocks go together? I sometimes just make quilts for myself, and then after I show them on the blog people want the pattern.... and I don't usually take "in process" pictures when I'm "in the zone" if you know what I mean! I'd love to be able to do a quick drawing for people in those cases. Is there software just for that? Or do you draw everything by hand in Illustrator or something?
~Angela~
Pam
Thank you Thank you Thank you! This is the perfect quilt for me right now. Just was given two large boxes of printed fabric cottons that came from a curtain manufacturer....yippy! Want to make new boyfriend a quilt for his newly painted bedroom....you rock!
happydancequilting
So simple and so absolutely yummy. Thanks for the wonderful inspiration.
Ramblin' On
Just made this. Thank you so much for the clear and concise tutorial. I love the colors you use and love your quilts. Very generous of you.
Linhda
Kate Marshall
I cut a huge pile of 4.5" squares one day and haven't been sure what to do with them until now! Thanks for sharing such a gorgeous pattern.
Jeanne
Thank you!
Judy
Love it Allison! I have very few scraps but I do have lots of charm packs! Thank you for your kindness.
Elizabeth V Kelbaugh
What a wonderful easy pattern for my stash of squares and strips. Thanks for sharing and inspiring!
Teresa Steward
Saw three of your quilts I'd love to try. I've only made two before. Spooo have decided on either the hourglass the churn dash, or summer scrappy quilt. Which would you suggest for me. Have lots of both scraps and yardage fabric, was manager at fabric store and now poor me right? Fabric poor. By the way didn't want to quit on other two quilts and made them so big skimmed floor on both sides, more like quilted bedspread,can't have these that big hubby won't let me use them on bed saying they're too heavy. Thanks ahead of time for these beautiful patterns and projects
pamelajs56
Sweeeeeet! I adore it!
Yoka Bazilewich
You make such gorgeous quilts they are a real inspiration. Love the great materials use and sharing a tutorial.
Thank you very much I love scrappy quilts the best.
Happy quilting.
Yoka Bazilewich
Allison
Thank you Yoka!
sandra oluoma
How do I make those rumples appear on my quilt? Am I gonna run a thread ontop the quilt? Please help
Allison
Hi Sandra! That is the quilting part you are referring to. Google "Free Motion Quilting" and you will find lots of great info and tutorials on you tube to learn how to do it!
Sybil M Cox
If I wanted my print fabric cut to a 6 1/2" square, what would I cut my two small solid fabrics
Sybil M Cox
I want to make the Scrappy Summer quilt, If I wanted to change the size of my print fabric to 6 1/2", what would I cut my two small solid fabric pieces.
Carol Kauffman
I believe the small pieces would be cut at 3 1/2. After all seams are sewed, the 6 1/2 would end up at 6 finished and the small squares would end up 3 finished. To check, cut a piece of paper at 6 1/2 and draw a 1/4 inch all four sides. Take another piece of paper and make 4 3 /12 pieces and draw the 1/4 in on all 4 sides and them you could actually sew them on the machine and check the sizes to make sure they fit.
karen
I am trying to find dimensions and directions for a double sized quilt for the 4-square pattern. The link on your site goes to a dead link. Can you assist? Thank you, karen
Allison
Hi Karen, It looks like I didn't make that in a Queen size or King size or double sized quilt unfortunately. I'll take a look at it today closer...it's been a little too long since I made it I can't remember! Thanks - Allison
okbetbetting
OKBET is one of the most trusted online betting site in the Philippines!!! Want to know more about site? visit here --->> http://www.okbetcasino.live
Lucky Cola
Ang Lucky cola ay isang online casino brand na nagsusumikap na magbigay sa mga manlalaro ng first-rate na entertainment at napakahusay na on-line na karanasan sa paglalaro. Ang isang malaking uri ng mga larong may mataas na kalidad, kasaganaan ng mga jackpot, mga nangungunang bonus sa casino, mga kasanayan sa patas na paglalaro, at suporta ay ilan sa maraming bagay na naging dahilan upang ang Lucky Cola ay isa sa mga pinagkakatiwalaang online na casino ngayon. Ang mga laro sa online na casino mula sa Lucky Cola ay binuo gamit ang mga advanced na 3D graphics at tanging ang pinaka-cutting-edge na software. Tinitiyak nito na masisiyahan ka sa pinakamahusay sa online na pagsusugal na libangan. Kapag sumali ka sa kasiyahan, magagawa mong maglaro ng malawak na hanay ng mga sikat at kapana-panabik na mga laro kabilang ang roulette, blackjack, slots, poker at marami pang iba. Gusto mong makakuha ng higit pa tungkol sa Lucky Cola na balita, maaari mong suriin
Charlotte Brown
That quilt is so simple and yet so beautiful. I love it!!